Installing glass block windows can be A great way to enhance the aesthetic and structural value of your home. These windows are not only attractive, offering A unique, vintage style, But they also provide an excellent source Of natural light while maintaining privacy And insulation. Though installation may appear challenging at first glance, It can be made quite manageable with the right tools And steps. This process involves preparing the opening, placing the block panel, And securing and sealing it. Whether you’re looking to improve your bathroom, basement, Or any other room, follow this guide to successfully install glass block windows And transform your living space.
What Are Glass Block Windows?

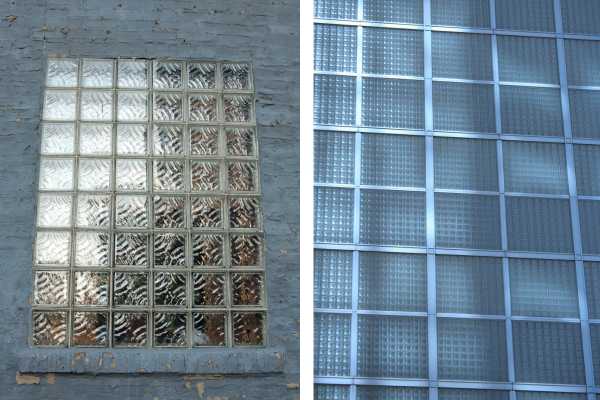
Glass block windows, Also known as glass bricks, Are a type Of architectural element made from thick, translucent glass. They provide A unique blend of aesthetic appeal And practical functionality. Often used in bathrooms, basements, and other areas where privacy and light are both needed, These windows allow natural light to flow in without compromising privacy due to their opaque nature.
Besides their stylish appearance that fits both modern And traditional home designs, They are also highly durable, energy-efficient, And provide good sound insulation. Available in A variety Of sizes, shapes, And colors, glass block windows can be A versatile and attractive addition to any home.
How Do I Measure For Glass Block Windows?

- Measure the Width: Use A tape measure to record the width Of the existing window or opening. Make sure to measure from the inside Of one side jamb to the inside Of the other side jamb. Always measure at the top, middle, And bottom Of the opening to account for any variations.
- Measure the Height: Similarly, measure the height Of the window opening from the bottom Of the sill to the top of the opening. Again, It’s important to measure at the left side, center, And right side Of the opening to ensure accuracy.
- Record Smallest Measurements: If the measurements vary, Always use the smallest measurement. This ensures that the glass block window will fit into the opening.
- Account for Mortar Joints: When ordering your glass block window, remember to account for the space that the mortar joints will take up. A typical mortar joint is approximately 1/4 inch.
- Subtract for Installation Space: Subtract 1/2 inch from both the width and height measurements. This allows a 1/4-inch space around the entire window for adjustments during installation.
- Check Squareness: Finally, check the squareness of the window opening by measuring diagonally in both directions. If the measurements are the same, the window is square. If not, you might need to make adjustments during installation to ensure the glass block window fits properly.
Reasons To Install Glass Block Windows

Enhanced Privacy
One of the most significant advantages Of installing glass block window is the enhanced privacy they offer. Unlike traditional windows, These windows Are made Of thick, translucent glass that allows light to filter through while maintaining privacy. This makes them an excellent choice for rooms where both natural light and privacy are important, Such as bathrooms Or bedrooms facing busy streets. You can enjoy the sunlight without the worry of prying eyes, providing A sense Of security and comfort.
Improved Insulation
That is also highly beneficial for their insulating properties. They have better insulating values compared to traditional single-pane windows, Helping to keep your home warmer in the winter And cooler in the summer. This not only contributes to A more comfortable living environment but can also lead to savings on energy costs. Additionally, Their thickness And sturdiness make them an effective barrier against outside noise, providing sound insulation And further enhancing the tranquility Of your home.
Increased Aesthetic Appeal
From an aesthetic standpoint, glass block windows add A unique and stylish element to your home. They have A timeless appeal that can complement both modern And traditional architectural designs. Available in A variety of sizes, shapes, And even colors, These windows can Be customized to match your specific design preferences. Whether you’re looking to create A vintage vibe or A sleek, contemporary look, These windows can help enhance the aesthetic appeal Of your home, adding both charm and value.
Materials And Tools Needed

Materials:
- Glass Block Window: Purchase the right size based on your measurements.
- Mortar Mix: For securing the glass blocks in place.
- Plastic Spacers: To ensure consistent and accurate spacing between each block.
- Caulk: To seal the perimeter of the window.
- Plastic Mixing Tub: To mix your mortar.
- Clean Water: For mixing with the mortar.
Tools:
- Tape Measure: For precise measurements.
- Level: To ensure the blocks are straight and even.
- Trowel: To apply and smooth the mortar.
- Sponge: For cleaning off excess mortar.
- Caulk Gun: To apply caulk around the window frame.
- Mixing Paddle and Drill: For mixing the mortar (optional but helpful).
- Rubber Mallet: To gently adjust the position of the blocks as needed.
- Safety Glasses: To protect your eyes during installation.
- Gloves: To protect your hands while handling the glass blocks and mortar.
Step-By-Step Guide On Installation
Window Measurement

Start by measuring the existing window opening or the area where the glass blocks window will be installed. Use a tape measure to record the width and height of the window opening. Measure the width from one inside edge to the other and the height from the bottom sill to the top edge. Do this at multiple points to account for any variations. If measurements differ, always use the smallest one. Subtract half an inch from both the height and width to allow room for adjustments during installation. Also, check the squareness of the opening by measuring diagonally in both directions.
Purchase Materials

With your measurements in hand, purchase the appropriate size of glass blocks windows. Remember, each glass block will have a specific size, and you will need to account for the size of the mortar joints, typically about a quarter of an inch. Apart from the glass blocks, you’ll also need to purchase other materials such as mortar mix, plastic spacers, caulk, and possibly a plastic mixing tub for the mortar. You may already own some of the necessary tools, but if not, now is the time to purchase or rent them.
Remove The Existing Window

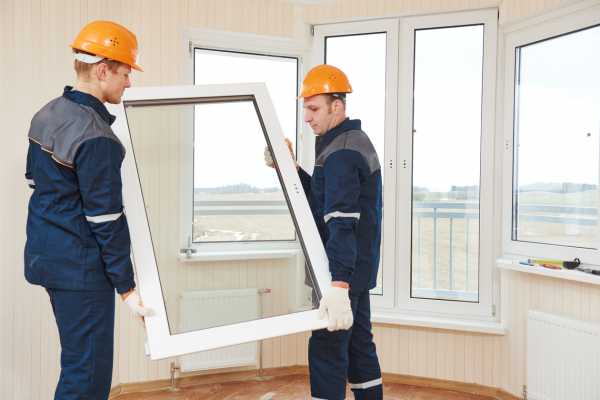
Begin the actual installation process by carefully removing the existing window if there is one. Use a pry bar to gently remove the interior trim and any other hardware. Once the old window is free, remove it from the opening. Be sure to wear gloves and safety glasses during this step to protect yourself from potential injury. After the window is removed, clean the area thoroughly, removing any old caulk, paint, or other debris to ensure a clean, smooth surface for the new glass block window installation.
Prepare The Opening

Once the old window has been removed and the area is clean, it’s time to prepare the opening for your new glass block window. If necessary, repair any damage to the window frame to ensure a smooth and secure fit. To prepare for the mortar, dampen the window opening slightly. This will prevent the frame from absorbing the water in the mortar too quickly, which can weaken the bond. Also, apply a bed of mortar to the sill or bottom of the window opening, using your trowel to spread it evenly. This will form a secure base for your first row of glass blocks.
Install The Glass Blocks

Start installing the glass blocks from the bottom corner of the opening. Apply mortar on the side and bottom edges of each block, then place it firmly in the opening. Use plastic spacers between blocks to ensure consistent and accurate spacing. Check each block with a level as you go to ensure that they are straight and even. Continue this process until all the glass blocks are installed. You may need to use a rubber mallet to make slight adjustments to the blocks. Remember to clean off any excess mortar promptly with a damp sponge to avoid it hardening on the face of the blocks.
Seal And Finish

After all the blocks are installed and the mortar has dried (usually about 24 hours), it’s time to seal and finish the installation. Apply a bead of caulk around the perimeter of the window where it meets the window frame to create a weather-tight seal. Smooth the caulk with a caulk finishing tool or your finger. Allow the caulk to dry according to the manufacturer’s instructions. Finally, replace or install new interior trim if necessary. Congratulations, you have successfully installed your glass block window. Now you can enjoy the natural light, added privacy, and aesthetic appeal it provides!
After-Installation Care

Proper after-installation care is important to maintain the aesthetics and prolong the lifespan of your glass blocks windows.
Here are some tips:
- Cleaning: Clean the glass blocks regularly using a mild, non-abrasive cleaning solution and a soft cloth or sponge. Avoid using harsh chemicals or abrasive materials that could scratch or damage the surface of the blocks.
- Inspect Caulking: Periodically inspect the caulking around the window to ensure that it is still providing a good seal. If you notice any cracks or shrinkage, reapply the cackling to maintain the window’s insulation and prevent leaks.
- Check Mortar Joints: Over time, the mortar joints between the blocks may show signs of wear or cracking. If this happens, You may need to repair the joints to maintain the window’s structural integrity.
- Avoid Sharp Objects: Be careful not to hit the glass blocks with sharp or hard objects, as this could cause them to chip or crack.
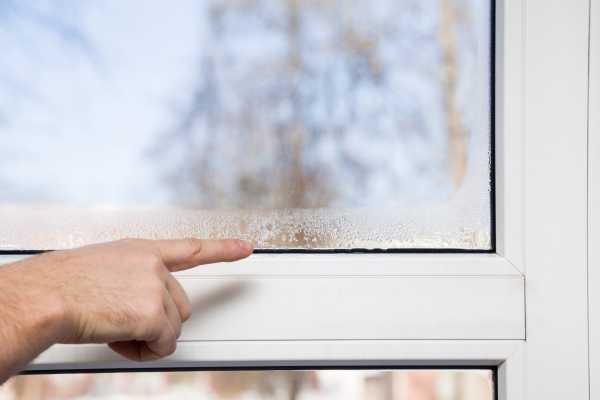
- Deal with Condensation: If you notice condensation forming on your glass block window, it could be a sign of high humidity levels in your home. Consider using a dehumidifier or improving the ventilation in the room to address this issue.
- Professional Help: For any significant issues or if you’re unsure about a maintenance procedure, don’t hesitate to reach out to a professional. This can help to prevent further damage and ensure the longevity of your glass blocks windows.
How Do I Maintain Glass Block Windows After Installation?

Maintaining glass blocks windows after installation is relatively straightforward and requires regular, simple care to keep them looking their best and functioning effectively. Regular cleaning should be done using a soft cloth or sponge with a mild, non-abrasive cleaning solution, avoiding harsh chemicals that could damage the glass surface.
It’s also important to periodically inspect the caulking around the window to ensure it’s still intact. Reapplying if you notice any cracks Or shrinkage to maintain insulation and prevent leaks. The mortar joints between the blocks should also be checked for any signs of wear or cracking. Which may require repair to maintain the structural integrity of the window.
Avoid striking the blocks with sharp or hard objects, as they could chip or crack. If condensation appears, It could indicate high indoor humidity levels, Which might necessitate the use Of A dehumidifier Or increased ventilation. Lastly, Don’t hesitate to consult A professional for any significant issues Or uncertainties about maintenance to preserve the longevity and aesthetic appeal Of your glass blocks windows.
The Final Thoughts
Installing glass block windows is A task that requires careful preparation, Precise measurements, And diligent work, but the end result is worth the effort. These attractive, durable, And functional windows offer enhanced privacy, And improved insulation, And can significantly boost the aesthetic appeal Of your home. The installation process involves measuring the opening, Purchasing the right materials, preparing the opening, installing the blocks with mortar And spacers, And sealing the window for a weather-tight finish. After installation, proper care and maintenance are crucial to keep your windows looking their best and functioning effectively. With the right tools, materials, and steps, You can successfully install glass blocks windows And enjoy the numerous benefits they provide for many years to come.


