Incorporating a shower bench into your bathroom isn’t merely a luxury—it’s a transformation. The ability to relax, shave, or simply sit comfortably while showering adds an entirely new layer of convenience and relaxation to your space. But what truly elevates this feature is the framing itself, which ensures both practicality and durability. Crafting a well-framed shower bench will not only enhance the aesthetic of your bathroom but also provide a safe, supportive seat for years to come. Whether you’re a seasoned DIY enthusiast or considering professional help, this guide will walk you through the intricate process of framing a shower bench—from materials to the finishing touches.
Why You Should Frame A Shower Bench
There’s more to a shower seat than its inviting surface. A sturdy, well-constructed bench improves functionality and significantly enhances the overall ambiance of your shower. Imagine having a dedicated space to relax or handle grooming tasks without having to constantly shift your position or worry about balance. Proper framing ensures that the seat is safe, structurally sound, and durable enough to withstand the test of time. Additionally, the right benches increase the value of your home—whether you’re selling or simply enhancing your living space, a bath seat adds a desirable, high-end touch to your bathroom.
Benefits Of A Shower Bench In Your Bathroom
A shower bench isn’t just a space-saver; it’s a practical, multi-functional addition to your bathroom. For those with mobility issues or anyone who seeks extra support while bathing, the benches offers a safe place to sit, reducing the risk of falls. It’s an essential feature for any household, adding a layer of safety without taking up unnecessary space. On top of this, a bath seat maximizes the usability of your bathroom, especially in smaller areas. Beyond the practicality, it introduces a sophisticated, spa-like touch, transforming an ordinary shower into an oasis of relaxation.
Choosing The Right Materials
Material selection is a critical aspect of framing a shower seat that will withstand the constant exposure to water and humidity. Begin by selecting pressure-treated lumber for the bench’s frame. This type of wood is designed to resist rot and mildew, which are inevitable in a moist environment like a shower. For the surface of the benches, marine-grade plywood is an excellent choice. It’s robust, water-resistant, and capable of enduring prolonged moisture exposure. When it comes to tiling, ceramic, porcelain, or stone are ideal options. These materials are not only aesthetically pleasing but also offer slip-resistant properties, which are crucial for ensuring safety. Don’t forget to use waterproof grout and adhesives to firmly secure the tiles and prevent water damage over time.
Planning Your Shower Bench Design
Planning is key. Before you even begin framing, take the time to sketch out your design and consider your shower space’s dimensions. Will a corner bench fit best, or would a traditional straight bench work better? Will the seat be purely functional, or do you envision built-in storage to hold toiletries? Measure carefully, keeping in mind how the benches will interact with other elements like the showerhead, walls, and door. It’s essential to ensure that the bench doesn’t overcrowd the space or block any critical features, such as the shower controls or water flow. Thoughtful design will lead to a seamless integration of the benches into your shower, contributing to both the functionality and visual harmony of the entire bathroom.
Preparing The Shower Area
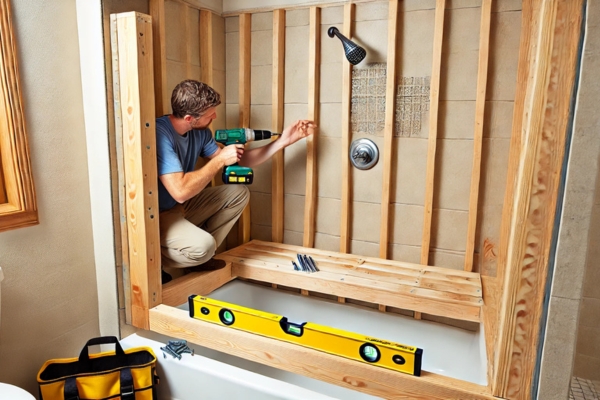
Properly preparing the shower area is paramount to the success of framing a shower bench. Begin by clearing the space of any existing tiles, plumbing, or fixtures that might obstruct the process. Inspect the wall studs and subfloor for stability. If you’re working with a tiled surface, remove the tiles where the benches will be installed. Be sure to check that the wall is level and plumb—this will ensure that the bench is installed securely and doesn’t result in an uneven seating surface. A solid foundation is critical, so take the time to ensure everything is properly aligned and ready for the framing process.
Framing The Shower Bench: Step-By-Step
Step 1: Build The Bench Frame

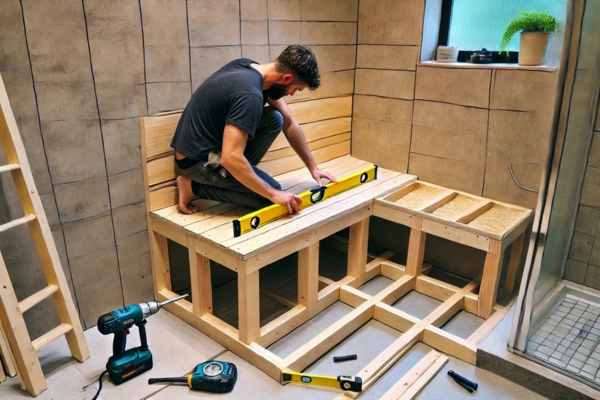
Start by constructing the rectangular frame that will form the base of your bath seat. Cut pressure-treated lumber to the required lengths based on your design. The frame will consist of both vertical and horizontal components that come together to support the seat. Secure these pieces using wood screws, ensuring that the frame is both square and level. It’s critical to double-check the frame’s measurements before moving forward to ensure a solid and even base.
Step 2: Attach The Frame To The Wall

Once your frame is complete, position it within the shower area, ensuring that it aligns with the wall studs. Using heavy-duty screws or anchors, securely attach the frame to the studs. Be sure that the frame is mounted at a comfortable height, usually between 18 and 20 inches from the floor. A level is crucial here—check that the frame is perfectly level to ensure stability and prevent any tilting once the bench is finished.
Step 3: Add Support Beams

To reinforce the bench and prevent any sagging or instability, add support beams underneath the frame. These beams provide additional structural support, ensuring the benches remains sturdy even with weight. Use pressure-treated lumber for this step and place the beams evenly for maximum reinforcement. This added support ensures the bench can endure frequent use without compromising safety or comfort.
Adding Waterproofing And Moisture Resistance
Waterproofing is an indispensable step when framing a bath seat. Moisture resistance must be built into every layer of the bench. Start by applying a waterproof membrane to the walls surrounding the bench area. This will prevent any water from seeping into the structure, thereby protecting the frame from potential rot or mold. Additionally, make sure to use waterproof adhesive and grout when applying tiles to the bench. These precautions will help safeguard your bench against the damaging effects of constant water exposure.
Installing The Bench Seat

With the frame securely in place and properly waterproofed, the next step is to install the bench seat. Marine-grade plywood is ideal for this purpose, as it combines durability and water resistance. Cut the plywood to fit within the frame and secure it using screws. Once attached, ensure the seat is level and smooth to provide a comfortable and safe seating area. It’s also important to leave a small gap between the seat and the surrounding walls to allow water to drain freely and avoid accumulation.
Finishing The Shower Bench

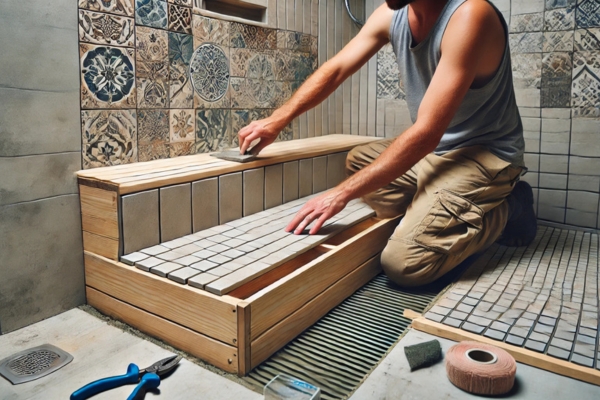
After the bench structure is complete, focus on the finishing touches. Tile the bench seat and surrounding areas with materials that complement the rest of your shower. Non-slip tiles are particularly important for the seating area, ensuring safety under wet conditions. Apply grout to seal the tiles in place and finish the edges of the seat with trim pieces for a neat, polished look. To add an extra layer of sophistication, consider applying a waterproof wood finish or a decorative touch to the seat frame.
Maintenance And Care
Regular maintenance will ensure your bath seat stays functional and attractive for years. Check the bench periodically for any signs of wear or water damage. Pay particular attention to the seams and edges, where water can potentially seep in. Clean the tiles regularly to prevent soap scum and grime buildup, and ensure the area is well-ventilated to prevent mold growth. Additionally, consider reapplying waterproofing layers every few years to maintain optimal protection.
Common Mistakes To Avoid
While framing a bath seat may seem straightforward, several common mistakes can derail the project. Improper waterproofing is one of the most frequent issues; inadequate sealing allows moisture to infiltrate, leading to mold and rot. Another mistake is insufficient structural support, which can cause the seat to sag under weight. Failing to measure the space correctly can also result in a poorly placed bench that obstructs essential features. Lastly, using materials that aren’t resistant to water damage can lead to premature deterioration.
FaQs
How To Use A Shower Transfer Bench?
Using a shower transfer bench helps individuals with mobility challenges move safely in and out of the shower. Sit on the outer side of the tub or shower, then slide across the seat into the shower space, minimizing the risk of falls.
How Long Will It Take To Frame A Shower Bench?
The time it takes to frame a bath seat depends on your experience and the complexity of the design. Generally, the project can take anywhere from 4 to 8 hours, including framing, waterproofing, and tiling.
Can I Frame A Shower Bench Myself, Or Should I Hire A Professional?
If you have carpentry skills, you can likely frame the bath seat yourself. For those unsure of their abilities, hiring a professional ensures the benches are securely installed and waterproofed properly.
What Kind Of Tile Is Best For A Shower Benches?
Slip-resistant tiles such as ceramic, porcelain, or stone are ideal choices. These materials provide durability and safety, especially in wet environments.
How Do I Ensure My Showers Bench Is Waterproof?
Use a waterproof membrane around the benches area, apply waterproof adhesives and grout, and choose water-resistant materials like marine-grade plywood to prevent moisture from damaging the seat.
What Tools Are Essential For Framing A Shower Bench?
The essential tools include a saw (for cutting wood), a drill, a level, a measuring tape, screws, waterproof adhesive, grout, and a waterproof membrane for sealing the structure.
Conclusion
Framing a shower bench is an investment in both the functionality and beauty of your bathroom. By carefully selecting materials, planning your design, and following the correct installation steps, you can create a sturdy, long-lasting, and aesthetically pleasing feature. Whether you choose to tackle this project yourself or hire a professional, a well-framed shower benches will provide comfort, safety, and style for years to come.


