A shower bench isn’t just an accessory—it’s a game-changer for your bathroom. It transforms what might otherwise be a mundane, purely functional space into a haven of relaxation, convenience, and modern sophistication. Whether you crave the bliss of spa-like comfort, a safer showering experience, or simply a practical spot to rest, build a shower bench into your existing shower is a surprisingly achievable project. It’s not just about aesthetics; it’s about elevating your daily routine while enhancing the value of your home.
Why A Shower Bench Can Transform Your Bathroom
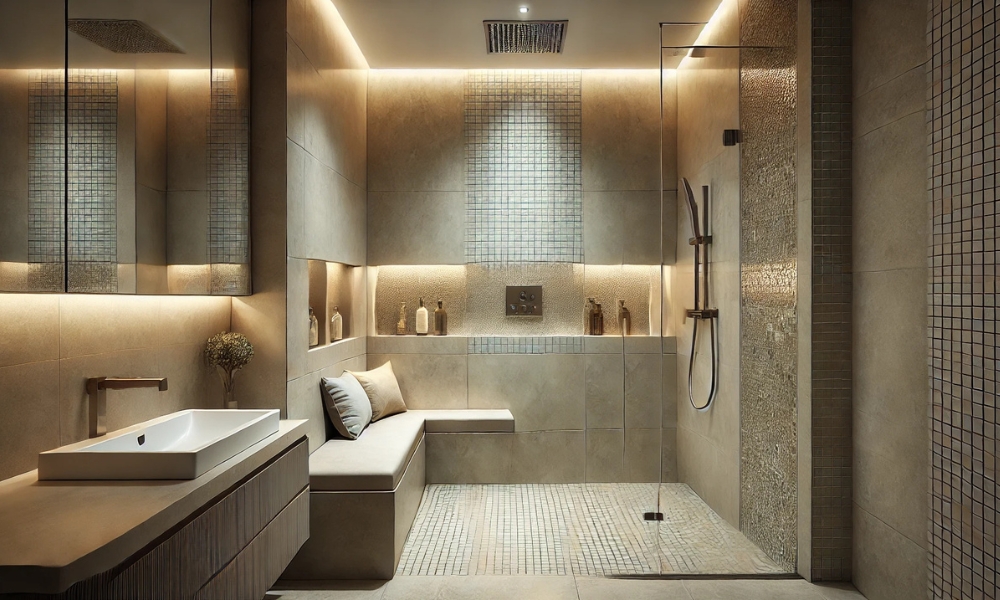
Step into the realm of functional luxury. A shower bench serves more purposes than one might initially imagine. Picture yourself unwinding beneath a cascade of warm water, perched comfortably on a sleek, sturdy surface. For some, it’s a place of pause—restful, rejuvenating. For others, it’s a pragmatic tool for everyday routines: shaving, scrubbing, or simply stashing shower essentials. Beyond the comfort, a well-designed bench injects a modern aesthetic into your bathroom, creating a focal point that is both practical and beautiful.
And there’s more. Resale value skyrockets when thoughtful upgrades like a built-in bench showcase the bathroom’s versatility. It’s luxury that pays off, both now and later.
Benefits Of Adding A Shower Bench To An Existing Shower
Comfort and Convenience: A perfect seat for lathering, relaxing, or pampering yourself—comfort in its simplest form.
Improved Accessibility: For individuals with mobility limitations, a bench provides stability and safety, redefining the shower experience.
Visual Elegance: With the right materials and placement, a bench can elevate your shower from basic to spa-worthy.
Functional Storage: Cleverly designed benches offer hidden or open spaces for shampoos, soaps, and accessories, decluttering the shower area effortlessly.
What You’ll Learn About Building A Shower Bench
This guide will empower you to:
- Determine the ideal type and size of bench for your space.
- Master the step-by-step process of building, waterproofing, and tiling.
- Troubleshoot common problems and maintain your creation for years to come.
Understanding Shower Bench Types
Shower benches come in a variety of styles, each catering to different needs, aesthetics, and shower layouts. Built-in benches, integrated directly into the shower’s structure, offer a seamless and permanent solution, ideal for those seeking a sturdy and visually cohesive design. Floating benches, on the other hand, provide a modern, minimalist touch, mounted to the wall to save space while maintaining a sleek profile. Freestanding benches, with their portability and versatility, are perfect for those looking for a non-permanent option that can be moved or replaced as needed. Whether prioritizing style, space, or functionality, selecting the right bench type ensures a balance of practicality and visual appeal in your bathroom sanctuary.
Planning Your Shower Bench Build
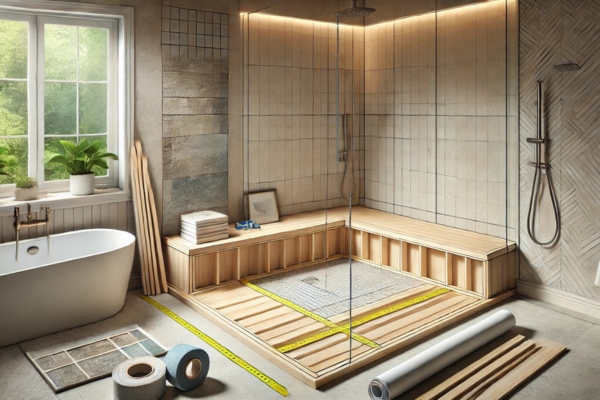
Planning your shower bench build is the cornerstone of a successful project, requiring thoughtful consideration of space, materials, and design. Start by measuring your shower area to determine the ideal size and placement of the bench, ensuring it doesn’t obstruct drainage or restrict movement. Material selection is equally crucial—options like waterproof wood, natural stone, or tiles offer durability and aesthetics, but each requires proper sealing to prevent water damage. Consider the weight-bearing capacity as well, especially for built-in or floating designs, as stability is paramount for safety. A well-thought-out plan not only streamlines the building process but also guarantees a functional, long-lasting, and visually appealing addition to your shower.
Essential Tools And Materials
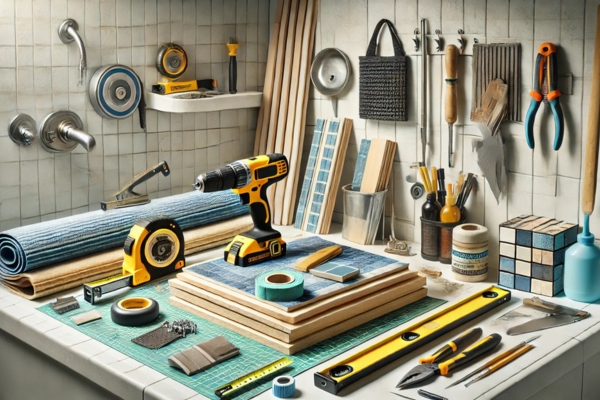
Having The Right Tools And materials is essential to ensure your shower benches are both efficient and durable. Key tools include a tape measure for precise dimensions, a level to ensure perfect alignment, a power drill for securing the frame, and a trowel for spreading adhesive evenly. You’ll also need a tile cutter for clean, accurate cuts and a utility knife for adjustments. On the materials side, opt for waterproof components like pressure-treated wood or metal studs for framing, cement backer board for a solid foundation, and a waterproof membrane to prevent leaks. Additionally, gather high-quality tiles, thin-set mortar, grout, screws, and a waterproof sealant to finish the job. With these essentials in hand, you’ll be equipped to create a sturdy, water-resistant, and stylish shower bench that stands the test of time.
Preparing Your Shower Area
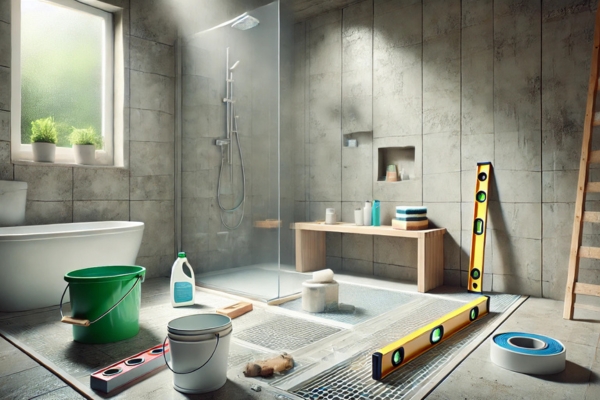
Preparing your shower area is a critical step to ensure a smooth and durable bench installation. Begin by thoroughly cleaning the space, removing any soap scum, mold, or debris that could interfere with adhesion or waterproofing. Inspect the existing shower surface for cracks, leaks, or structural issues, as these must be addressed before proceeding. Use a level to mark the exact placement of the bench, ensuring the dimensions align with your plan and won’t disrupt water flow or drainage. If your shower lacks proper waterproofing, apply a waterproof membrane to the walls and floor to create a moisture barrier. Proper preparation not only sets the foundation for a sturdy bench but also safeguards against potential water damage, ensuring your shower remains functional and pristine for years to come.
Building A Frame For Your Shower Bench
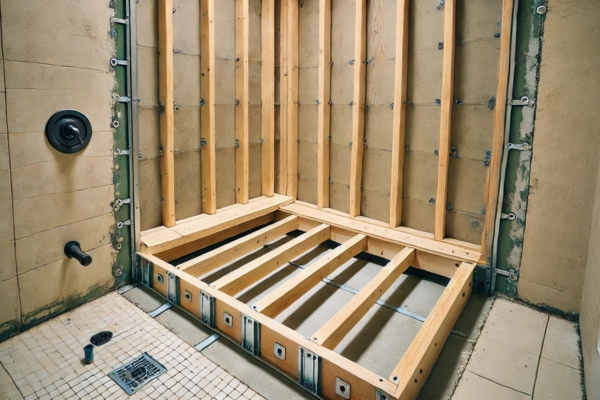
Building a frame for your shower bench is where the project starts to take shape, laying the foundation for durability and stability. Begin by constructing the frame using either pressure-treated wood for moisture resistance or metal studs for added strength. Measure and cut the materials precisely to match the planned dimensions, ensuring a snug fit within the shower space. Secure the frame to the existing shower walls using heavy-duty screws and anchors, reinforcing all joints to eliminate wobbling. For built-in benches, extend the frame to the floor for maximum support. Once the skeleton is in place, cover it with a cement backer board, which serves as a waterproof and sturdy surface for tiling. Double-check that the frame is level and securely anchored, as a well-built foundation is critical for supporting weight and maintaining the bench’s longevity in a wet environment.
Adding Waterproofing Layers
Adding waterproofing layers is a non-negotiable step to protect your shower benches from moisture damage and ensure its longevity. Begin by applying a waterproof membrane over the cement backer board, covering the entire surface of the bench, including the corners and seams, where leaks are most likely to occur. Use a paint-on liquid waterproofing solution or a waterproof fabric membrane, ensuring even coverage for a watertight seal. Reinforce the edges and joints with waterproofing tape, pressing it firmly into place to eliminate gaps. Allow the membrane to cure fully, typically 24 hours, before proceeding to tiling. Proper waterproofing creates a robust moisture barrier, preventing mold, mildew, and water seepage, which can compromise both the bench and the shower’s structural integrity over time.
Installing Tiles On Your Shower Bench
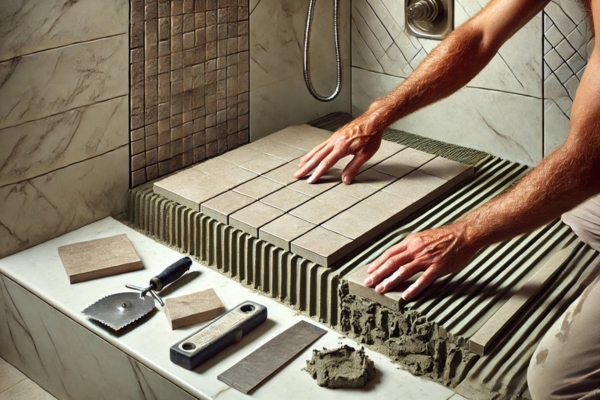
Installing tiles on your shower bench brings both functionality and beauty to your project, but precision is key for a professional finish. Begin by selecting slip-resistant tiles that are both durable and suitable for wet environments. Apply a thin layer of thin-set mortar to the surface of the bench using a notched trowel, ensuring even coverage for a strong bond. Carefully lay the tiles, starting with the top surface and working your way down to the sides, pressing them firmly into place. For edges and corners, cut tiles to size with a tile cutter for a seamless fit. Allow the mortar to set according to manufacturer instructions before applying grout between the tiles, ensuring all gaps are completely filled. Finally, wipe away excess grout with a damp sponge and seal the grout lines for added water resistance.
Finishing Touches For Your Shower Bench

The finishing touches for your shower benches elevate it from a functional addition to a polished, spa-like feature. Start by sealing the grout lines with a high-quality waterproof sealant to protect against moisture and prevent mold growth. Smooth out any rough edges or corners, ensuring a comfortable and safe surface for daily use of the shower bench. Clean the tiles thoroughly to remove grout haze, revealing their full shine and texture. For an added touch of luxury, consider incorporating decorative accents such as mosaic tile borders or contrasting edge tiles to create visual interest. If desired, accessories like a built-in niche for toiletries or a subtle slope for improved drainage can enhance both practicality and aesthetics. These final steps ensure your shower bench not only looks stunning but also functions seamlessly, transforming your shower into a space of relaxation and elegance.
Maintenance Tips For A Long-Lasting Bench
Maintaining your shower bench is essential to ensure its longevity and keep it looking as pristine as the day it was installed. Regularly clean the surface with a mild, non-abrasive cleaner to remove soap scum, grime, and mineral deposits that can build up over time. Avoid harsh chemicals that may damage grout or tiles. Check grout lines periodically for any signs of wear, cracking, or discoloration, and reseal them annually with a waterproof sealant to prevent moisture infiltration. Keep an eye out for mold or mildew in corners and joints, addressing it promptly with a gentle solution of vinegar and water or a mold-specific cleaner. For wooden benches, apply a protective waterproof coating periodically to shield against moisture damage. By implementing these simple maintenance practices, your shower bench will remain durable, clean, and safe for years to come.
Eco-Friendly And Budget-Friendly Ideas
Incorporating eco-friendly and budget-friendly ideas into your shower benches project allows you to create a sustainable, stylish addition without breaking the bank. Consider using reclaimed wood, recycled tiles, or salvaged materials, which not only reduce waste but also bring unique character to your bench. Opt for prefabricated waterproof panels or composite materials that are both cost-effective and durable, eliminating the need for expensive, labor-intensive waterproofing layers. For a natural look, choose bamboo, an eco-friendly, water-resistant option that adds warmth and charm to your space. To save further, shop for discounted tiles at local surplus stores or clearance sections, where you can find high-quality materials at a fraction of the cost. By combining creativity with conscious choices, you’ll achieve a beautiful, functional shower bench that’s kind to both your wallet and the environment.
Upgrading Your Bench Over Time
Upgrading your shower bench over time allows you to enhance its functionality and style as your needs evolve. Start by adding built-in shelves or niches beneath the bench for extra storage, keeping shower essentials neatly organized and within reach. For a touch of luxury, consider retrofitting the bench with heated tiles to create a warm, spa-like experience during colder months. Installing grab bars or additional supports can improve safety, making the bench more accessible for all users. If aesthetics are your focus, refresh the look with new tiles, such as elegant mosaics or textured stone, to give your bathroom a modern upgrade. For eco-conscious improvements, replace materials with sustainable options like bamboo or recycled composites. These thoughtful upgrades not only enhance your bench’s functionality but also ensure it continues to complement your shower space for years to come.
Safety Tips For A Diy Shower Bench Build
Safety is paramount when undertaking a DIY shower benches build to ensure both the construction process and the final product are secure and reliable. Start by wearing appropriate protective gear, including safety goggles, gloves, and a dust mask, especially when cutting tiles or working with adhesives and sealants. Use slip-resistant tiles for the bench surface to minimize the risk of accidents during use, and ensure the bench has a slight slope for proper water drainage to prevent pooling. Always double-check that the bench frame is securely anchored to the shower walls and can support substantial weight without shifting. If working with power tools, follow manufacturer guidelines and keep the work area clean and free of hazards. Lastly, test the bench for stability before regular use to guarantee it can safely hold its intended load. Prioritizing safety at every stage ensures a durable, functional, and risk-free addition to your shower space.
Inspiring Shower Bench Design Ideas
When it comes to inspiring shower bench design ideas, the possibilities are endless, offering a perfect blend of style and functionality to suit any bathroom aesthetic. For a sleek, modern look, consider a floating bench with marble or quartz tiles that give a luxurious, seamless finish. If you prefer a rustic or spa-like vibe, opt for natural stone or warm-toned wooden benches that exude earthy elegance. Compact corner benches with built-in niches or shelves are ideal for maximizing space in smaller showers, offering both comfort and storage. For a bold statement, incorporate mosaic tiles or geometric patterns that transform your bench into a visual focal point. Those looking for a minimalist design might lean towards clean lines, neutral hues, and smooth finishes. Whether your style is contemporary, traditional, or eclectic, a well-designed bench can elevate your shower space into a sanctuary of relaxation and beauty.
DIY vs. Professional Help
Deciding between DIY and professional help for building shower benches largely depends on your skill level, time, and project complexity. A DIY approach can be rewarding and budget-friendly, allowing you to customize the bench to your preferences while saving on labor costs. With the right tools, materials, and careful attention to waterproofing and structural stability, a confident DIYer can achieve excellent results. However, for those less experienced with tiling, framing, or waterproofing, hiring a professional may be the safer choice to ensure durability and prevent costly mistakes down the line. Professionals bring expertise, precision, and efficiency, especially for complex designs or benches in showers with unique layouts. Ultimately, weigh the pros and cons of time, cost, and confidence—while a DIY bench offers personal satisfaction, professional help guarantees a flawless, long-lasting addition to your bathroom.
Conclusion
A shower bench isn’t just a functional addition; it’s a statement. It marries comfort, beauty, and practicality into one transformative upgrade. By building a bench in your existing shower, you craft a space where relaxation and utility coexist seamlessly. Whether you dive into this DIY journey or seek professional help, the results are certain: a more luxurious, accessible, and enjoyable bathroom experience.

