
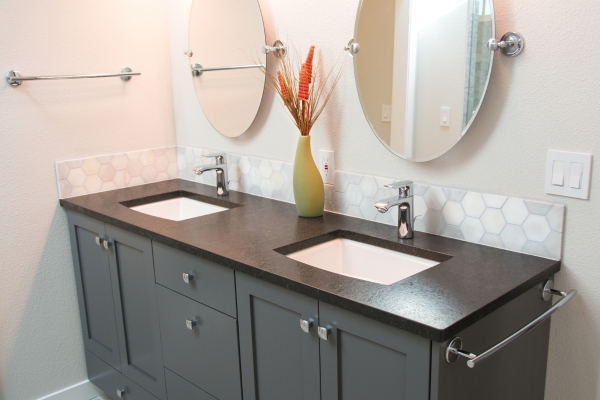
Fix a sink to a vanity unit can seem like a daunting task, but with the right tools and a step-by-step approach, it becomes a manageable DIY project. Whether you are upgrading your bathroom or simply replacing an old sinks, understanding the process is crucial to ensure a secure and functional installation. This guide will walk you through the necessary steps, from preparing your vanity unit and sink to securing the plumbing connections. By following these instructions, you can achieve a professional result and enhance the look and functionality of your bathroom.
How Do I Prepare the Area Before Fixing the Sink?
Before fixing a sink to a vanit unit, it’s crucial to properly prepare the area to ensure a smooth installation process. Start by removing any existing sink and thoroughly cleaning the vanity surface to eliminate any debris or old adhesive. Ensure that the vanity unit is level and securely attached to the wall to provide a stable foundation for the sinks. Next, dry-fit the sink to the vanity to confirm that it fits correctly and aligns with the plumbing connections. Mark the positions for the mounting brackets or clips, and drill pilot holes if necessary. Finally, apply a bead of silicone sealant around the edge of the vanit unit where the sinks will sit to create a watertight seal. Proper preparation is key to preventing issues and ensuring a professional finish when you fix the sinks to the Fix Basin To Vanity Unit.
What Should I Do If There Are Leaks?
Encountering leaks after you fix a sinks to a vanit unit can be frustrating, but addressing them promptly is essential to avoid water damage and ensure a functional sink. Start by checking all the plumbing connections, including the supply lines and drain pipes, to identify the source of the leak. Tighten any loose connections and ensure that all fittings are properly sealed with plumber’s tape or pipe sealant. If the leak persists, inspect the silicone sealant around the sink and vanity unit; reapply it if necessary to ensure a watertight seal. Additionally, verify that the sink is properly aligned and seated on the vanity to prevent gaps where water could escape. By taking these steps, you can effectively troubleshoot and resolve leaks, ensuring a reliable and leak-free installation of your sinks to the vanit unit.
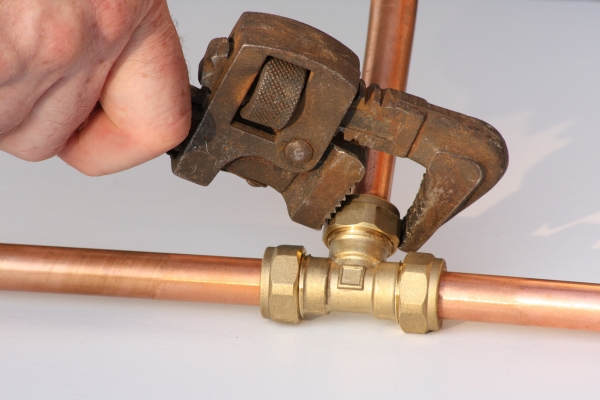
Tools And Materials Needed:
- Sink
- Vanity Unit
- Silicone Sealant
- Screws And Brackets
- Screwdriver Or Drill
- Adjustable Wrench
- Plumber’s Tape
- Pipe Wrench
- Leve
- Caulk Gun
Step-By-Step Guide
1. Preparation
Before starting, gather all necessary tools and materials, including a drill, silicone sealant, mounting brackets, and plumbing supplies. Remove any existing sink and thoroughly clean the surface of the vanit unit. Ensure that the vanity is level and securely attached to the wall to provide a stable foundation for the new sink. Turn off the water supply and disconnect any existing plumbing connections.
2. Assemble the Vanity Unit

Follow the manufacturer’s instructions to assemble the vanit unit. Ensure that all parts are securely fastened and the unit is sturdy. If the vanity comes with drawers or doors, install them according to the instructions. Position the vanit unit in its designated spot in the bathroom and secure it to the wall using appropriate brackets or screws. Double-check that the unit is level before proceeding.
3. Prepare the Sink
Dry-fit the sinks on top of the vanity unit to ensure it fits properly and aligns with the plumbing connections. Mark the positions for the mounting brackets or clips that will hold the sink in place. Remove the sinks and drill pilot holes for the brackets if necessary. Apply a bead of silicone sealant around the edge of the vanit unit where the sink will sit to create a watertight seal.
4. Install the Faucet and Drain
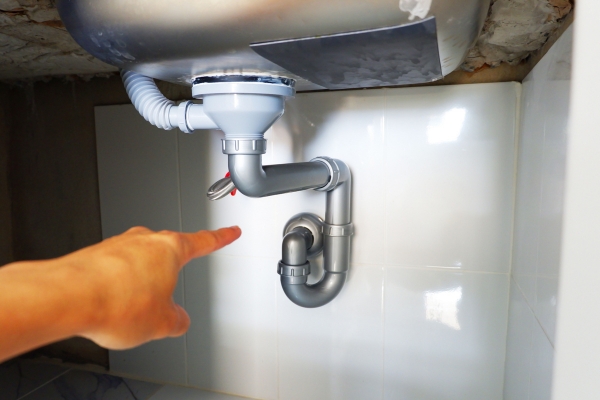
Install the faucet and drain assembly onto the sinks according to the manufacturer’s instructions. Ensure that all connections are tight and properly sealed with plumber’s tape or pipe sealant to prevent leaks. Carefully place the sinks onto the vanit unit, aligning it with the pre-drilled holes and the silicone sealant. Secure the sinks to the vanity using the mounting brackets or clips. Connect the water supply lines to the faucet and the drain pipe to the plumbing system. Turn on the water supply and test for any leaks, tightening connections as needed.
5. Mount the Sink

Carefully lower the sinks onto the vanity unit, making sure it fits snugly into place. Align the sink with the mounting brackets or clips and secure it by tightening the screws. Ensure that the sink is level and firmly attached to the vanity. Apply additional silicone sealant around the edges of the sinks to create a watertight seal and prevent any water from seeping underneath.
6. Connect the Plumbing
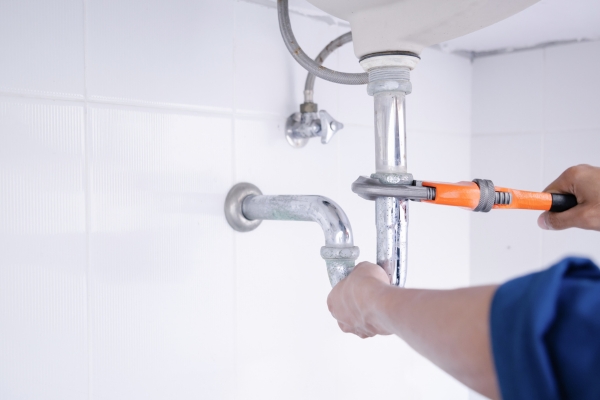
Reconnect the water supply lines to the faucet and ensure that all connections are tight and secure. Connect the drain assembly to the plumbing system, making sure there are no gaps or leaks. Turn on the water supply and test the faucet and drain for any leaks. If any are detected, tighten the connections and apply additional plumber’s tape or sealant as needed.
7. Finishing Touches
Once the sink is securely mounted and the plumbing is connected, apply a final bead of silicone sealant around the base of the sinks where it meets the vanit unit. Smooth the sealant with a caulking tool or your finger to ensure a neat and professional finish. Install any additional accessories or fixtures, such as a soap dispenser or sinks strainer, as desired.
8. Clean Up
Remove any excess sealant and clean up the work area. Dispose of any packaging materials, old plumbing parts, or debris. Wipe down the sinks and vanity units to remove any fingerprints, dust, or residue. Double-check that all connections are secure and that the sinks and faucet are functioning properly.
The Final Thought
Fixing a sink to a vanity unit can be a rewarding DIY project that enhances the functionality and aesthetic of your bathroom. By following these step-by-step instructions, you can achieve a professional result and ensure that your new sinks are securely and properly installed. Taking the time to prepare the area, assemble the vanity units, and carefully connect the plumbing will help prevent leaks and ensure a long-lasting, reliable installation. With patience and attention to detail, you can transform your bathroom with a new sinks and vanit unit that meets your needs and style preferences.

