
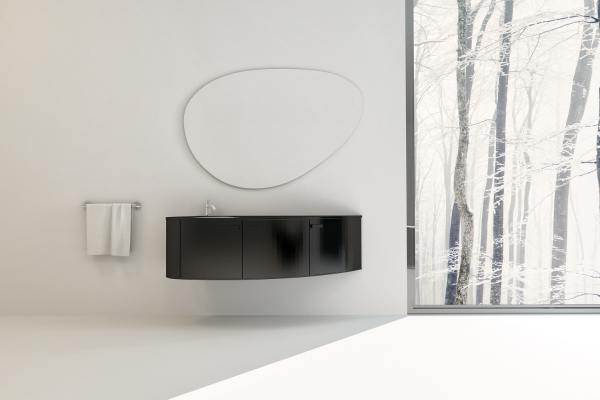
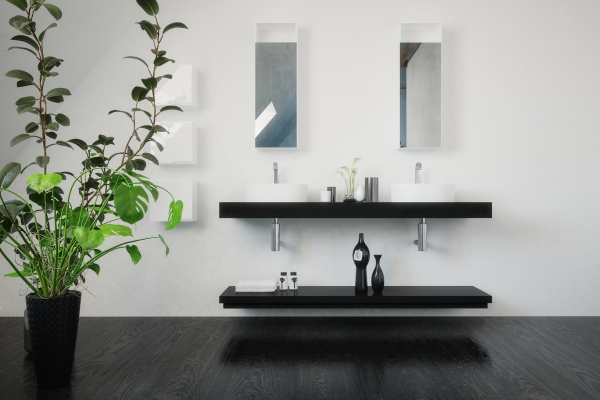
Installing a vanity unit can significantly enhance the aesthetics and functionality of your bathroom, providing both storage and style. Learning how to fix a vanity unit to the wall is essential for ensuring stability and longevity. This guide will walk you through the process step-by-step, covering everything from preparing the wall and securing the unit to making necessary adjustments for plumbing and ensuring a perfect fit. With the right tools and techniques, you can confidently fix It to the wall, creating a seamless and sturdy addition to your bathroom.
How Long Does It Take To Install A Vanity Unit?
The time required to install a Batroom vanity units can vary depending on the complexity of the project and your level of experience. For a straightforward installation, it typically takes between two to four hours. This includes the time needed to prepare the wall, position the It, secure it, and connect the plumbing. However, if modifications to the plumbing or wall structure are necessary, or if you encounter any unexpected issues, the process might take longer. It’s important to allocate sufficient time and ensure you have all the necessary tools and materials on hand before starting the installation.
What Kind Of Sealant Should I Use Around The Vanity Unit?
Choosing the right sealant is crucial for maintaining the integrity and appearance of your vanity units. A high-quality, waterproof silicone sealant is recommended for sealing around the edges of It where it meets the wall and the countertop. This type of sealant provides a flexible, durable barrier that prevents water from seeping into the gaps, which could otherwise lead to mold growth or damage to the wall and It. Ensure that the sealant is mildew-resistant to maintain a clean, hygienic surface over time. Proper application of the sealant will not only enhance the waterproofing but also give a neat, finished look to your installation.
Importance Of A Secure Vanity Unit
Ensuring that your Itt is securely fixed to the wall is of paramount importance for both safety and functionality. A well-secured It prevents accidents, such as the unit tipping over, which could cause injury or damage to the bathroom. It also ensures the longevity of the unit, as a stable installation minimizes the risk of wear and tear from regular use. Additionally, a securely mounted vanity units provides a solid foundation for attaching fixtures like sinks and mirrors, ensuring they remain properly aligned and functional. By taking the time to properly fix your It to the wall, you enhance the overall safety, durability, and aesthetic appeal of your bathroom.
Step-By-Step Guide To Fixing A Vanity Unit
1. Locating The Wall Studs
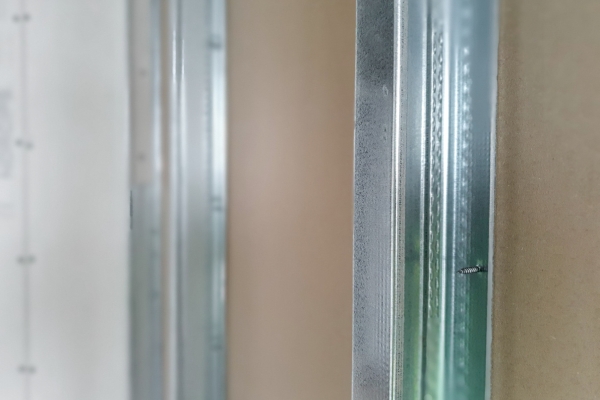
Before you begin, use a stud finder to locate the wall studs where you’ll anchor the vanity unit. Wall studs provide the necessary support for securing heavy fixtures like a It. Mark the positions of the studs using a pencil or masking tape.
2. Marking The Position Of The Vanity Units
With the studs identified, place the It against the wall in the desired position. Use a level to ensure it’s perfectly horizontal. Once aligned, use a pencil to mark the outline of the It on the wall. This outline will serve as a guide for drilling holes and positioning the unit.
3. Drilling The Holes
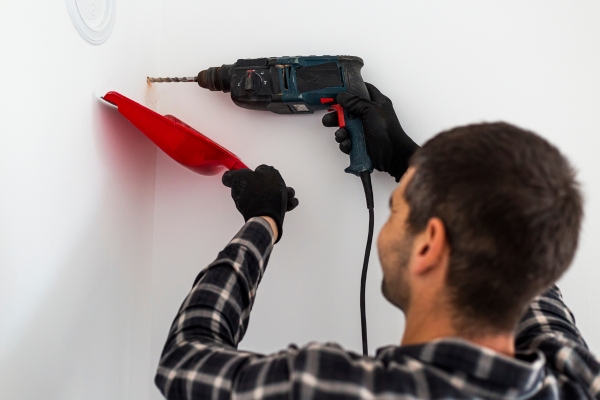
Next, carefully drill pilot holes into the marked positions on the walls, ensuring they correspond with the locations of the wall studs. Use a drill bit slightly smaller than the diameter of the screws you’ll be using to secure the It. Drill through the drywall and into the studs to create stable anchor points.
4. Attaching The Vanity Units
Once the holes are drilled, lift the It into place, aligning it with the marks on the wall and ensuring it sits securely against the surface. Use appropriate screws and a screwdriver to attach the It to the walls through the pilot holes and into the studs. Tighten the screws carefully to avoid over-tightening, which could damage the unit or the walls.
5. Connecting Plumbing And Fixtures

After securing the vanity units to the wall, proceed to connect the plumbing fixtures. Install the sink basin, faucet, and drain according to the manufacturer’s instructions. Ensure all connections are tight and leak-free. Test the water flow and drainage to confirm everything is functioning properly.
6. Troubleshooting Common Issues
If you encounter any issues during installation, such as misaligned plumbing connections or uneven mounting, troubleshoot accordingly. Adjust the position of the It if necessary, tighten loose fittings, or use sealant to fix minor leaks. Addressing these issues promptly will prevent potential damage and ensure the It operates efficiently.
Conclusion
Installing a vanity unit requires careful planning and execution to achieve a secure and functional fixture in your bathroom. By following this step-by-step guide—from locating walls studs and drilling pilot holes to attaching the unit, connecting plumbing, and troubleshooting issues—you can successfully complete the installation process. A properly installed It not only enhances the aesthetics of your bathroom but also provides valuable storage and utility. Take your time, use the right tools and materials, and enjoy the satisfaction of a well-installed It that meets your needs for years to come.

