Removing a bathtub drain can be a necessary task for various reasons, whether you’re replacing the drain assembly, conducting maintenance, or dealing with a stubborn clog deep within your plumbing. While it may seem like a daunting task, with the right tools And step-by-step guidance, You can successfully remove a bathtub drain. In this guide, We will walk You through The process, providing You with The knowledge And confidence To tackle this DIY project effectively And avoid The need For costly professional assistance.
Why Remove Bathtub Drain?

Removing a bathtub drain Plug Is often necessary For various reasons. Primarily, It’s done To address issues like clogs, leaks, or damaged components within The drainage system. By removing The drain, You gain access to The pipes and fittings, allowing For thorough cleaning, repairs, or replacement Of worn-out parts. Additionally, during bathroom remodeling or renovation projects, drain removal may be required To replace the drain To match the new fixtures or configurations. Ultimately, removing The bathtub drain serves As a fundamental step in maintaining A properly functioning and reliable plumbing system In your bathroom.
Gather Necessary Tools And Materials
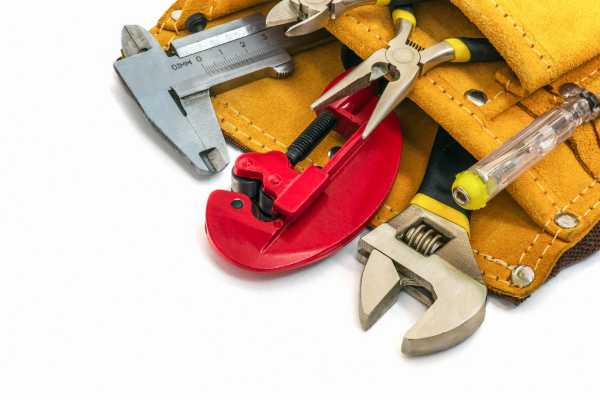
Before You begin The task Of removing a bathtub drain, It’s crucial To gather the necessary tools and materials To ensure a smooth and safe operation. You’ll need a set of essential tools such As pliers, a screwdriver, and A drain wrench to help with the removal process. Additionally, don’t forget to prioritize safety by wearing gloves and safety glasses To protect your hands and eyes during The procedure. Depending on your specific situation, You may also need replacement parts For the drain, so It’s a good idea to have those on hand As well. Having these tools and materials ready will set You up for success As You embark on the journey of bathtub drain remove.
Identifying The Type Of Drain
Identifying the type of drain In your bathtub Is a crucial first step In the removal process, As different drain types require specific removal methods. Common types include pop-up drains, trip lever drains, And lift-and-turn drains, each with their unique mechanisms. To determine your drain type, start by visually inspecting It. A pop-up drain typically has A visible stopper that You can push down And pop up, while a trip lever drain has An overflow plate with a lever You can move. A lift-and-turn drain, on The other hand, usually has a stopper that You can twist to open and close. Understanding the specific type of drain You have will enable you to proceed with the appropriate removal method, ensuring A successful bathtub drain remove project.
Removing The Drain Stopper
Removing the drain stopper is a crucial precursor to bathtub drain removal, and The process varies depending on the type of stopper You have. To remove a pop-up stopper, start by locating And removing the pivot rod nut beneath The sink, allowing You to extract the stopper easily. For a trip lever stopper, remove The overflow plate’s screws And linkage to free the stopper. If You have a lift-and-turn stopper, unscrew It counterclockwise to release It from the drain. In all cases, be prepared To deal with any screws or fasteners securing The stopper or overflow plate In place, As these may require loosening or removal For a successful extraction. Properly taking out The stopper Is a crucial initial step toward effectively removing your bathtub drain.
Accessing The Drain Flange

Accessing the drain flange is a crucial step in the process of bathtub drain removal. Located beneath the stopper within the drain opening, you’ll need the appropriate tools, like pliers or a drain wrench, to remove any screws or fittings that may secure the flange in place. Once these obstructions are cleared, ensure that the drain flange Is entirely free from any debris Or blockages To facilitate A smooth And successful removal of The bathtub drain.
Unscrewing the Drain Flange

Unscrewing The drain flange Is a straightforward process that involves A few key steps. Begin by inserting A drain wrench or pliers into The flange, securing a firm grip. Then, rotate counterclockwise to gradually loosen the flange from It’s position. Exercise caution And apply steady pressure To avoid damaging the plumbing or sink. Once adequately loosened, carefully remove The drain flange, allowing For maintenance, replacement, or cleaning As needed. This procedure Is essential For maintaining a well-functioning and leak-free sink drainage system.
Installing a Replacement Drain

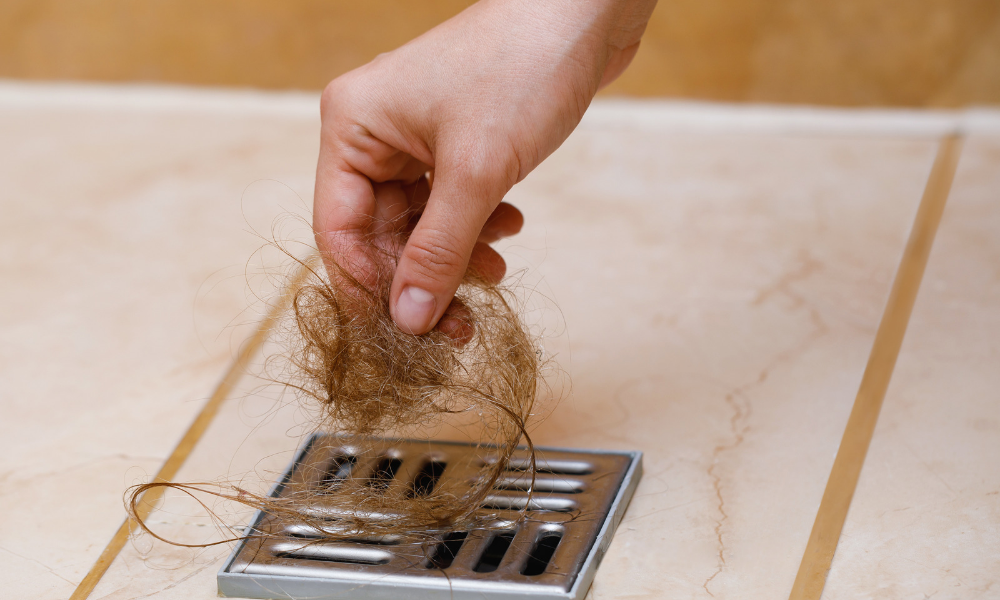
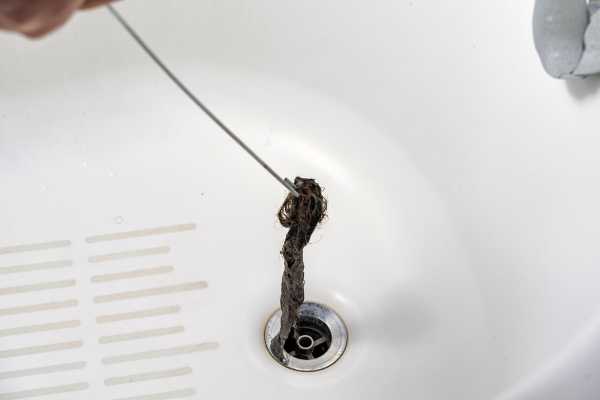
Inspecting and cleaning The drain Is An important routine maintenance task To ensure the proper functioning Of your plumbing system. After removing The drain flange, carefully examine It For any signs of damage Or wear that might require replacement. Next, clean out any accumulated debris Or hair from The drainpipe To maintain optimal flow. Additionally, take The opportunity To check For any clogs further down The drainpipe To prevent potential blockages that could lead To plumbing issues. This thorough inspection And cleaning process contribute to A healthier and more efficient drain system In your home.
Reassembling the Drain

To successfully reassemble the drain, follow these steps carefully: Begin by placing the cleaned or new drain flange back into the drainpipe, ensuring a secure fit. Next, tighten the flange clockwise using the appropriate drain wrench or pliers, making sure it’s snug but not over-tightened to avoid damage. Reattach any screws or fittings that were removed during the disassembly process, ensuring everything is securely in place. Finally, reinstall the drain stopper, completing the reassembly process. This meticulous approach ensures your sink’s drainage system is fully functional and leak-free.
Final Cleanup

Completing the final cleanup Is a crucial step To ensure a tidy and safe work environment after any plumbing task. Begin by wiping down The bathtub and The surrounding area To remove any dust or debris. Dispose of any old or damaged parts In An environmentally responsible manner, following local disposal guidelines. Store your tools and materials In a secure and organized place, Ready For future use. This attention To detail not only leaves your workspace clean but also helps maintain A clutter-free And safe home environment.
The Final Thought
The drain removal process involves several key steps, including unscrewing The drain flange, inspecting and cleaning the drain, installing A replacement drain If necessary, and reassembling The drain meticulously. Regular drain maintenance Is of paramount importance To prevent blockages and leaks, ensuring The smooth operation Of your plumbing system. By following these steps And maintaining your drains, You can look forward To enjoying A properly functioning bathtub again, free from The hassles of clogs And drainage issues, And ensuring The longevity of your plumbing fixtures.

