Remove Tiles From Bathroom Floor may seem like a daunting venture, but with the right understanding and tools, it is able to be a achievable DIY mission. Whether you’re making plans to renovate your rest room or update old tiles, understanding the proper technique is vital to prevent harm to the subfloor and ensure a easy floor for brand new floors. In this guide, we will stroll thru the step-by-step system of casting off bathroom floor tiles effectively and competently.
Understanding the Basics of Tile Removal
Before diving into the tile elimination technique, it is vital to apprehend why and how tiles are established. Most bathroom ground tiles are secured the use of mortar, adhesive, or thin-set, which creates a sturdy bond with the subfloor. Some installations include a cement backer board, whilst others are immediately affixed to a plywood or concrete base. Knowing the form of installation will assist determine the first-rate removal approach and gear wanted. Common mistakes inclusive of fallacious tool utilization, immoderate pressure, or failing to defend underlying structures can cause unnecessary damage. Being mindful of those potential pitfalls can make the process smoother and extra green.
Gathering the Right Tools and Materials
Having the ideal equipment available will make tile elimination less complicated and safer. Essential tools for the process include:
- Hammer and chisel – Used to pry up individual tiles.
- Floor scraper – Ideal for removing adhesive residue.
- Pry bar – Helps in lifting stubborn tiles.
- Rotary tool or oscillating multi-tool – Useful for cutting through grout lines.
- Dust mask and safety goggles – Essential for protecting against airborne debris.
- Work gloves and knee pads – Ensure comfort and safety throughout the project.
- Shop vacuum – Helps in cleaning up dust and small debris.
Having these types of equipment organized earlier than beginning will help streamline the removal method and minimize pointless disruptions.
Preparing Your Bathroom for Tile Removal
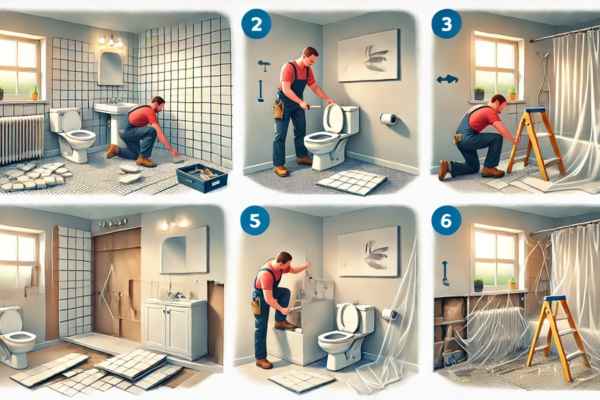
Proper instruction could make the tile removal system greater efficient and less messy. Start via eliminating any bathroom fixtures, such as the rest room or conceitedness, if necessary. This will provide complete get right of entry to to the tiled floor and save you damage to these fixtures. Next, cowl nearby surfaces and vents with plastic sheeting or painter’s tape to comprise dust and particles. If your rest room has baseboards, don’t forget casting off them carefully to keep away from breaking them. Finally, make sure proper ventilation, as tile elimination can generate considerable dirt, which may also cause breathing infection.
Checking for Underlayment and Subfloor Types
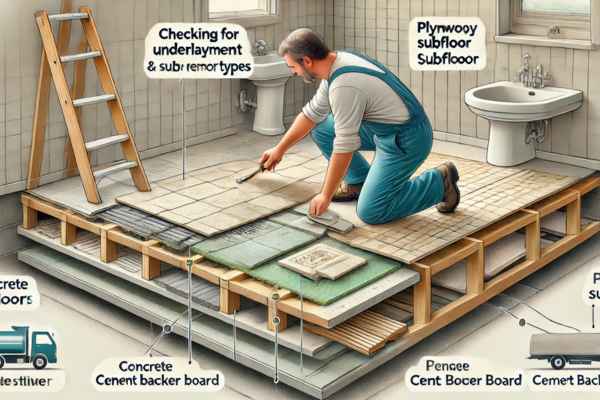
Before prying up tiles, decide the kind of subfloor underneath them. Common subfloor substances include:
- Concrete – Typically found in basement and ground-level bathrooms. Concrete subfloors are more durable but may require additional work when removing adhesive residue.
- Plywood – Often used in second-story bathrooms. Removing tiles from plywood requires extra caution to prevent damage to the wood.
- Cement backer board – Installed to provide stability for tiles. This layer may need to be removed entirely if it is compromised.
Identifying the subfloor kind will help you pick out the precise removal approach and avoid accidental harm.
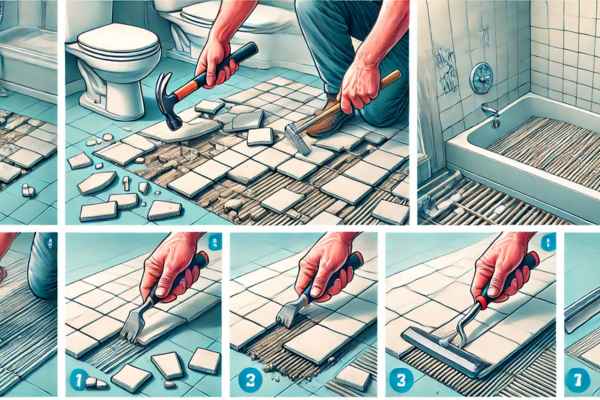
Starting with Tile Removal: The Best Techniques
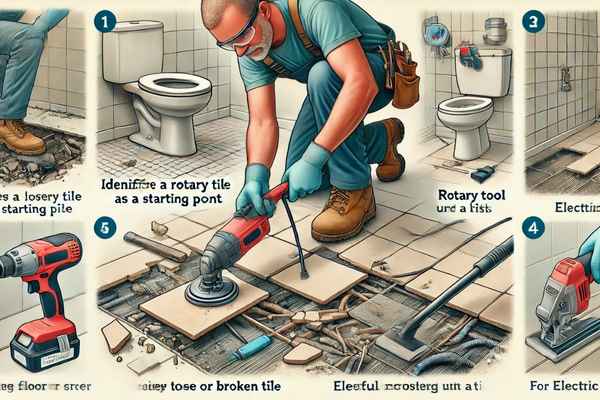
Begin by way of figuring out a free or broken tile to serve as the start line. If all tiles are intact, use a rotary device or chisel to interrupt the grout surrounding one tile. Insert a chisel under the tile and faucet it gently with a hammer to boost it from the floor. Continue this procedure for every tile, working methodically to limit subfloor harm. For large regions, do not forget using an electric floor scraper to speed up the method. Always wear defensive tools and take breaks as needed to keep away from pressure or injury.
Breaking Up Stubborn Tiles
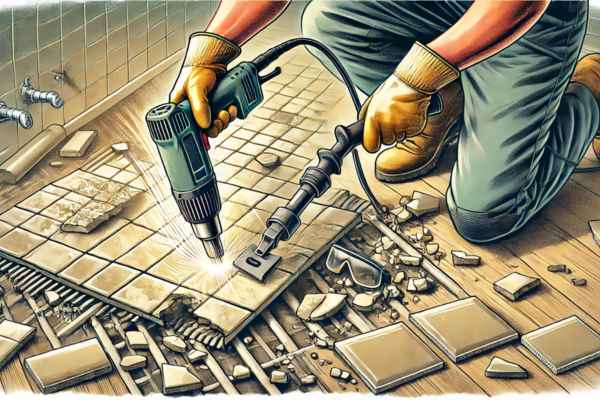
Some tiles are greater difficult to take away due to robust adhesive bonds. In such instances, making use of heat can assist melt the adhesive and make elimination easier. Use a warmth gun or warm air blower to heat up the tile before prying it up. If tiles are especially resistant, a electricity chisel or demolition hammer may be necessary. However, these equipment require cautious handling to avoid gouging the subfloor. Always take a look at for cracks or harm as you remove tiles, as this can decide if upkeep are needed before installing new flooring.
Handling Grout and Adhesive Removal
After the tiles were removed, a substantial challenge remains—doing away with the leftover grout and adhesive. Grout, the fabric used to fill gaps among tiles, can be fantastically stubborn. Similarly, the adhesive that holds tiles in place can grasp tightly to the subfloor, making it difficult to cast off. To address grout removal, use an oscillating multi-device or a grout noticed to scrape away the hardened fabric. If the grout is particularly thick, making use of warm water or a specialized grout softener can make the job easier. Be affected person and work slowly to avoid negative the underlying surface.
Adhesive elimination depends on the type used. Thin-set mortar, normally discovered underneath ceramic tiles, is quality eliminated the use of a chisel and hammer or an angle grinder with a diamond blade attachment. If adhesive residue remains, a floor scraper can assist carry stubborn patches. In a few cases, making use of a warmness gun or chemical adhesive remover can loosen the bond, making it less complicated to scrape off. Ensuring a clean and easy surface is critical earlier than installing new flooring.
Removing Tile Pieces and Cleaning Up the Debris
Once the tiles are removed, you’re left with sharp shards, dust, and adhesive chunks. Cleaning up properly is vital for protection and for preparing the toilet for its next section. Start with the aid of amassing larger tile portions the usage of heavy-duty gloves to protect your arms. Place them in a strong trash bag or a bucket unique for tile disposal. For smaller fragments and dirt, use a store vacuum as opposed to a widespread family vacuum, as great tile dust can clog filters and damage the device.
You’re operating in an enclosed space, recall the usage of an air cleanser or commencing windows to reduce airborne dust. Wetting the ground slightly before sweeping also can help manage dust tiers. Proper disposal of tile waste is vital—check with neighborhood authorities regarding regulations for eliminating creation debris. Some areas assist you to do away with broken tiles in everyday waste containers, while others require taking them to a delegated recycling center.
Repairing and Prepping the Subfloor
With the tiles and debris removed, the following step is to investigate and repair the subfloor. This is a vital part of the process due to the fact any damage left unaddressed can affect the toughness of your new flooring. Begin by using checking for cracks, uneven patches, or moisture damage. If the subfloor is made of concrete, search for signs and symptoms of crumbling or susceptible spots. If it’s plywood, look into for water damage or rotting. Any broken sections should be replaced or bolstered before proceeding with new flooring set up.
To create a clean floor, use a ground scraper to put off any lingering adhesive. If vital, sand the place to level out minor imperfections. In some cases, applying a self-leveling compound can assist make certain the floor is even, that’s especially beneficial if you plan to install new tiles. Properly sealing the subfloor can also prevent destiny moisture issues, especially in bathrooms where humidity ranges are excessive.
Alternative Methods for Removing Bathroom Tiles
Traditional tile elimination methods seem too hard work-in depth or risky in your subfloor, alternative techniques can make the system easier. One famous method is the use of a electricity scraper or demolition hammer with a chisel attachment. These tools can notably accelerate the elimination manner, specifically whilst coping with massive, stubborn tiles. However, they require cautious handling to save you useless harm. Another method includes softening the adhesive before trying elimination. A steam cleaner or warmness gun can loosen the bond, making it less complicated to raise tiles without immoderate pressure. This approach is particularly useful for tiles hooked up with strong thin-set mortar.
For the ones seeking to salvage tiles for reuse, a putty knife or tile lifter can assist pry them up without immoderate breakage. This method works best while tiles are hooked up using a much less competitive adhesive. In a few instances, hiring a professional may be the quality choice, particularly if you’re dealing with delicate flooring substances, antique installations with asbestos-containing tiles, or complex layouts. A expert tile elimination carrier can make certain a clean and harm-free result, saving effort and time.
Dealing with Unexpected Challenges
Removing tiles from a rest room floor may appear sincere, however sudden challenges can arise in the course of the technique. You may come upon cussed adhesive, cracked tiles that refuse to budge, or even harm to the subfloor. To tackle these surprises, usually begin by using assessing the condition of the tiles and grout. If tiles are hard to take away, the usage of a warmth gun or heat water can help loosen the adhesive. In cases in which tiles wreck inconsistently, a chisel and hammer can help in prying them up cautiously. Additionally, be organized for hidden problems like mould, vulnerable subflooring, or plumbing pipes underneath the tiles. Addressing these troubles early can keep time and prevent luxurious repairs later.
Saving and Reusing Old Tiles
You’re hoping to save and reuse antique tiles, cautious elimination is crucial. Begin by using gently tapping around the rims of the tile to discover free spots. A putty knife or pry bar can help carry tiles without breaking them. If tiles are adhered with sturdy mortar, applying a solvent or tile remover solution can melt the adhesive for less complicated extraction. Once removed, soak tiles in heat water to easy off residual grout and cement. Reused tiles can be an extremely good way to keep money and hold consistency to your bathroom’s layout. However, continually look at them for cracks or harm before reinstalling.
Final Cleanup and Post-Tile Removal Tips
After all of the tiles are eliminated, a thorough cleanup is important. Sweep and vacuum the place to clear away dust and debris. Any remaining adhesive ought to be scraped off the use of a ground scraper or chemical adhesive remover. If you plan to install new tiles, make sure the subfloor is clean and stage to prevent future tiling problems. It’s additionally an awesome time to check for water harm or choppy spots that may need repair. Cleaning up properly will make the following step of upkeep a whole lot simpler and extra efficient.
Wrapping Up
Wrapping up the tile removal system entails eliminating damaged tiles responsibly. Many home development stores or recycling facilities be given old tiles for repurposing. If the tiles are still in correct circumstance, consider donating them to reuse facilities or selling them online. With the proper method, eliminating rest room tiles may be a viable DIY task that prepares your space for a fresh new appearance.

