
Having A well-organized bathroom can significantly enhance your bathing experience, and a shower holder is a simple yet effective tool to achieve this goal. However, attach a shower caddy to a tile can sometimes pose a challenge. If not done correctly, you might end up damaging your beautiful tiles or ending up with a caddy that constantly slips or falls. This Blog is here to guide you through the process step by step. You’ll learn the right techniques, The tools you need, And some valuable tips to ensure A secure And damage-free installation. By the end of this post, you’ll be well-equipped to install your shower holder, contributing to a clutter-free, convenient, and stylish bathroom space. Get ready to level up your shower routine with your perfectly installed caddy!
How Do You Secure A Shower Caddy?

To secure A shower holder, There are A few options you can consider. You can use suction cups to attach the caddy to the wall or shower tiles. Make sure to clean the surface thoroughly before attaching the suction cups for better adherence. Another option is to use adhesive hooks or strips specifically designed for bathroom use. These hooks can be attached to the wall and then the caddy can be hung from them. If you have A built-in shower shelf, You can simply place the caddy on it to keep it secure. Whichever method you choose, Ensure that It is properly installed and regularly check for any signs of loosening or damage.
Clean The Tile Surface Thoroughly

Before installing your shower holder, it’s crucial to ensure the tile surface is as clean as possible. Dirt, dust, or soap residue can hinder the adherence of the caddy, making it less secure. Start by wiping the tile with A clean, Damp cloth to remove any surface grime. Then, use a mild cleaning solution to remove stubborn residues. Rinse thoroughly and dry the area to ensure no moisture interferes with the adhesive. This step is not merely a suggestion, but a requirement – a clean surface will drastically increase the likelihood of your holder staying put, promoting a safer and more organized rain space.
Mark The Desired Position For The Shower Caddy
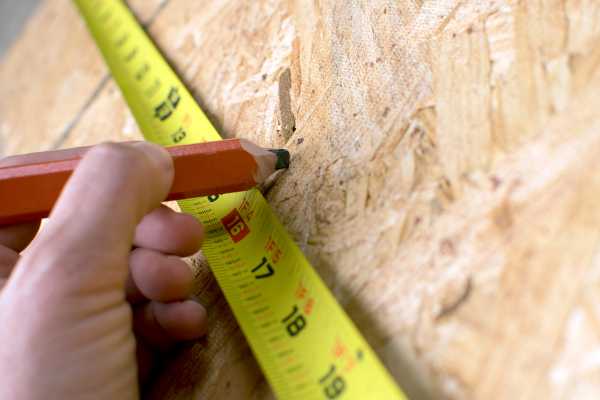
The next step is determining where you want your shower keeper to be. Consider factors like your reach, The rain head’s location, And where It will least obstruct your movement. Once decided, Use A non-permanent marker to outline the area where the keeper will be positioned. This will serve as A guide during installation, Ensuring accurate placement. Take your time during this step; proper positioning will enhance the functionality of your keeper, providing easy access to your products while maintaining a streamlined aesthetic in your bathroom.
Apply The Adhesive Product To The Tile Surface

Once the surface is clean And you’ve marked your desired position, It’s time to apply the adhesive. Depending on the type of caddy, this could be suction cups, adhesive strips, or silicone glue. Whatever the method, Ensure you’re following the manufacturer’s instructions. Apply the adhesive product evenly And firmly press the rain keeper against the tile. Hold It for A few seconds to allow the adhesive to take hold. By properly applying the adhesive, you’re ensuring A strong bond between the caddy And tile surface, Crucial for A secure and long-lasting rain keeper installation.
Attach The Shower Holder To The Adhesive

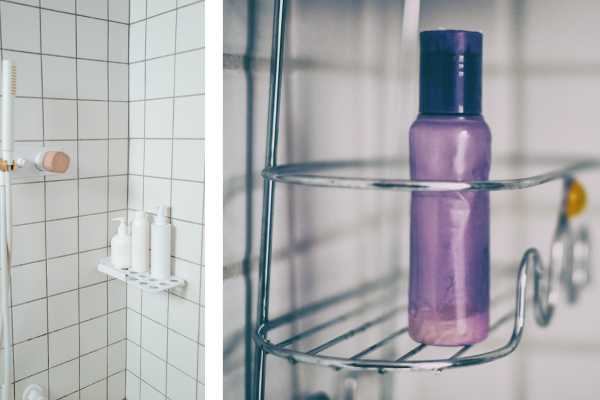
After applying the adhesive to the tile, the next step is to attach the shower caddy. Align the caddy with the marked area and press It firmly against the tile, Ensuring it’s straight and level. You may need to hold It in place for A few moments to ensure A strong bond. It’s important to follow the caddy manufacturer’s instructions regarding the application of pressure and the recommended positioning. If the caddy isn’t secure or is uneven, you may need to reposition it quickly before the adhesive sets. By attaching the holder correctly, you’re taking a significant step towards a more organized and efficient bathroom.
Allow Sufficient Curing Time For The Adhesive To Set

After you’ve attached the shower holder, Resist the urge to immediately load it with your rain essentials. Patience is pivotal at this stage. The adhesive needs ample time to set or cure completely, forming a strong and durable bond with the tile surface. The curing time can vary, Usually ranging from A few hours to A whole day, Depending on the specific adhesive used. Always refer to the manufacturer’s instructions for the recommended wait time. By allowing sufficient curing time, You’ll be confident that the adhesive has been set properly, Ensuring that your keeper will stay secure and serve you effectively for a long time.
Can I attach a shower caddy to the tile without drilling?

Yes, You can attach A shower caddy to the tile without drilling. There are several alternatives to drilling that you can consider. One option is to use adhesive hooks or suction cups specifically designed for bathroom use. These hooks or cups can be easily attached to the tile surface and provide A secure hold for your rain holder. Another option is to use adhesive strips or double-Sided tape that are strong enough to support the weight of the caddy. Make sure to clean the tile surface thoroughly before attaching any adhesive products to ensure A strong bond.
What type of shower holder is suitable for tile walls?
When It comes to choosing A holder for tile walls, There are A few factors to consider. Look for A caddy that is specifically designed for tile walls, As these typically come with suction cups or adhesive strips that provide A strong And secure attachment. Additionally, Opt for A caddy that is made from materials like stainless steel or aluminum, As these are durable And resistant to rust or corrosion.
Another important consideration is the size And storage capacity of the caddy. Make sure It has enough space to hold all your shower essentials without overcrowding the area. Lastly, Choose A design that complements your bathroom decor And personal style. Look for options with adjustable shelves or hooks that can accommodate different sizes of bottles and accessories. Overall, Selecting A keeper suitable for tile walls involves finding one with secure attachment, Durability, Ample storage space, And aesthetic appeal.
The Final Thought
Installing A holder might seem like a minor task, But the convenience It provides can significantly enhance your daily routine. By following these straightforward steps, you can ensure A secure and sturdy keeper installation, Giving you easy access to your bath essentials while maintaining A clutter-free environment. Not only does it add functionality to your space, but a well-installed caddy also contributes to the overall aesthetic of your bathroom. Remember, investing a little time in proper installation can pay off long-term stability and convenience. Enjoy your newly organized rain space!

