Keeping your bathroom sink clean And free of grime is essential for maintaining A hygienic and pleasant bathroom environment. Over time, Sinks can accumulate soap scum, Toothpaste residue, Hard water stains, And other unsightly marks that not only make your sink look dirty but also harbor bacteria. However, With the right tools And techniques, Cleaning A bathroom sink can be an easy task that yields sparkling results. In this article, We will guide you step-by-step on how to effectively clean your bathroom sink using simple household ingredients And professional cleaning products. Whether you are dealing with porcelain, stainless steel, Or another type of material, These expert tips will help you achieve A spotless and germ-free sink in no time.
How Can I Make My Washroom Sink Look New?

There’s something uniquely satisfying about A shiny, Clean bathroom sink that appears almost brand-new. But how can you achieve this look? The answer lies in regular cleaning, Maintenance, And minor restorations. Tools you may need include A good cleaning agent, A non-abrasive sponge, baking soda, Vinegar, And possibly A soft cloth for polishing. By using these tools in A systematic cleaning routine and carrying out minor repairs when necessary, you can restore the shine and luster to your washroom basin, making It look as good as new.
Importance Of Maintaining A Clean Bathroom Sink

Maintaining A clean bathroom sink is not just about aesthetics. It’s also A crucial aspect of hygiene and health. A dirty sink can harbor bacteria And germs, posing A potential risk to anyone using the bathroom. Furthermore, dirt and grime can accumulate over time, leading to unpleasant odors, Discoloration, And even corrosion or other damage to the sink’s material. Regular cleaning and maintenance will not only keep your basin looking shiny and new but also contribute to a healthier, more enjoyable washroom environment.
Remove Debris And Loose Dirt

Before diving into deep cleaning, It’s crucial to clear the sink of debris And loose dirt. This initial step makes the subsequent cleaning more effective. Start by removing any items from the basin and use A damp sponge or cloth to wipe away any dust, Hair, Or other loose particles. For drain openings, You may need to use A small brush to dislodge any debris. Don’t forget to clean around the faucet And handles, As these areas often collect dirt. It’s recommended to do this light cleaning regularly to prevent the buildup of grime and make deep cleaning sessions less daunting.
Use Mild Detergent Or Dish Soap

Once you’ve cleared your sink of debris and loose dirt, It’s time to step up your cleaning game with A mild detergent or dish soap. These cleaning agents are usually gentle enough not to damage the sink’s surface, Yet powerful enough to cut through grease, Grime, And soap scum. Take A small amount of detergent or dish soap, add warm water, And stir until it forms A sudsy mixture. You could also consider using A dedicated washroom cleaner, provided it’s suitable for the material of your basin. Always read the product’s label to ensure It won’t scratch or damage your sink’s surface.
Apply The Cleaner To The Sink Surface

Application of the cleaner is A critical step in making your washroom basin look new again. Using A soft sponge or cloth, Apply the sudsy detergent mixture or washroom cleaner to the basin. Work the cleaner into all parts of the basin, including the drain, faucet, And handles, scrubbing gently to avoid scratching the surface. For stubborn stains, A paste of baking soda and water can be a useful, gentle abrasive. Apply the paste, Allow it to sit for A few minutes, Then scrub lightly. Once you’ve thoroughly cleaned the basin, Rinse It well with warm water to remove all traces of the cleaner. Your basin should now be starting to regain its original shine And look as good as new.
Use An Old Toothbrush To Reach Small Crevices
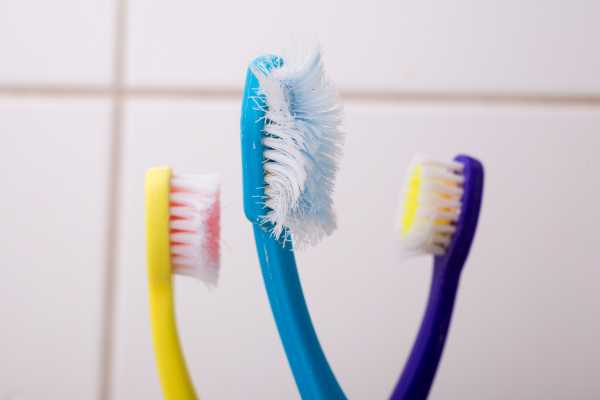
An old toothbrush can be an indispensable tool when aiming to rejuvenate your washroom basin. Despite our best efforts, Grime tends to accumulate in hard-to-reach crevices, Such as around the base of the faucet And the drain opening. The small size And stiff bristles of A toothbrush make It ideal for these tasks. Simply apply some of your cleaning solutions to the toothbrush and scrub gently but firmly in these areas. The toothbrush’s bristles are designed to reach where your sponge or cloth can’t, helping to remove the last remnants of stubborn grime and bringing your basin closer to Its original glory.
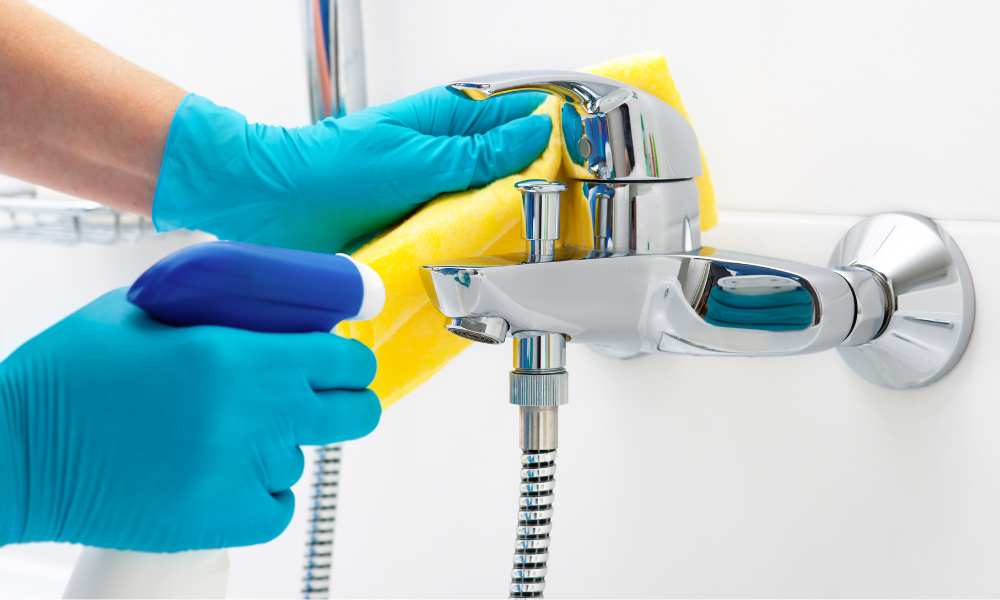
Rinse The Faucet Thoroughly

After all the scrubbing And cleaning, It’s time for A thorough rinse. This step is vital to remove the residue of the cleaning products And any loosened dirt. Start from the top And work your way down, Ensuring the entire sink and faucet area is covered. Warm water is best, as It helps dissolve any soap residue. Pay special attention to the faucet and drain, Areas where soap scum tends to linger. A handheld showerhead or A jug can help direct the water flow for an effective rinse. Finally, dry the sink and faucet with a soft, clean cloth to prevent water spots and bring out the shine.
The Final Thought
Maintaining your washroom basin And the faucet isn’t merely A chore; It’s an integral part of maintaining A clean, Pleasant, and hygienic washroom environment. By following these simple steps, Your sink can regain its original shine and appear as good as new. Start by removing debris, then use A mild detergent or dish soap for A deep clean. Don’t forget to reach into small crevices with an old toothbrush, and always rinse thoroughly after cleaning. With regular attention And A little effort, your washroom basin can be A point of pride, Gleaming brilliantly and contributing to A beautiful, Well-maintained washroom.

