Maintaining a clean bathroom is essential for both hygiene and aesthetics, and knowing how to clean a plunger and toilet brush effectively is a key part of this process. These tools, often overlooked, can harbor bacteria and unpleasant odors if not cleaned regularly. By following simple steps to sanitize and maintain these cleaning essentials, you can ensure a fresher, more sanitary bathroom environment. This guide will provide you with easy-to-follow instructions on how to clean a plunger and toilet brush, ensuring they are ready for use whenever you need them.
How Often Should I Clean My Plunger And Toilet Brush?
Maintaining cleanliness in the bathroom is crucial, and knowing how to clean a plunger and toilet brush is an integral part of this upkeep. Regular cleaning of these tools not only ensures hygiene but also extends their lifespan. A common question is, “How often should I clean my plunger and toilet brush?” Ideally, both tools should be cleaned after each use to prevent the buildup of bacteria and odors. However, if they are not used frequently, a thorough cleaning once a week should suffice. This routine helps in maintaining a sanitary bathroom environment.
How Do I Prevent My Toilet Brush From Smelling?
Another common concern is, “How do I prevent my toilet brush from smelling?” To keep your toilet brush from emitting unpleasant odors, it’s essential to rinse it thoroughly with hot water after each use. Additionally, soaking the brush in a disinfectant solution or a mixture of bleach and water for about an hour can effectively kill bacteria and neutralize odors. Storing the brush in a well-ventilated holder also helps it dry faster, reducing the chances of mold and mildew growth. By following these steps, you can ensure your toilet brush remains fresh and ready for use.
Cleaning A Plunger
1. Rinse In Toilet

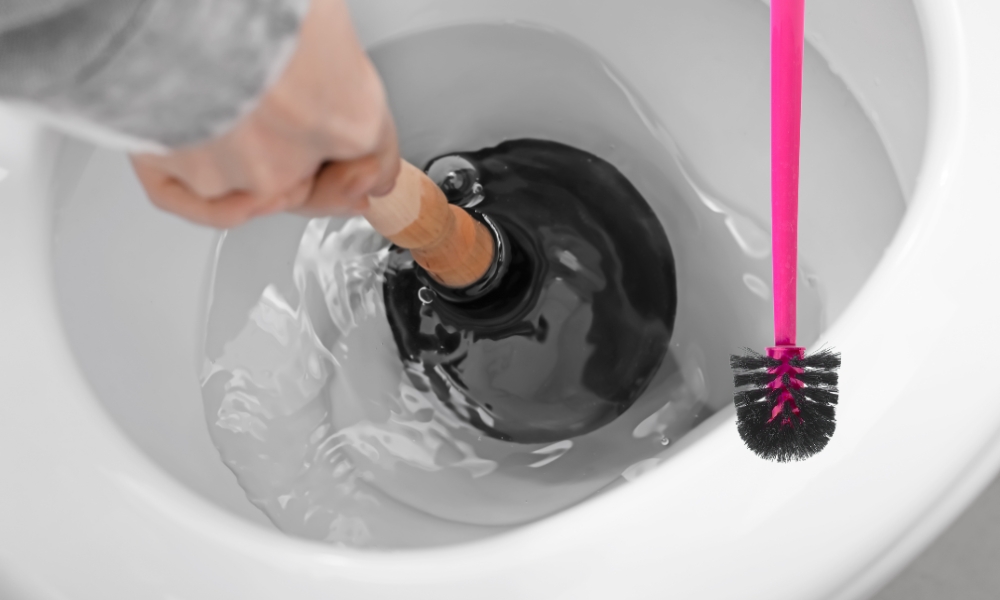
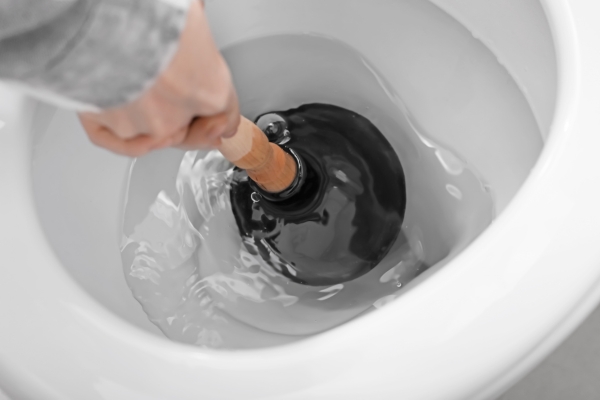
To begin cleaning a plunger, start by giving it a thorough rinse in the toilet bowl. This step helps to remove any visible debris or residue that may have accumulated on the plunger’s surface. By rinsing the plunger in the toilet, you can quickly and effectively dispose of any waste materials, preparing it for the next steps of the cleaning process. This initial rinse sets the foundation for a more thorough cleaning, ensuring that the plunger is ready to tackle any future clogs with optimal cleanliness and effectiveness.
2. Soak In Disinfectant
Following the initial rinse, the next step in cleaning a plunger involves soaking it in a disinfectant solution. This solution, typically made with bleach and water or a commercial disinfectant cleaner, helps to eliminate germs and bacteria that may be present on the plunger’s surface. By allowing the plunger to soak in the disinfectant solution for a designated period, usually a few minutes, you ensure thorough sanitation, enhancing its hygiene and effectiveness. This crucial step ensures that the plunger is free from harmful pathogens, promoting a cleaner and safer bathroom environment.
3. Scrub The Plunger
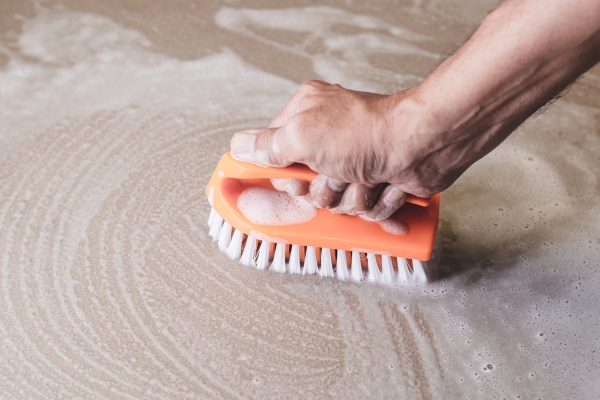
After soaking in the disinfectant solution, the next step in cleaning a plunger is to scrub it thoroughly. Using a brush or sponge, scrub the entire surface of the plunger, paying particular attention to areas where dirt and grime may have accumulated. This step helps to remove any remaining debris and ensures that the plunger is clean and sanitary for future use. By scrubbing the plunger, you effectively eliminate any lingering germs and bacteria, promoting optimal hygiene in your bathroom. Once scrubbed, rinse the plunger again with clean water to remove any loosened dirt and disinfectant residue, and then allow it to air dry completely before storing it away.
4. Rinse Thoroughly
The fourth step in cleaning a plunger is to rinse it thoroughly. After scrubbing, hold the plunger under running water or rinse it in the toilet bowl to remove any remaining disinfectant solution and loosened debris. Make sure to rinse all parts of the plunger, including the handle and the rubber suction cup, to ensure no cleaning residue is left behind. Thorough rinsing is crucial to eliminate any leftover chemicals that could degrade the plunger’s material or cause unpleasant odors. Once the plunger is completely rinsed, it will be ready for the final step of the cleaning process.
5. Dry The Plunger
The final step in cleaning a plunger is to dry it thoroughly. After rinsing, shake off any excess water and allow the plunger to air dry in a well-ventilated area. It’s important to ensure the plunger is completely dry before storing it to prevent the growth of mold and mildew. You can place the plunger on a clean surface or hang it up to dry. Proper drying not only helps maintain the plunger’s cleanliness but also extends its lifespan, ensuring it remains effective and hygienic for future use. Once dry, store the plunger in a clean, dry location until it is needed again.
Cleaning A Toilet Brush
1. Rinse In Toilet
To start cleaning a toilet brush, begin by rinsing it thoroughly in the toilet bowl. Swish the brush around in the clean water to remove any loose debris and residue that has accumulated on the bristles. This initial rinse helps to dislodge grime and prepare the brush for deeper cleaning. Make sure to flush the toilet during the process to keep the water clean and help wash away the loosened dirt. By rinsing the brush in the toilet, you ensure that it is ready for the next steps in the cleaning process, ensuring better hygiene and effectiveness.
2. Soak In Disinfectant
The next step in cleaning a toilet brush is to soak it in a disinfectant solution. Fill a bucket or container with a mixture of disinfectant or bleach and water, ensuring there is enough liquid to fully submerge the brush. Place the toilet brush in the solution and let it soak for several minutes. This soaking process is crucial for killing germs and bacteria that may be lingering on the bristles and handle. By thoroughly disinfecting the brush, you ensure that it is not only clean but also hygienic, ready to effectively maintain the cleanliness of your toilet without spreading harmful pathogens.
3. Scrub The Brush
After soaking the toilet brush in disinfectant, the next step is to scrub it thoroughly. Use a pair of rubber gloves and a second brush or sponge to scrub the bristles and handle of the toilet brush. Pay close attention to any areas where grime and residue might be trapped, ensuring that all parts of the brush are cleaned effectively. This scrubbing action helps to remove any remaining dirt and enhances the sanitizing effect of the disinfectant. Once the brush has been thoroughly scrubbed, rinse it under running water to remove any loosened debris and cleaning solution. This step ensures that your toilet brush is clean and ready for hygienic use.
4. Clean The Holder
Cleaning the holder is an essential part of maintaining a sanitary toilet brush. Start by emptying any water or residue from the holder. Then, use a disinfectant spray or solution to thoroughly clean the inside and outside of the holder. A sponge or brush can help scrub away any buildup or stains. Rinse the holder with clean water to remove any remaining disinfectant, and then dry it completely with a clean towel or allow it to air dry. Ensuring the holder is clean and dry before placing the toilet brush back in it prevents the growth of mold, mildew, and bacteria, maintaining overall bathroom hygiene.
5. Rinse Thoroughly
After scrubbing the toilet brush, it’s important to rinse it thoroughly. Hold the brush under running water, ensuring that all the bristles and the handle are well-rinsed. This step helps to wash away any remaining disinfectant and loosened dirt, leaving the brush clean and free from chemical residue. Make sure to rotate the brush under the water to reach all sides and angles. A thorough rinse is crucial for preventing any residual cleaner from contaminating your toilet or causing odors. Once fully rinsed, the brush will be ready for the final drying step.
6. Dry The Brush
The final step in cleaning a toilet brush is to dry it thoroughly. After rinsing, shake off any excess water and place the brush in a well-ventilated area to air dry. You can hang it over the toilet bowl or position it in a manner that allows good airflow around the bristles. Proper drying is crucial to prevent the growth of mold and mildew, which thrive in damp environments. Ensure that the brush is completely dry before placing it back in its holder. A dry brush not only maintains better hygiene but also prolongs the life of the brush, keeping it effective for future use.
What Are Some Natural Disinfectants I Can Use?
There are several natural disinfectants readily available for cleaning purposes, offering an effective alternative to chemical-based cleaners. Vinegar, known for its acidic properties, can effectively kill bacteria and viruses. Hydrogen peroxide, a mild antiseptic, is another natural option that can disinfect surfaces effectively. Essential oils like tea tree oil and lavender oil possess antimicrobial properties and can be used to create natural cleaning solutions. Additionally, baking soda, with its abrasive nature, can help scrub away dirt and grime while deodorizing surfaces. By utilizing these natural disinfectants, you can effectively clean your home while minimizing exposure to harsh chemicals.
Conclusion
Incorporating natural disinfectants into your cleaning routine offers numerous benefits. Not only are they effective at killing germs and bacteria, but they are also safer for both your health and the environment compared to chemical-based cleaners. By utilizing ingredients like vinegar, hydrogen peroxide, essential oils, and baking soda, you can achieve a clean and hygienic living space while promoting a healthier lifestyle.

