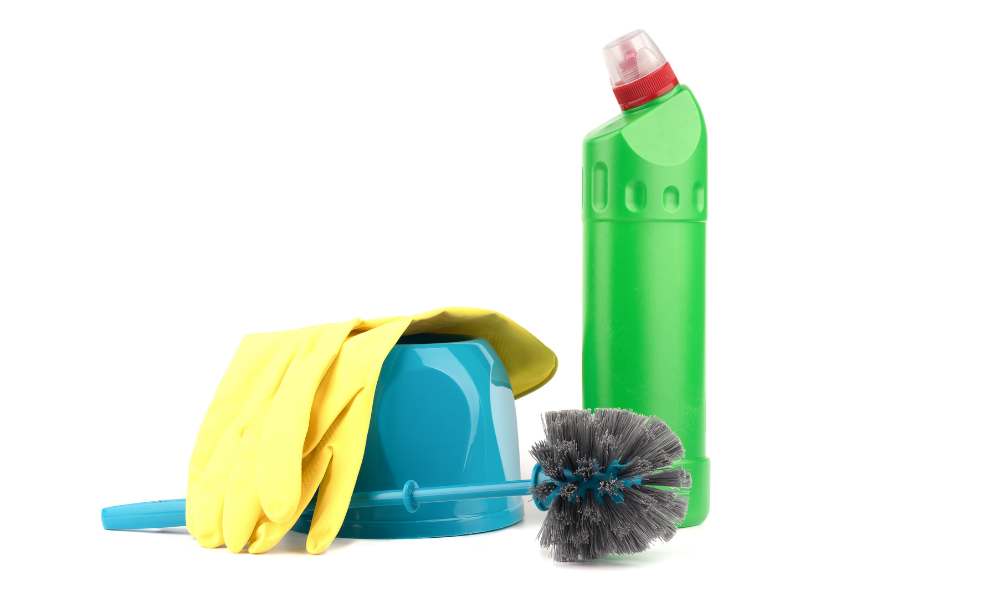
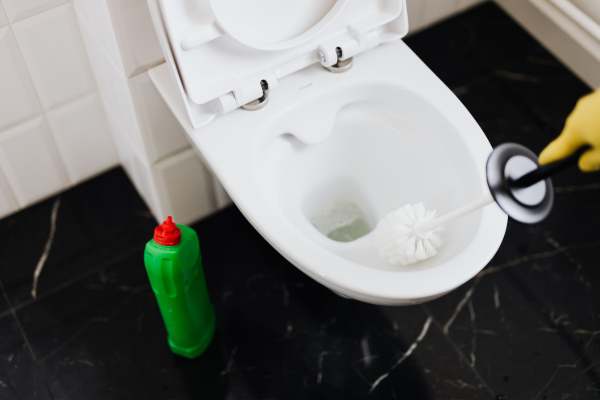
Maintaining a pristine bathroom involves more than just surface cleaning; it extends to the tools we use for hygiene. Among these, the often overlooked yet essential toilet brush plays a crucial role in ensuring cleanliness and sanitation. Learning how to clean a toilet brush not only prolongs its lifespan but also safeguards against the spread of germs. By following a few simple steps, you can effectively sanitize this frequently used tool, ensuring that your bathroom remains a haven of freshness and hygiene.
Why Cleaning Toilet Brushes Is Important?
Cleaning toilet brushes is a critical aspect of maintaining a hygienic bathroom environment. Over time, toilet brushes accumulate bacteria, germs, and other contaminants from cleaning the toilet bowl. If left uncleaned, these brushes can become breeding grounds for harmful microbes, posing health risks to anyone who comes into contact with them. Furthermore, using a dirty toilet brush can potentially spread germs to other surfaces in the bathroom, perpetuating the cycle of uncleanliness. Therefore, regular cleaning of toilet brushes is essential to prevent the spread of infections and maintain a healthy living environment.
Step-By-Step Guide On How To Clean A Toilet Brush
Step 1: Prepare A Cleaning Solution
Before beginning the cleaning process, prepare a cleaning solution using hot water and a disinfectant cleaner. You can also use a mixture of bleach and water for a more potent sanitizing solution. Ensure that the cleaning solution is sufficient to submerge the bristles of the toilet brush completely.
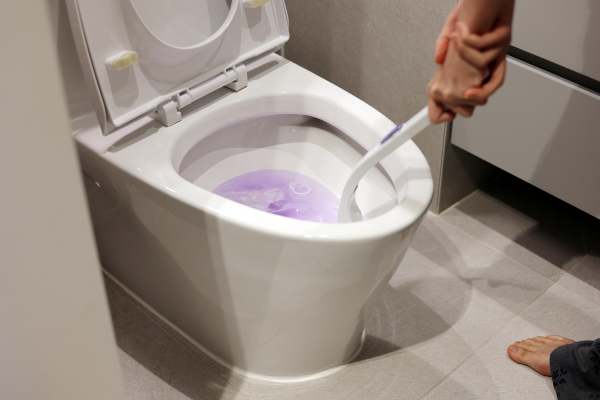
Step 2: Soak The Brush
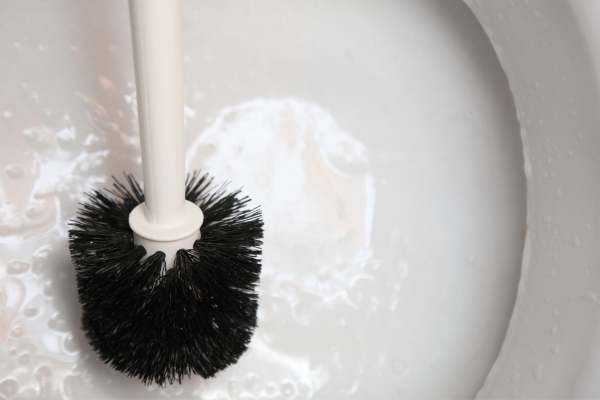
Once the cleaning solution is ready, place the toilet brush in the solution, ensuring that the bristles are fully submerged. Allow the brush to soak for at least 15 to 30 minutes to loosen any dried-on residue, bacteria, and germs. During this time, the cleaning solution will work to disinfect the brush and break down any stubborn stains or debris. If the brush has a plastic or metal handle, you can also immerse it in the cleaning solution to sanitize it thoroughly.
Step 3: Scrub And Rinse
After the toilet brush has soaked for the appropriate amount of time, remove it from the cleaning solution. Using a pair of rubber gloves to protect your hands, scrub the bristles of the brush thoroughly with a toilet brush cleaner or an all-purpose cleaner. Pay close attention to any remaining stains or residue, and use a scrubbing motion to dislodge them from the bristles. Additionally, you can use an old toothbrush to reach into the crevices and ensure a more thorough cleaning. Once the bristles are scrubbed clean, rinse the brush under running water to remove any loosened debris and cleaner residue.
Step 4: Rinse Thoroughly
After scrubbing the brush, it’s essential to rinse it thoroughly to remove any remaining cleaning solution and debris. Hold the brush under running water, ensuring that all parts of the brush, including the bristles and handle, are rinsed clean. Use your fingers to comb through the bristles, ensuring that any trapped residue is flushed out completely. Continue rinsing until the water runs clear and there are no visible signs of dirt or cleaner residue on the brush. Once thoroughly rinsed, shake off any excess water and allow the brush to air dry completely before returning it to its holder.
Step 5: Dry Properly

After rinsing the toilet brush thoroughly, it’s crucial to dry it properly to prevent the growth of bacteria and mold. Shake off any excess water from the brush and then place it in a well-ventilated area to air dry completely. Ensure that the brush is positioned with the bristles facing downward to allow any remaining water to drip off. Avoid placing the wet brush back into its holder immediately, as this can trap moisture and promote bacterial growth. Depending on the humidity levels in your bathroom, drying may take several hours. Once the brush is completely dry, you can return it to its holder or storage location.
Step 6: Disinfect The Holder
While cleaning the toilet brush itself is essential, it’s also crucial to disinfect its holder or storage container regularly. Remove the holder from its location and empty out any residual water or debris. Prepare a disinfectant solution using a household disinfectant cleaner or a mixture of bleach and water. Wipe down the entire surface of the holder, both inside and out, using a clean cloth or sponge soaked in the disinfectant solution. Pay close attention to any areas where moisture may accumulate, such as the bottom of the holder. Allow the disinfectant to sit for a few minutes to ensure thorough sanitization, then rinse the holder with clean water and allow it to air dry completely before reassembling the toilet brush setup.
Step 7: Dispose Of Water Properly
Once you have completed cleaning and disinfecting your toilet brush and its holder, it’s essential to dispose of any leftover cleaning water properly. Avoid pouring the dirty water down the sink or toilet, as this can reintroduce bacteria and contaminants into your bathroom environment. Instead, empty the cleaning water into a toilet bowl and flush it away. Alternatively, you can pour it down a floor drain if available, ensuring that it doesn’t come into contact with surfaces used for food preparation or personal hygiene.
How Often Should I Clean My Toilet Brush?
The frequency of cleaning your toilet brush depends on how frequently it is used and the level of cleanliness you wish to maintain in your bathroom. As a general rule of thumb, it’s recommended to clean your toilet brush after each use or at least once a week. However, if you notice any visible stains, odors, or buildup on the brush, it’s advisable to clean it more frequently. Regular cleaning helps prevent the buildup of bacteria and ensures that your toilet brush remains an effective tool for maintaining a hygienic bathroom environment. Additionally, don’t forget to replace your toilet brush periodically, as bristles can wear out over time and become less effective at cleaning.
What Is The Best Way To Dry A Toilet Brush After Cleaning?
The best way to dry a toilet brush after cleaning is to allow it to air dry completely in a well-ventilated area. After rinsing the brush thoroughly, shake off any excess water and place it in a position where the bristles can air dry naturally. It’s essential to ensure that the brush is positioned with the bristles facing downward to allow any remaining water to drip off. Avoid placing the wet brush back into its holder immediately, as this can trap moisture and promote bacterial growth. Depending on the humidity levels in your bathroom, drying may take several hours. Once the brush is completely dry, you can return it to its holder or storage location.
Conclusion
Maintaining a clean and hygienic bathroom environment is essential for the health and well-being of your household. Cleaning your toilet brush regularly is an integral part of this process, as it helps prevent the buildup of bacteria and ensures the effectiveness of your cleaning tools. By following a few simple steps, such as preparing a cleaning solution, soaking, scrubbing, rinsing. And properly drying your toilet brush, you can keep it clean and free from harmful germs. Additionally, disinfecting the brush holder and disposing of cleaning water properly further enhances the cleanliness of your bathroom. Incorporating these practices into your cleaning routine will help you maintain. A fresh and hygienic bathroom that you and your family can enjoy.

