Hang a shower caddy on the wall is a simple yet effective way to organize your bathroom essentials. With A variety of caddy designs available, selecting one that suits your bathroom’s style And your storage needs Is crucial. This guide focuses on the straightforward process of securely mounting a shower caddy, ensuring It holds all your items conveniently and safely. Whether you’re looking to save space or simply want to add A touch of organization To your shower area, this step-by-step approach will help you achieve A tidy and functional bathroom setup.
Introduction To The Topic Of Hanging A Shower Caddy On The Wall
Initiating The process of hanging a shower caddy on the wall can transform your bathroom into a more organized and efficient space. This task, though seemingly straightforward, requires careful consideration of the type of It and the specifics of installation. It’s A practical solution for keeping your rain essentials neatly arranged and within easy reach, enhancing the overall functionality and appearance of your bathroom.
What Types Of Shower Caddies Are Suitable For Wall Mounting?
When considering wall-mounted shower caddies, it’s important to understand that not all caddies are suitable For this purpose. The most appropriate types are usually made of rust-resistant materials like stainless steel or plastic, designed To withstand constant moisture. Look for caddies with secure mounting systems, such As suction cups for smooth surfaces or screw-in brackets for more permanent fixtures. Caddies with adjustable shelves offer added versatility, allowing you to customize the storage space according to your needs.
How Often Should I Perform Maintenance On My Wall-Mounted Shower Caddy?
Regular maintenance Is key To prolonging the life and appearance of your wall-mounted shower caddy. It’s advisable to clean the caddy weekly to prevent soap scum and mildew buildup. For caddies mounted with suction cups, It’s important To check and reapply the suction monthly To ensure A secure hold. For screw-mounted caddies, periodically check the screws and brackets For any signs of rust or loosening, especially in humid environments.
Benefits Of Wall-Mounted Shower Caddies
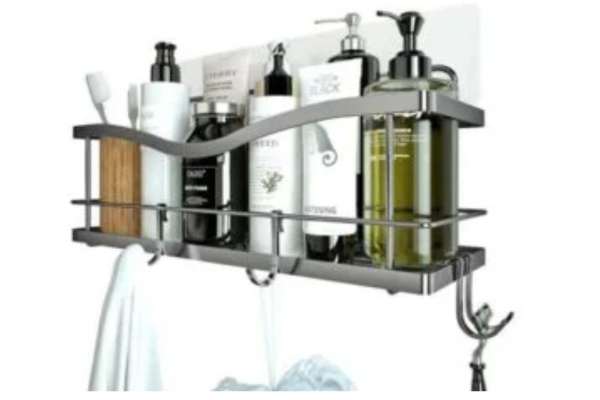
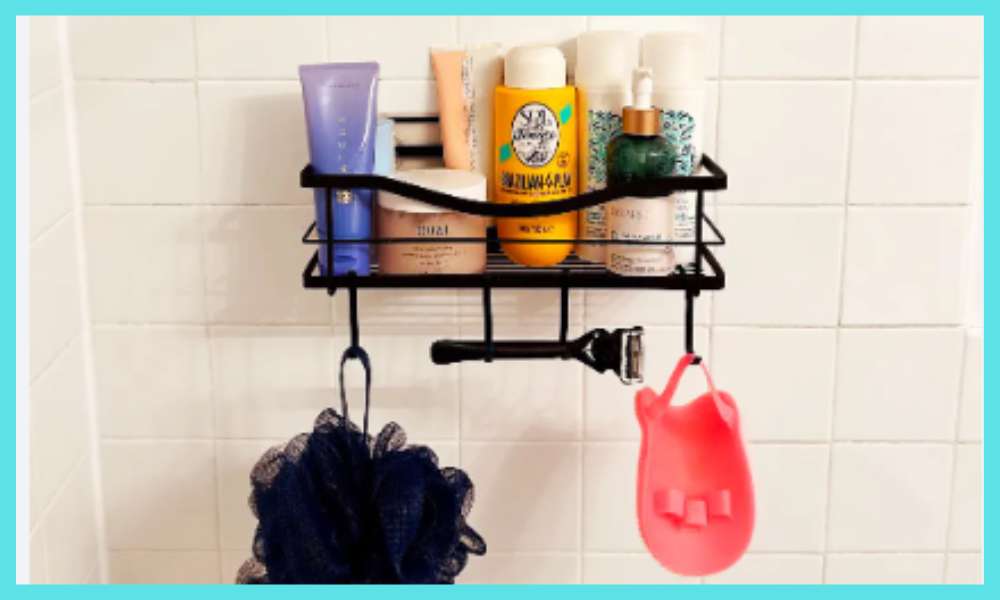
Wall-mounted shower caddies offer numerous benefits. They help save space, especially in smaller showers, by utilizing wall area that would otherwise go unused. This type of caddy also keeps your rain essentials like shampoo, soap, and razors neatly organized and easily accessible, streamlining your rain routine. Additionally, elevating these items off the rain floor reduces clutter and makes cleaning easier. With their variety of designs and sizes, wall-mounted caddies can also contribute to the aesthetic appeal of your bathroom.
Types of Shower Caddies
There are several types of rain caddies available, each suitable for different bathroom layouts and personal preferences. The most common types include:
- Tension Pole Caddies: These extend from the floor to the ceiling, using tension to stay in place. Ideal for corner placement and can hold multiple items on various shelves.
- Hanging Caddies: Designed to hang from the showerhead or a hook on the wall. These are easy to install and remove, making them a convenient option for renters.
- Suction Cup Caddies: These use suction cups to adhere to the wall, requiring no drilling. They are best for lightweight items and smooth surfaces.
- Screw-In Caddies: These require drilling into the wall but provide a more permanent and sturdy solution. They’re ideal for holding heavier items.
- Freestanding Caddies: Stand-alone units that can be placed on the floor of the shower or the bathroom. They don’t require installation but take up more space.
Tools And Materials Needed
To install a wall-mounted shower caddy, you will need:
- Drill
- Screwdriver
- Wall anchors and screws
- Level
- Pencil or marker
- Measuring tape
- Cleaning supplies
Step-By-Step Guide For Hanging A Shower Caddy
1. Choose The Right Location

Selecting the ideal spot for your shower caddy Is crucial. Look for a place within the shower that Is easily reachable but not directly In the path of the water stream. This will prevent your items from getting unnecessarily wet and reduce the risk of The caddy being dislodged. Additionally, make sure that the chosen location doesn’t hinder the rain door or curtain’s movement. Consider the height for convenient access, especially for the shorter or taller users in The household.
2. Marking And Measuring

After identifying the perfect spot, the next step is marking and measuring. If you’re installing A screw-In caddy, use a pencil to mark the drill points on the wall. It’s important to measure The distance between these points accurately To ensure that the caddy will be level and stable. A level can be used To confirm that the marks are even. For suction cup caddies, this step might simply involve determining the exact position where the suction cups will adhere.
3. Preparing The Wall

Clean the area where the caddy will be installed. For suction cup caddies, The surface must be smooth and free of any soap residue. If you’re using a screw-in caddy, drill holes where you’ve marked, then insert wall anchors. These will provide stability and support for the screws.
4. Installing The Mounting Hardware

For screw-in caddies, the next step Is To install the mounting hardware. Place The wall anchors into the drilled holes, ensuring they fit snugly. Then, screw in The mounting brackets or directly attach the caddy, depending on The design. Ensure everything is tightly secured but be careful not To overtighten and strip the screws. For caddies that use suction cups, ensure the wall is dampened slightly before pressing the cups firmly against the wall for A strong seal.
5. Attaching the Shower Caddy

Once the mounting hardware Is In place, it’s time to attach The shower caddy. If your caddy hangs directly from the mounting brackets, carefully align it with the brackets and lower It into place. Ensure it’s firmly attached and stable. For tension pole caddies, extend the pole until It’s wedged securely between the floor and ceiling. Check for sturdiness And make adjustments as needed.
DIY Ideas for Customization

Customizing your shower caddy can make It more functional and aesthetically pleasing. Consider adding additional hooks or small baskets To hang razors, loofahs, or washcloths. You can also use waterproof adhesive hooks on The caddy to hold more items. If you’re feeling creative, you can paint a metal caddy with waterproof paint to match your bathroom’s color scheme.
Can I Use Adhesive Strips Instead of Screws?
Yes, you Can use adhesive strips for mounting shower caddies, especially if You want to avoid drilling holes in the wall. Make sure To choose waterproof, heavy-duty adhesive strips designed for bathroom use and capable of supporting the weight of the caddy and its contents. However, Adhesive strips might not be suitable for heavier caddies or those that will hold large, heavy bottles.
Conclusion
Installing A shower caddy is a straightforward process that can significantly enhance the functionality And organization of your bathroom space. Whether you opt for a screw-in, suction cup, or tension pole model, or even decide To use adhesive strips, there’s a solution that fits every rain setup and personal preference. With some basic tools, a bit of planning, and the possibility for customization, you can easily create a more organized and efficient shower area. Read More: How To Remove Shower Caddy Adhesive

