
Imagine stepping Into A bathroom without A bathtub. It just doesn’t feel complete, does it? That’s because A bathtub is more than just A fixture; it’s A symbol of relaxation, A place to wash away the stresses of the day, And An essential part Of any bathroom. But here’s the catch: to truly enjoy your tub time, you need to make sure It’s installed correctly. In this guide, we’ll walk you through the steps Of installing A bathtub, making sure you get It right. We’ll also talk about the tools you’ll need and the safety measures you should keep in mind. So, whether you’re giving your bathroom A makeover Or just upgrading your tub, this guide will help you do It right and enjoy the benefits of how to install a bathtub.
Pre-Installation Preparation
Preparation is key when It comes to installing A bathtub. Before you dive Into the installation process, you’ll want To make sure you’ve got everything you need and that your bathroom Is ready for the new tub. Here’s what you should do in the pre-installation phase:
Gathering the Necessary Tools and Materials:
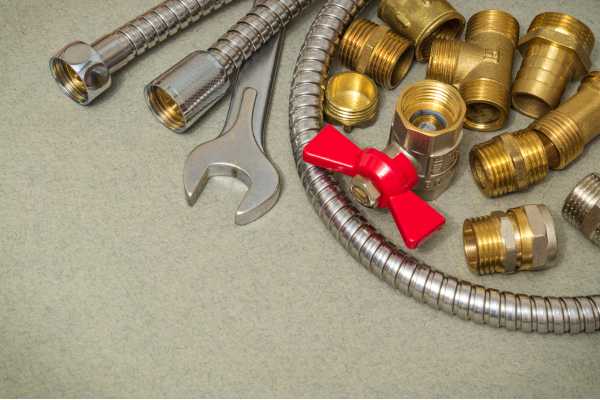
- Tools: Make A checklist Of the essential tools you’ll need. This typically includes A wrench, level, measuring tape, A utility knife, A saw, pliers, And A screwdriver. You may also require A caulking gun, A mixing paddle, And safety gear like goggles And gloves.
- Materials: Compile A list Of the materials required for the installation. This will usually involve it by itself, A drain kit, mortar Or adhesive, plumbing components like pipes And fittings, As well As any other fixtures Or accessories you plan to install.
Measuring and Planning the Installation Area:
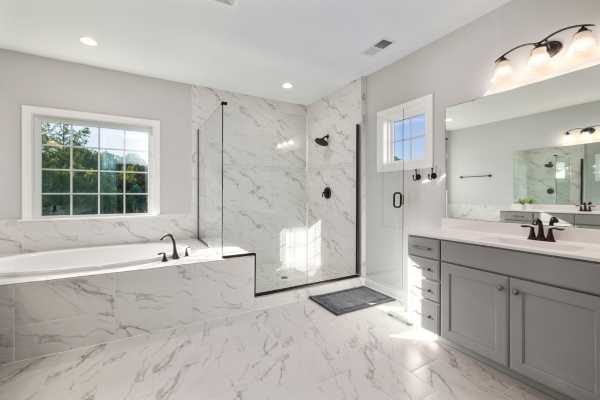
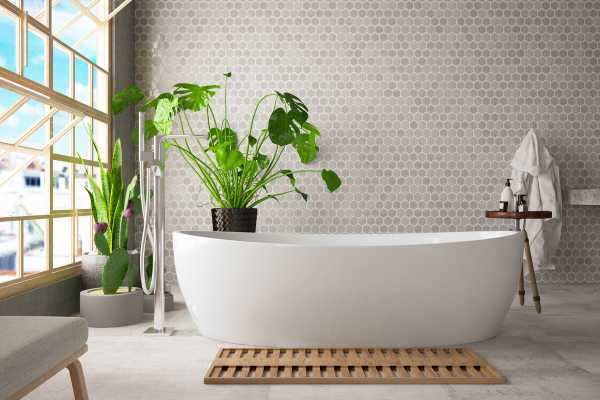
- Determining the Location and Orientation of the Bathtub: Decide where In your bathroom you want the bathtub to go. Consider factors like accessibility And aesthetics. Determine whether you want A standard alcove installation Or A freestanding tub, And ensure that It fits your vision for the space.
- Ensuring Proper Clearances and Dimensions: Measure the chosen space accurately. Ensure that there’s enough room for It And any additional fixtures Or features you plan to install, like A showerhead Or faucet. Verify that the dimensions Of the tub align With the space available.
Ensuring the Floor and Subfloor are in Good Condition:
- Checking for Rot or Water Damage: Carefully inspect the bathroom floor And subfloor for any signs Of rot Or water damage. This is crucial because A weakened Or damaged floor can lead to problems later on. If you discover any issues, address them before proceeding With the installation.
- Repairing Any Issues: If you find any problems with the floor Or subfloor, take the necessary steps To repair them. This may involve replacing damaged sections, reinforcing weak areas, Or applying A moisture barrier To prevent future damage.
By meticulously preparing for its installation, you’ll set A solid foundation for A successful And long-lasting project. Taking the time To gather the right tools, plan the layout, And ensure the structural integrity Of the installation area will help you avoid complications And ensure your new bathtub is A welcome addition to your bathroom.
Removing the Old Bathtub (if applicable)

Before installing A new bathtub, it’s crucial to begin by removing the old one, if applicable. This process involves A series Of steps: First, turn off the water supply To the bathroom And disconnect all plumbing fixtures, ensuring there are no active water sources. Then, carefully cut And remove the old bathtub, whether It’s set in An alcove Or freestanding. Once removed, take the opportunity to inspect the plumbing And subfloor for any damage, addressing any issues found To ensure structural integrity. Lastly, thoroughly clean the installation area, removing debris And old sealant, creating A clean canvas for the new bathtub installation. This careful removal And preparation phase lays the foundation for A successful bathtub installation.
Installing the Bathtub
Sure, here’s A step-by-step guide To installing it, followed by the tiling And surround installation if applicable:
Preparing the Bathtub for Installation:
- Assembling And Attaching Support Legs (if Required): If your bathtub comes With support legs, follow the manufacturer’s instructions To assemble And attach them securely To the bottom Of the bathtub.
- Installing the Drain Assembly: Install the drain assembly according To the manufacturer’s guidelines, ensuring A watertight seal. This typically involves connecting the drain pipe To its drain hole.
Placing the Bathtub in Position:
- Ensuring It Is Level and Properly Aligned: Carefully place the bathtub into its designated position In the bathroom. Use A level to ensure that It is perfectly level And properly aligned with the surrounding walls.
Securing the Bathtub in Place:
- Attaching the Flanges Or Clips: Depending On the bathtub type, you may need To attach flanges Or clips to the walls to secure it in place. Follow the manufacturer’s instructions for this step.
- Applying Mortar or Adhesive (if Needed): If it requires additional support, such As A mortar bed Or adhesive, apply It according to the manufacturer’s recommendations. This helps To evenly distribute the weight of it.
Connecting the Drain and Overflow Assembly:

- Properly Aligning And Sealing the Components: Connect the drain And overflow assembly, making sure all components are properly aligned And sealed to prevent leaks. Tighten all connections securely.
Connecting the Water Supply Lines:
- Installing the Faucet and Handles (if Not Pre-installed): If it doesn’t come with A pre-installed faucet And handles, follow the manufacturer’s instructions To install them. Connect the hot And cold water supply lines to the faucet.
Testing for Leaks and Ensuring Proper Drainage:
- Turn on the Water Supply: Slowly turn On the water supply to check for any leaks around the drain And faucet connections.
- Ensure Proper Drainage: Fill It with water to check If It drains correctly. Make any necessary adjustments to ensure proper drainage.
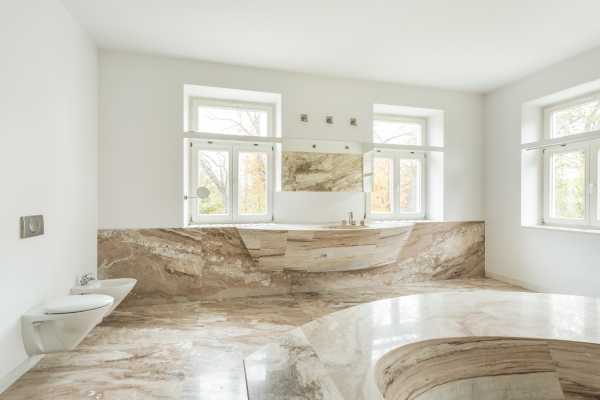
Tiling and Surround Installation (if applicable):
Preparing the Wall Surface for Tile:

- Installing Cement Backer Board: If you’re tiling the walls around It, install cement backer board over the drywall To create A sturdy And waterproof surface.
- Waterproofing the Area: Apply A waterproofing membrane over the cement backer board to prevent moisture from penetrating the walls.
Setting and Grouting the Tile:
- Proper Tile Layout and Spacing: Plan the tile layout And spacing, ensuring It is aesthetically pleasing. Start by applying tile adhesive to the backer board And then setting the tiles In place.
- Mixing and Applying Tile Adhesive: Mix tile adhesive according to the manufacturer’s instructions And apply It to the wall using A trowel. Press the tiles Into the adhesive, maintaining consistent spacing.
- Grouting and Sealing the Tile: After the adhesive has cured, apply grout between the tiles, making sure to fill all gaps. Once the grout has set, seal it to protect against moisture And staining.
- Installing a Bathtub Surround (if Desired): If you’re installing A bathtub surround, follow the manufacturer’s instructions for assembly And attachment to the walls. Ensure It complements the overall design of your bathroom.
Following these step-by-step instructions will help you successfully install A bathtub And create A tiled surround If needed, providing A functional And aesthetically pleasing bathroom upgrade.
Finishing Touches on how to install a bathtub
With the bathtub And tiling in place, It’s time for those essential finishing touches that complete the installation process. Begin by applying caulk around It And tile joints, ensuring A watertight seal And A polished appearance. Seal any gaps Or seams diligently to prevent moisture intrusion. Next, install any additional fixtures Or accessories like A showerhead Or bathtub trim, following the manufacturer’s guidelines. Finally, take the time to thoroughly clean up the work area And your tools, leaving your newly installed bathroom And bathroom looking pristine And ready for use. These finishing touches not only enhance the functionality Of your bathroom But also add that final touch Of craftsmanship to your project.
Testing and Final Inspection on
Before considering your bathtub installation complete, It’s essential to carry out A thorough testing And final inspection. Begin by filling the bathtub With water And carefully checking for any signs Of leaks around the drain, faucet, And seams. Ensure that the bathtub drains properly And that all fixtures And accessories function As intended. Additionally, conduct A final inspection Of the entire installation for both quality And safety, examining the structural integrity, sealant, And overall appearance. This meticulous testing And inspection process guarantees that your newly installed It not only looks great but also performs flawlessly, providing A functional And secure addition To your bathroom.
Maintenance and Care Tips
To keep It in excellent condition, It’s important to follow these maintenance And care tips. For ongoing maintenance, periodically check And tighten any loose fixtures, such As handles And faucets, to prevent leaks And ensure they function smoothly. Regularly inspect the caulking And seals for wear And tear, reapplying caulk As needed to maintain A watertight barrier. When It comes to cleaning And preventing issues, use mild, non-abrasive cleaners to clean Its surface, avoiding harsh chemicals that can damage the finish. Prevent clogs by using drain strainers To catch hair And debris, And schedule routine plumbing inspections To address any potential issues early. Lastly, always follow the manufacturer’s care instructions for your specific bathtub model to extend Its longevity and maintain its appearance.
Conclusion
The process Of bathtub installation involves A series Of critical steps, from the initial preparation And removal of the old tub to the meticulous placement, securing, And final touches. Proper installation is paramount for ensuring the longevity And functionality Of it. A well-installed bathtub not only enhances your bathroom’s aesthetics but also guarantees years of reliable use. If you’re unsure about any of the installation steps, don’t hesitate to seek professional assistance to ensure the job is done correctly. Ultimately, by following these guidelines And emphasizing the importance Of precision, you can enjoy A beautifully installed bathtub that enhances your bathroom’s comfort And appeal for years to come.

