
Installing A bathroom sink may seem like A daunting task, But with the right tools And step-by-step instructions, It can be A straightforward project that you can tackle on your own. Whether you’re remodeling your bathroom or simply replacing an old sink, Learning how to install A bathroom sink is essential knowledge for any DIY enthusiast. In this article, We will guide you through the process of installing A bathroom basin, Providing you with all the information And tips you need to complete this project. So grab your tools And let’s get started on transforming your bathroom by installing A beautiful new basin!
Align The Sink Template Or Tracing The Sink Outline

A significant part of install a bathroom sink is getting the measurements and positioning right. The first step involves aligning the sink template or tracing the sink outline on your countertop or vanity top. This requires precision, as you need to ensure that the hole you cut aligns with the basin dimensions. For sinks without templates, it’s crucial to carefully trace the outline on the countertop surface. Remember to make allowances for mounting hardware as well. Not doing this step right could lead to irregularities that may affect the functionality and aesthetics of your basin.
Ensure Proper Positioning And Alignment With Other Fixtures

A significant part of install a bathroom sink is getting the measurements and positioning right. The first step involves aligning the sink template or tracing the sink outline on your countertop or vanity top. This requires precision, as you need to ensure that the hole you cut aligns with the sink dimensions. For sinks without templates, it’s crucial to carefully trace the outline on the countertop surface. Remember to make allowances for mounting hardware as well. Not doing this step right could lead to irregularities that may affect the functionality and aesthetics of your basin
Cut The Countertop Or Vanity (if necessary)
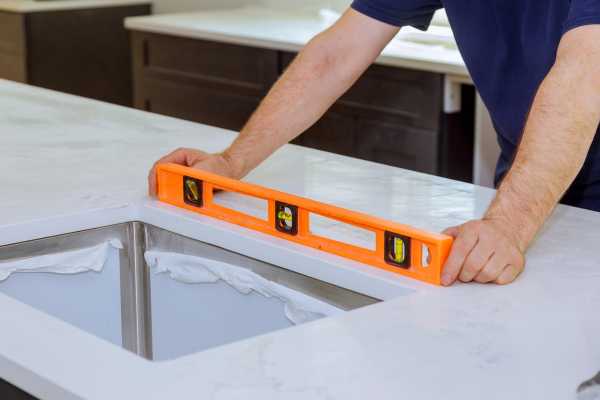
A successful bathroom sink installation often requires initial preparation. A crucial step is cutting the countertop or vanity, particularly if you’re opting for an under-mount or drop-in sink. Start by creating a template that outlines your sink’s shape. Most sink manufacturers provide one, but if not, you can make one yourself. Place the template on the vanity and trace it. Then, drill a hole in each corner of the drawn shape and insert a jigsaw to cut along the lines. Remember to always maintain safety precautions, wearing goggles and gloves. Your goal here is to ensure the basin fits snugly, so precision is key.
Attach The Sink To The Countertop Or Vanity

After preparing your countertop or vanity, it’s time to attach the sink. Align your sink with the hole you’ve just created. Make sure it sits level with the countertop or vanity top. To fasten the basin, apply a bead of silicone adhesive around the underside of the basin rim. This will help create a seal and prevent water leakage. Once the adhesive is applied, press the basin into place on the countertop or vanity. Wipe away any excess silicone with a damp cloth. This step is fundamental as it ensures the basin is correctly positioned and secure.
Secure The Sink With Mounting Clips Or Brackets

The final stage in installing a bathroom sink involves securing it with mounting clips or brackets. This is a critical process to guarantee your sink’s stability. If you’re installing an under-mount basin, mounting clips should be attached to the underside of the countertop. For a drop-in basin, brackets are usually secured to the basin rim. Tighten these fixtures but avoid over-tightening as it may crack the basin or countertop. Once these brackets are secure, connect the faucet and drain following the manufacturer’s instructions, then attach the water supply lines. Be sure to test everything for leaks before finalizing your installation. With the correct steps and patience, you can confidently install a bathroom basin that adds functionality and aesthetic value to your bathroom.
Install The Faucet And Handles Instructions
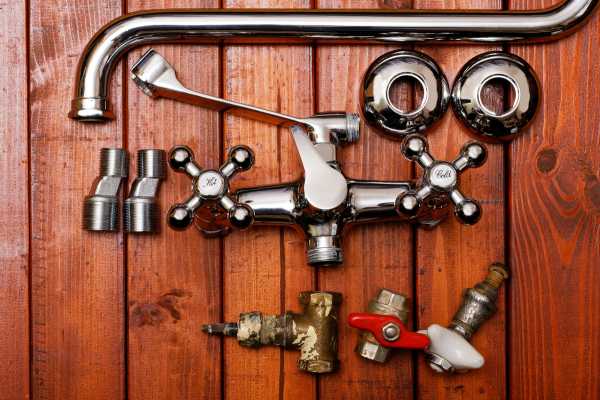
Now that the sink is securely in place, It’s time to focus on the faucet And handles. Your basin isn’t complete without these vital components that control the water flow. Begin by placing the gasket onto the faucet base and insert the faucet into the designated holes on the basin. Ensure it’s positioned correctly. From underneath, screw on the mounting nuts and washers to the faucet shanks, securing the faucet to the basin. Install the handles next, aligning them with the faucet’s stems and tightening accordingly. Remember, The process may vary slightly based on your faucet model, So always refer to the manufacturer’s instructions. Make sure you tighten everything securely but avoid overtightening, which could damage your new fixtures.
Connect The Water Supply Lines

The water supply lines are crucial components that channel water to your faucet. To connect them, start by identifying the hot and cold water valves typically located under the basin. Connect one end of your water supply line to the faucet using A wrench, And the other end to the shut-off valves. Remember, the left valve usually controls hot water, And the right controls cold water. Ensure all connections are tight but be cautious not to overtighten as it might damage the threads. Once connected, slowly turn on the water supply and check for leaks.
Attach The Drain Assembly And Trap
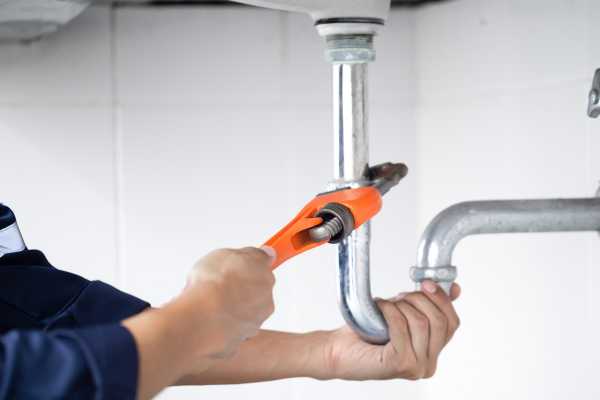
The final stage of your sink installation involves attaching the drain assembly and trap. This system is responsible for carrying away used water and preventing unpleasant sewer gas from entering your bathroom. Start by applying a layer of plumber’s putty around the drain flange and press it into the sink’s drain hole. Underneath, screw the washer and nut onto the drain body and tighten. Connect the p-trap to the drain pipe and fasten the slip nut. Always remember to check your work for any potential leaks. Turn on the faucet and let the water run to verify that your drain is working properly. With these steps, you’ve now completed your bathroom basin installation a true DIY achievement!
Turn On The Water Supply And Checking For Leaks

After you’ve diligently worked on the faucet, Water supply lines, And drainage assembly, It’s time to restore the water supply to your newly installed basin. Turning on the water supply involves opening the shut-off valves beneath the basin. Do this slowly And observe the connections you made. If you see any water leaking, Immediately shut off the water and tighten the relevant connections. Remember, overtightening can cause damage, So use your best judgment. Conducting this check is essential as it can help you spot any issues before they become a problem, ensuring your basin works perfectly without any hidden water damage.
Test The Sink’s Drainage And Water Flow
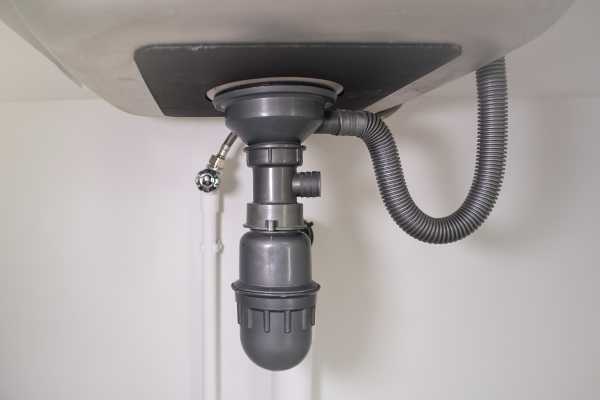
After confirming no leaks in your connections, test your sink’s drainage And water flow. Turn on the faucet, Let the water flow into the sink, And watch how It drains. It should drain smoothly without any overflow. Similarly, the water flow from your faucet should be steady and without splashes. If you notice the water draining slowly, there might be an issue with your p-trap installation. Also, check for leaks underneath the basin while the water is running. This final testing phase is critical to ensure your basin is fully operational and to correct any potential issues.
The Final Thought
Install A bathroom sink may seem intimidating, but with the right tools and A detailed guide, you can confidently complete this DIY project. This process not only saves you the expense of hiring A professional plumber but also provides an unmatched sense of accomplishment. Remember, Precision and patience are the keys to A successful installation. Don’t rush the process, and always refer to manufacturer instructions to ensure proper installation. With your new basin installed and working perfectly, you can enjoy the fruits of your labor every time you enter your bathroom. Remember, If you encounter any significant issues, Don’t hesitate to consult with A professional to ensure your bathroom remains A safe and functional space.

