
Installing A bathroom vanity light can instantly transform the look And ambiance of your bathroom. Whether you’re updating your current lighting or starting from scratch, Learning how to install A bathroom vanity light is A straightforward process that can be accomplished with minimal tools And experience. In this article, We will guide you through the step-by-step process of installing A toilet vanity light, Ensuring that your space is well-lit And visually appealing.
Proper lighting in the bathroom is crucial for performing daily tasks such as applying makeup, Shaving, Or simply getting ready for the day ahead. The right choice of vanity lamp not only enhances visibility but also adds an aesthetic touch to your overall bathroom decor.
Importance of Installing Bathroom Vanity Light

Bathroom vanity lighting plays A crucial role in daily routines, From morning preparations to winding down at night. This essential aspect of bathroom decor serves not only A functional purpose by illuminating your bathroom space but also adds A touch of style and elegance. The right lighting setup can dramatically improve visibility and aesthetics, Reducing shadows And glare that could cause inconveniences. Moreover, Well-placed vanity lights often enhance the overall ambiance, making the room more inviting. For those desiring to create a spa-like atmosphere in their bathroom, investing in a quality vanity lamp is a worthwhile venture.
Measure And Prepare

The first step in installing A bathroom vanity light is accurate measurement And preparation. Start by measuring the space where the light fixture will be installed to ensure the new light fits perfectly. Consider the size, Location, And the number of vanity lights needed. Keep the mirror size and placement in mind too as It will influence the overall lighting effect. Also, Prepare the necessary tools and materials, Including A screwdriver, Wire cutter, voltage tester, Wire nuts, And electrical tape. Having A clear plan in place and all the tools at your disposal will help streamline the installation process.
Shut Off The Electricity In The Bathroom
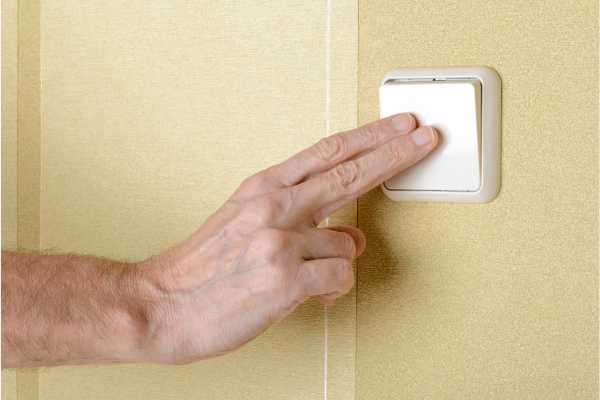
Safety should always come first when dealing with any electrical installation. Therefore, before you begin the process of install your bathroom vanity light, it is paramount to shut off the electricity in the bathroom. You can do this by locating the main electrical panel in your house and turning off the circuit breaker for the bathroom. Use a voltage tester to confirm there’s no power flowing to the wiring where you’ll be working. This step is crucial in preventing electrical shock And ensuring A safe And successful installation.
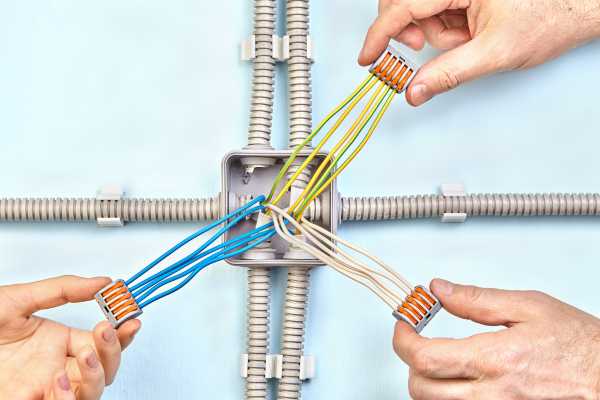
Connect Wires From The New Fixture To The Junction Box

Connecting the wires from your new fixture to the junction box is A vital step in the installation process. You’ll typically have three wires: a black (hot), white (neutral), and green or bare copper (ground). The new fixture should come with similar color-coded wires. Begin by connecting the ground wires together, then move to the black wires, and finally the white ones. Make sure to twist the ends of the same color wires together. The proper connection of these wires ensures the light works correctly and safely.
Secure Wire Connections And Use Wire Nuts Properly

Once you’ve connected the corresponding wires from the light fixture to those in the junction box, It’s time to secure them. Wire nuts are used for this purpose. Place the wire nut over the twisted wire ends and turn It clockwise until It’s tight. Pull gently on the wires to confirm the connection is secure. Wire nuts not only protect the exposed wire ends but also help prevent the wires from coming loose. It’s essential to use the correct size of wire nuts for A secure And safe connection.
Align The Fixture Mounting Plate With The Junction Box
The final stage before attaching the vanity light fixture involves aligning the mounting plate with the junction box. Most fixtures come with A mounting plate which serves as A foundation for the fixture. Position the mounting plate over the junction box, Making sure the screw holes line up. Then, use screws to secure the plate. Ensure It’s firm and level, As It will support the weight of the light fixture. This step sets the stage for A neat and successful fixture installation, ensuring the stability and longevity of your new vanity light.
Install And Secure The Fixture With Screws Or Brackets

After the mounting plate is securely attached to the junction box, It’s time to install the actual bathroom light fixture. Most vanity light fixtures come with screws or brackets to attach them to the mounting plate. Hold the fixture in place And attach It using the provided screws or brackets, Ensuring it’s firm and aligned properly. If your vanity lamp fixture is heavy, You may need an extra pair of hands to hold It in place while you secure it. This step is vital as it ensures the fixture is robustly mounted, eliminating any risks associated with a poorly installed fixture.
Install Light Bulbs And Shades
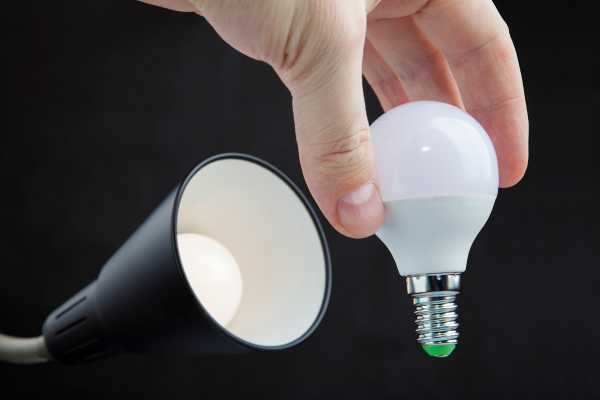
Once the vanity light fixture is firmly in place, it’s time to install the light bulbs and shades. Ensure you use the correct wattage of bulbs as specified by the manufacturer. Too much wattage could risk overheating and potential damage. After installing the light bulbs, affix the shades or globes. These not only soften and diffuse the light but also add to the overall aesthetics of the fixture. Make sure the bulbs and shades are securely installed before restoring the power. This step completes the installation process, leaving you with a beautifully lit toilet vanity. The right light bulbs And shades can create A welcoming ambiance and greatly enhance your bathroom’s overall aesthetic appeal.
Reconnect The Power And Turn On The Light

With the new vanity light fixture properly installed And the bulbs And shades securely in place, It’s time to reconnect the power. Head back to your home’s main electrical panel And turn on the circuit breaker for the bathroom. Then, switch on your new vanity lamp. The first time you flip the switch, It’s not only about seeing if the light works but also about admiring your handiwork. Be sure to watch for any flickering or unusual sounds. If all is well, Your bathroom should be basking in the soft glow of your newly installed vanity light.
The Final Thought
The process of install a bathroom vanity light might seem daunting, especially if you’re not familiar with electrical work. However, With the right tools, Safety measures, And A step-by-step approach, It’s A task you can confidently tackle. Remember to always prioritize safety when handling electrical installations. The reward is a well-lit vanity that not only enhances the functionality of your bathroom but also elevates its aesthetic appeal. It’s indeed a satisfying project that leaves a lasting impact on your home’s comfort and value.

