Install A shower caddy with suction cups Is A simple and effective way To organize your bathroom essentials without The need for drilling or permanent fixtures. This guide will walk you through the easy steps To securely attach a vacuum cup shower holder To your bathroom wall. With A focus on proper surface preparation and correct suction cup application, You’ll learn how To ensure A strong And lasting hold for your caddy. Ideal For renters or anyone looking to add convenient storage space In their shower, This method Is straightforward and can be done In just a few minutes. Whether you’re looking to declutter your shower area or simply need a handy spot for your toiletries, this guide on how to install A shower holder with suction cups will provide you with All The necessary information to get the job done right.
How To Secure A Shower Caddy?
Securing a What To Put In A Shower Caddy with It involves several crucial steps. First, You need To choose the right location In your shower. It should be a smooth, non-porous surface like tile or glass. Avoid grout lines or textured surfaces, as they can prevent the suction cups from adhering properly. Once you have chosen The location, thoroughly clean The area with rubbing alcohol and a cloth to remove any soap scum or residue. This step ensures A clean surface For The vacuum cups to adhere To.
After cleaning, dampen the vacuum cups slightly. This helps to create a better seal. Press the suction cups firmly against the wall, making sure To eliminate any air pockets. Some shower caddies also come with a locking mechanism on It; If yours has this feature, engage It To further secure The caddy.
List Of Tools Needed For Installation

To install a suction cup shower holder efficiently and accurately, you will need the following tools:
- Suction Cup Shower Caddy Kit: This is the main component. Make sure all parts are included before starting the installation.
- Cleaning Supplies (Rubbing Alcohol, Cloth): Rubbing alcohol is ideal for cleaning The wall surface, as it effectively removes grease And soap residue without leaving any harmful residues. A clean, lint-free cloth Is necessary for applying The alcohol And drying the area.
- Level: A level is crucial for ensuring that your shower holder Is installed straight. An uneven caddy Can lead to items slipping off or uneven weight distribution, which might weaken the suction hold over time.
- Tape Measure: Use A tape measure To find The ideal height for your holder and to ensure it is centered In your chosen location. This Is especially important If you’re installing multiple caddies or other accessories In the shower.
Preparing Suction Cups

Before attaching the suction cups to the caddy, It’s essential to ensure they are In optimal condition for The best grip. Start by inspecting It for any signs of damage or deformities. If they appear warped or cracked, they may not adhere properly to the wall. Clean the vacuum cups thoroughly with warm soapy water And rinse them off. This step removes any dirt or grease that could prevent a secure seal. After cleaning, dry them with A lint-free cloth. For An even better grip, You Can lightly moisten the cups right before installation. This helps create A stronger seal against The wall.
Installing The Shower Caddy
1. Attach Suction Cups To The Caddy

Most suction cup shower caddies have designated spots or hooks where The vacuum cups are meant To be attached. Secure It To these spots firmly, ensuring they are evenly placed And well-aligned.
2. Place The Caddy Against The Wall

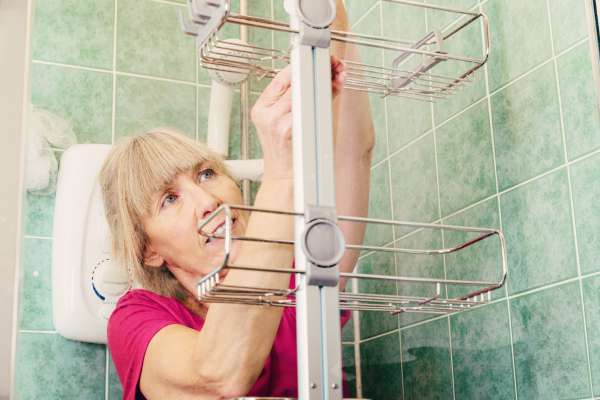
Once the aspiration cups are attached, hold The caddy against your pre-cleaned And chosen spot on The wall. Make sure it’s at a convenient height and location. Press each vacuum cup against The wall firmly, starting from The center of The cup And working your way outwards To remove any air pockets. This action ensures that the entire cup Is In contact with the wall, creating A strong vacuum seal.
3. Check for Level and Adjust as Necessary

After attaching The caddy To The wall, use a level to check that It’s perfectly horizontal. This is crucial, especially if your holder has shelves or soap dishes, To prevent items from sliding off. If the holder isn’t level, gently peel off the suction cups and reposition them. It’s often easier To adjust one vacuum cup at A time while keeping The other attached To maintain the caddy’s position.
4. Press The Suction Cups Firmly To Secure The Caddy

Once the caddy Is correctly positioned and leveled, the next crucial step is to secure It In place. Press down firmly on each suction cup, ensuring that The entire surface of each cup Is In full contact with the wall. Start from the center of the cup and press outwards to eliminate any trapped air, which Is key to creating A strong vacuum. For caddies with locking mechanisms on The vacuum cups, now Is The time To engage these locks, which will further secure the holder to the wall.
5. Test The Caddy’s Stability And Make Adjustments If Needed

After securing the holder, gently test its stability by applying a small amount of pressure. If the caddy shifts or feels loose, recheck It. It might be necessary To reposition them or reapply them To The wall. Make sure the surface Is still clean and moisten The aspiration cups again If they seem to have lost their initial stickiness.
Tips for Resolving Problems During Installation
- Surface Compatibility: Ensure that the wall surface is compatible with suction cups – ideally smooth, flat, and non-porous. Textured tiles, porous surfaces, or surfaces with grout lines are not ideal.
- Cleaning the Surface: Thoroughly clean the surface with rubbing alcohol before installation. Any residue, soap scum, or moisture can prevent it from adhering properly.
- Checking aspiration Cups: Examine it for any signs of damage or wear. Replace them if they are not In perfect condition.
- Proper Moistening: Lightly moistening the vacuum cups can improve their grip. However, too much water Can have the opposite effect, So use just enough to dampen the cup.
Conclusion
Installing a shower caddy with It Is An efficient way To add storage To your bathroom without the need For drilling or permanent modifications. By following these steps and tips, You Can ensure A secure And stable installation. Regular checks And occasional re-adjustments may be needed, but with proper care, your suction cup shower caddy should remain A reliable And convenient fixture In your bathroom.


