
Installing a shower stall can be a rewarding DIY project that enhances the functionality and appearance of your bathroom. This guide on how to install shower stalls will walk you through the process step by step, ensuring that you achieve a professional-looking installation. Whether you’re replacing an old shower or starting from scratch, this tutorial will help you understand the key components and best practices to make your installation smooth and efficient. By following these instructions, you can create a comfortable and stylish shower space in your home. Let’s get started with the basics of how to install showers stalls!
How Long Does It Take To Install A Shower Stall?
The time required to install a falls stall can vary depending on your experience and the complexity of the project. On average, the process can take anywhere from a few hours to a full day. If you are familiar with basic plumbing and construction techniques, you may be able to complete the installation in around four to six hours. However, if you are new to this type of DIY project, it’s best to allocate more time to ensure the installation is done properly. Allowing ample time for preparation, measuring, and securing the components will help you achieve a successful and professional-looking result.
Benefits Of Installing A Shower Stall
Installing a Shower Stalls Made Of offers several advantages for your bathroom. First, it can enhance the overall appearance and functionality of your space, providing a sleek and modern look. showerhead stalls are also easier to clean and maintain compared to traditional tiled showers, as their smooth, non-porous surfaces resist mold and mildew buildup. Additionally, a well-installed falls stall can improve water efficiency by providing a sealed environment that prevents water leakage. Lastly, upgrading your bathroom with a new falls stall can increase the value of your home and provide a more enjoyable and comfortable showers experience for you and your family.
Types Of Shower Stalls
- Level
- Measuring Tape
- Utility Knife
- Drill
- Screwdrivers
- Adjustable Wrench
- Caulking Gun
- Putty Knife
Installing A Prefabricated Shower Stall
Step 1: Removing the Old Shower
If you are replacing an existing showers, start by shutting off the water supply to the showerhead. Next, remove any It, fixtures, and hardware. Carefully remove the existing shower stall by unscrewing panels or cutting away caulk and adhesives. Be cautious while working to avoid damaging the plumbing or surrounding walls. Once the old shower stall is removed, clean up any debris and inspect the area for water damage that may need repair.
Step 2: Preparing the Area
After removing the old shower, prepare the installation area by cleaning it thoroughly. Remove any remaining caulk, adhesives, or old plumbing fixtures. Inspect the walls and floor for any damage, and make necessary repairs to ensure the surface is smooth and level. Measure the installation area to confirm it matches the dimensions of the new prefabricated shower stall. Adjust the plumbing if needed to fit the new stall’s fixtures, and ensure proper drainage. This preparation step is crucial for a successful installation and long-lasting performance of the falle stall.
Step 3: Assembling the Shower Stall
Once you have prepared the area, it’s time to assemble the prefabricated shower stall. Start by carefully unpacking the falls stall components and laying them out to familiarize yourself with each part. Follow the manufacturer’s instructions for assembling the stall. Typically, this involves attaching the wall panels to the showers base, ensuring that all connections are secure and properly aligned. Pay special attention to any built-in shelves, soap dishes, or other features to ensure they fit correctly and securely.
Use a level to make sure that the panels are straight and aligned. This step is crucial for a professional-looking installation. Apply silicone sealant to all seams and joints between the panels to prevent water leakage. Make sure to smooth out the sealant for a clean finish. Once the falls stall is fully assembled, give it some time to dry and set according to the manufacturer’s instructions.
Step 4: Installing the Shower Base
The shower base serves as the foundation of the shower stall, so it’s important to install it correctly. Start by positioning the showerhead base in the prepared area to ensure it fits properly. Check that it is level using a spirit level, adjusting the base as needed with shims to correct any unevenness in the floor.
Once the base is level, apply a layer of construction adhesive to the floor area where the base will sit. Carefully place the showerhead base in position and press down firmly to ensure good adhesion. Double-check that the base is level and properly aligned. Follow the manufacturer’s instructions to secure the base to the floor, typically using screws or other fasteners.
Once the base is installed, allow the adhesive to dry and cure according to the manufacturer’s instructions. This step ensures a stable and durable foundation for the rest of the falls stall.
Step 5: Attaching the Wall Panels
After ensuring the showers base is securely in place and level, the next step is to attach the wall panels of the prefabricated showers stall. Begin by dry-fitting the wall panels to the showerhead base to make sure everything lines up properly. If the panels fit well, remove them and apply a thin bead of silicone sealant or adhesive along the edges of the shower base and the seams of the panels for a watertight seal.
Carefully position the first wall panel against the wall and press it firmly into place. Make sure the panel is level and properly aligned with the base. Secure the panel according to the manufacturer’s instructions, typically using screws or clips. Repeat the process with the remaining panels, ensuring that each panel is properly sealed and secured. Wipe away any excess sealant with a damp cloth for a clean finish.
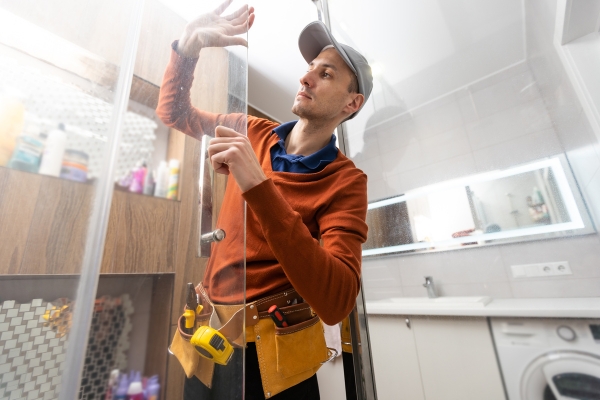
Step 6: Installing the Shower Door

Once the wall panels are installed and the silicone has had time to cure, you can proceed with installing the shower door. Begin by unpacking the shower door components and reading the manufacturer’s instructions for assembly and installation.
Dry-fit the door frame or tracks to the showerhead walls to confirm proper alignment and positioning. Use a level to ensure the frame is straight and plumb. Once you’re confident in the placement, attach the frame or tracks to the walls and base using the provided screws or other fasteners.
Next, install the door panels or glass according to the manufacturer’s instructions. This may involve sliding glass panels into the tracks or attaching hinges for a swinging door. Make sure the doors operate smoothly and that any seals are properly in place.
Finally, thoroughly test the showers door to ensure it opens and closes correctly and forms a watertight seal. Adjust as needed to achieve the desired fit and function. Once everything is properly installed and adjusted, your new prefabricated shower stall is complete and ready for use.
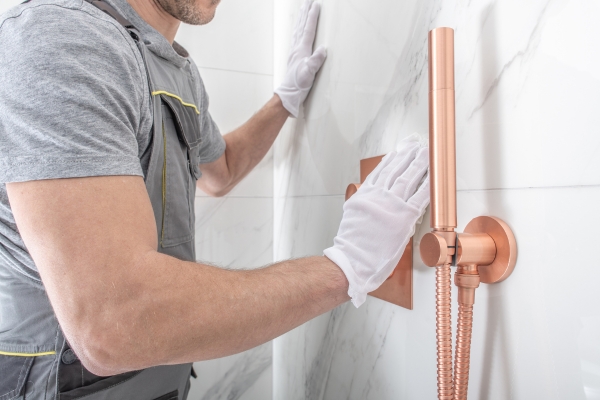
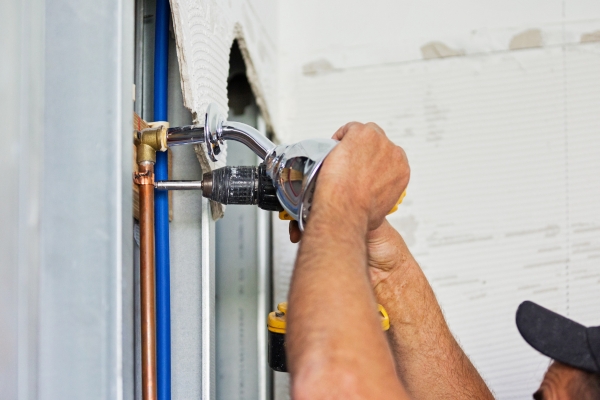
Step 7: Connecting Plumbing and Testing
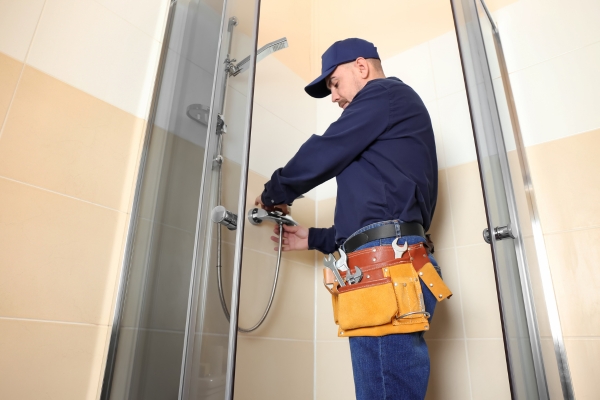
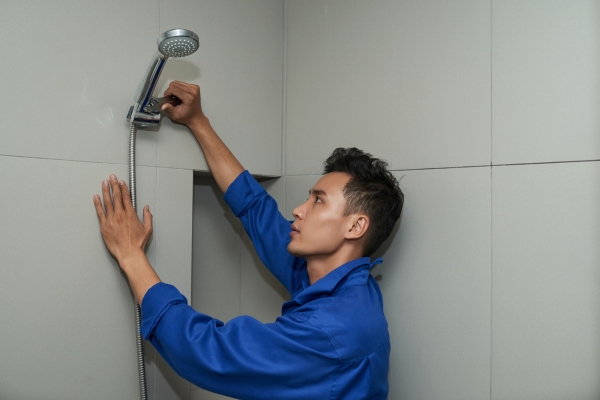
With the showers base and walls securely in place, you can now connect the plumbing fixtures. Begin by attaching the showerhead, faucet, and any other components according to the manufacturer’s instructions. Use plumbing tape to seal the connections and prevent leaks. Make sure to double-check all connections for proper fit and tightness.
Once the plumbing fixtures are installed, turn on the water supply to the shower and test for leaks. Start with a low water pressure to identify any potential issues. Examine the connections and seams carefully, and apply additional sealing if necessary. Once you’re confident there are no leaks, gradually increase the water pressure and continue testing. Test all functions of the shower, including the showerhead, faucet, and drain, to ensure everything is working correctly.
Conclusion
Installing a prefabricated shower stall can be a manageable DIY project that enhances the appearance and functionality of your bathroom. By following the outlined steps, you can achieve a professional-looking installation that will provide years of use and enjoyment. Remember to take your time during each phase of the installation, especially when it comes to securing the shower base and connecting the plumbing. Properly installed, a falls stall can improve your daily routine and increase the value of your home. Always consult the manufacturer’s instructions for any specific requirements and safety guidelines to ensure a successful installation.

