
Removing a vanity unit can seem like a daunting task, but with the right tools and a step-by-step approach, it becomes a manageable DIY project. Whether you’re updating your bathroom’s look or replacing a worn-out unit, understanding how to remove a vanity unit is crucial. This guide will walk you through the process, ensuring you handle each step with confidence and care. From turning off the water supply to safely disconnecting plumbing fixtures and detaching the vanity from the wall, we cover everything you need to know for a smooth and efficient removal. Get ready to transform your bathroom space with ease!
Importance Of Vanity Units
Vanity units are essential components of modern bathrooms, offering both functionality and aesthetic appeal. They provide valuable storage space for toiletries, cleaning supplies, and other essentials, helping to keep the bathroom organized and clutter-free. Additionally, vanity units often feature integrated sinks, making them a central piece in bathroom design. Given their importance, knowing how to remove a It properly is crucial when planning renovations or upgrades. Removing an old or damaged vanity unit allows you to refresh your bathroom’s look, improve functionality, and ensure all fixtures are in optimal working condition.
How Long Does It Take To Remove A Vanity Unit?
The time required to remove a vanity unit can vary depending on several factors, including the complexity of the installation, the type of It, and your level of experience. On average, the process can take anywhere from one to three hours. Simple, freestanding vanities might be quicker to remove, while more complex, built-in units with extensive plumbing connections can take longer. Preparation is key to minimizing the time needed; gathering all necessary tools and materials beforehand, such as wrenches, screwdrivers, and a utility knife, can streamline the process. Understanding each step, from disconnecting the plumbing to safely detaching the unit from the wall, helps ensure a smooth and efficient removal.
Tools And Materials Needed:
- Adjustable Wrench
- Screwdriver
- Utility Knife
- Bucket
- Towels Or Rags
- Pliers
- Putty Knife
- Safety Gloves
- Safety Goggles
- Flashlight
Step To Step Remove
1. Turn Off the Water Supply
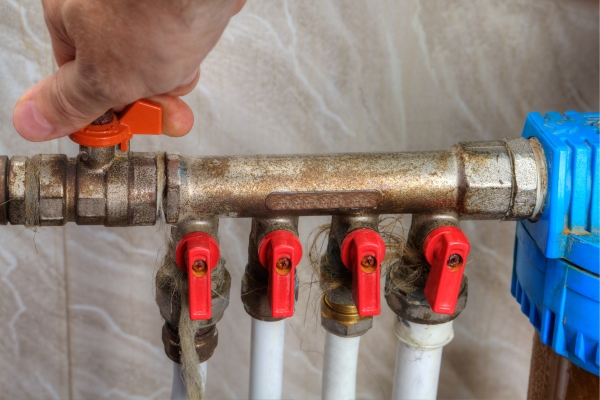
The first step in removing a It is to turn off the water supply. Locate the shut-off valves under the sink and turn them clockwise until they are fully closed. This prevents any water from flowing while you work on disconnecting the plumbing.
2. Drain the Water Lines
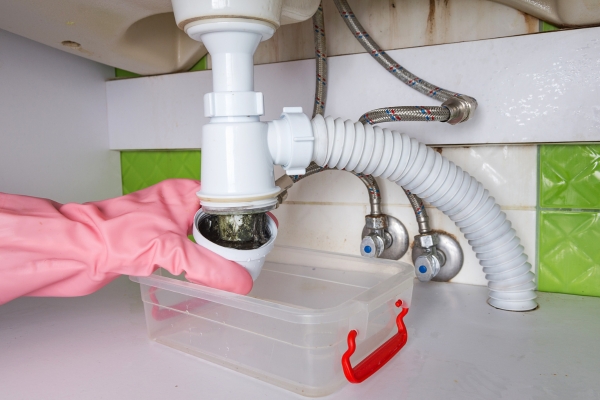
After turning off the water supply, you need to drain the water lines. Open the faucet to release any remaining water in the pipes. Place a bucket under the sink to catch any drips or spills, ensuring your workspace stays dry and manageable.
3. Disconnect the Plumbing
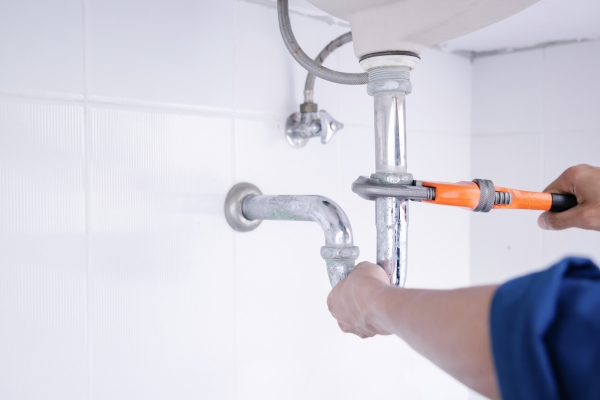
With the water supply turned off and the lines drained, the next step is to disconnect the plumbing. Use a wrench to loosen and remove the nuts connecting the water supply lines to the faucet. Carefully detach the drain pipe from the sink, and if applicable, disconnect the P-trap. Make sure to keep a bucket or towel handy to catch any residual water.
4. Disconnect the Vanity Top
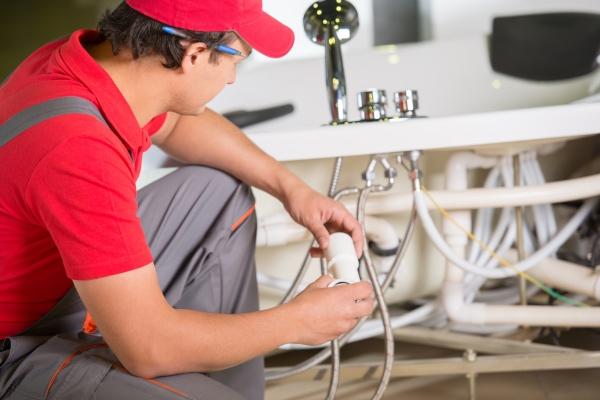
Once the plumbing is disconnected, it’s time to remove the vanity top. If the top is secured with caulk, use a utility knife to carefully cut through it. Then, look for screws or brackets underneath the It top that attach it to the cabinet. Unscrew these fasteners and gently lift the It top off the cabinet. You may need a helper for this step if the top is particularly heavy or cumbersome.
5. Remove the Vanity Cabinet

The final step is to remove the cabinet. Check for any screws or brackets securing the cabinet to the wall. Use a screwdriver or drill to remove these fasteners. If the cabinet is glued to the wall, you might need to use a pry bar to carefully detach it. Once all fasteners are removed, gently pull the cabinet away from the wall, being mindful of any remaining connections or obstructions.
6. Clean Up
After removing the It, it’s important to clean up the area. Remove any leftover debris, screws, or broken pieces. Use a vacuum or broom to clear the floor, and wipe down the walls where the vanity was installed. Cleaning up thoroughly will prepare the space for the installation of a new It or other renovations.
Conclusion
Removing a vanity unit involves several steps that require careful attention and the right tools. By turning off the water supply, draining the lines, disconnecting the plumbing, detaching the It top, and removing the cabinet, you can efficiently remove the unit with minimal hassle. Cleaning up afterward ensures the space is ready for the next phase of your bathroom renovation. Following these steps not only simplifies the removal process but also paves the way for a smooth and successful installation of your new vanity unit, allowing you to enhance both the functionality and aesthetic appeal of your bathroom.

