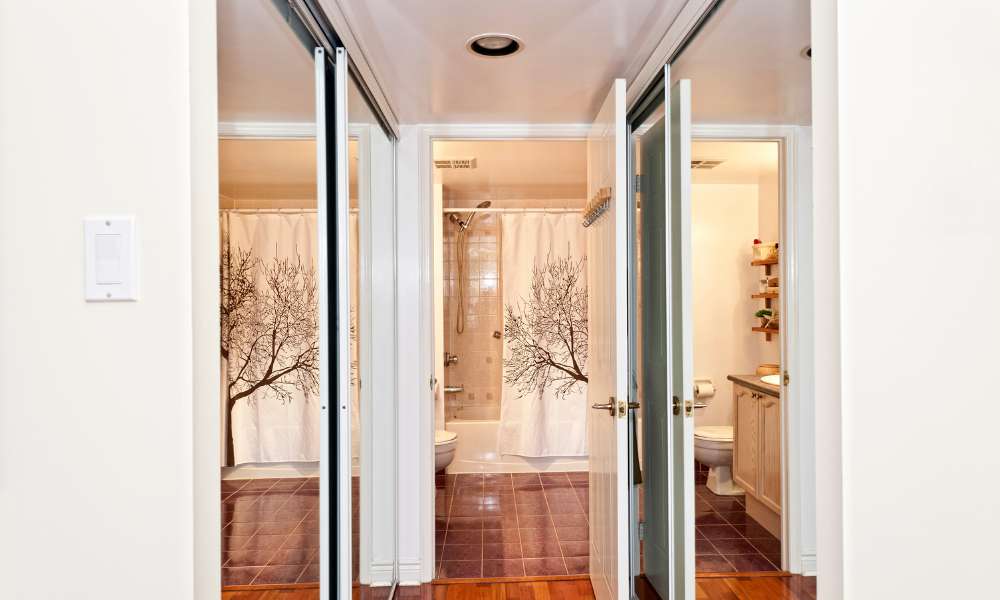
Remove sliding shower doors Can Be a practical And straightforward home improvement task. In this guide, To Remove Shower Doors, We will walk you through The process step-by-step, ensuring A Smooth And hassle-free experience. Whether You’re renovating your bathroom, cleaning hard-To-Reach areas, or replacing old gate with new ones, this article provides clear, easy-To-understand instructions. With A focus on safety And efficiency, We’ll help you remove your sliding shower gate with minimal fuss, making this task achievable For DIY enthusiasts of all skill levels.
What Should I Do With The Old Doors And Tracks?
Once You Have successfully dismantled The Doors and tracks, there are several options For dealing with them. Firstly, If the gate and tracks are still In good condition, consider repurposing or donating them. Home improvement projects, local community centers, or thrift stores often welcome such items. Alternatively, If They’re beyond repair or reuse, Proper disposal is crucial. Metal tracks can typically be recycled, so check with your local recycling center for guidelines. For The Glass Gate, Consult With Waste Management Services To Understand the best practices for disposal, as glass, especially from it, often requires special handling due To its composition And potential For breakage. Remember, handling old doors And tracks with care Is Important to avoid injury And environmental harm.
Tools And Materials Needed
Before we dive into the removal process, let’s gather the tools and materials you’ll need:
- Screwdriver
- Utility knife
- Drill
- Plunger
- Masking tape
- Safety goggles
- Gloves
- Silicone caulk remover
- Plastic putty knife
- Measuring tape
Removing Process
Process 1: Preparing For The Removal

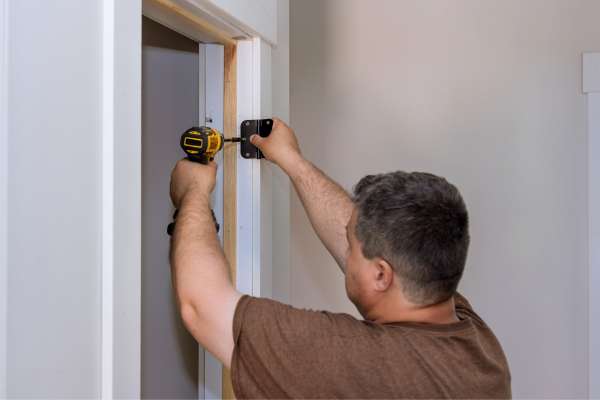
Before beginning The Remove of It, preparation Is Key to ensuring A smooth and safe process. Start by gathering The necessary tools, which typically include A screwdriver, A drill, pliers, and protective gloves. Clear the area around the shower To provide ample workspace and prevent Any accidental damage To bathroom fixtures. It’s also wise To lay down A Drop cloth or old towels To protect the floor And catch any debris. Next, examine The doors and frame To Identify how They are fitted. Look For screws or clips that hold The frame In place. Finally, if possible, enlist The help of A Second person. Removing sliding doors Can be cumbersome and having An Extra pair of hands not only makes The process easier but also safer.
Process 2: Removing The Frame
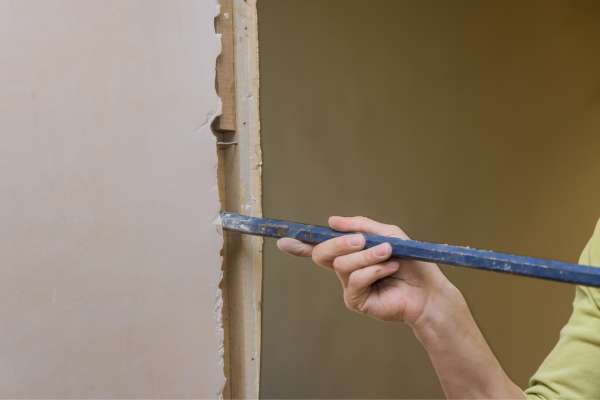
Once you’ve prepared the area, The next step Is To remove The frame of The sliding shower door. Start by detaching The doors from the frame. This Can be done by lifting the gate up and tilting The bottom part out. Be careful, As the gate Can be heavy and fragile. Once the gates are out, focus on The frame. Use a screwdriver or drill To remove any screws anchoring the frame To the wall. The Frame may also be sealed with A Caulk, which Can be cut with A Utility knife. Gently pry The Frame away from the wall, being cautious of any residual adhesive or sealant that may cause the frame To stick. If the frame Is made of metal, be mindful of sharp edges. After removing the frame, clean any residue from the walls to prepare For any new installation or To Leave A clean, tidy appearance.
Process 3: Detaching The Doors

Detaching the doors Is A crucial step In The Remove process of It. Begin by identifying The mechanism that holds The gate in place. Most sliding shower gates are equipped with rollers or gliders at the top, which fit into A Track. Carefully lift each door, Gently angling It To release The Rollers from The track. Some gates may require loosening or removing screws that secure the rollers. Handle The gate with care, As they are often made of glass and Can be heavy and fragile. If The gate seems stuck, Avoid using excessive force; instead, check for any additional fasteners or locking mechanisms. Once detached, Safely place The doors aside In A secure, flat area where they won’t be At risk of falling or breaking.
Process 4: Removing The Tracks

After the doors are removed, The next step Is To remove the tracks. The tracks are usually fixed to The shower’s walls And Threshold with screws. Using A screwdriver or A drill, remove these screws carefully. Some tracks might also Be Sealed To The Walls And Floor With Caulk Or Adhesive. In Such Cases, Use A Utility Knife Or A putty knife To cut through the sealant. Gently pry The tracks away from the surface, being careful not To damage the surrounding tiles or shower enclosure. If the tracks are stubborn, apply A small amount of mineral spirits or adhesive remover to help loosen them. Once The tracks are removed, clean off any remaining adhesive or caulk residue from the surfaces, leaving A smooth And clean area. Dispose of or recycle The tracks appropriately, depending on their material.
Process 5: Cleaning And Final Touches
After successfully Remove The sliding shower doors and tracks, It’s important to attend To cleaning And applying The final touches To The Area. Start by thoroughly cleaning The space where The tracks and frame were attached. This may involve scrubbing off residual adhesive, caulk, or Any mold And mildew that might have accumulated over time. Use A suitable bathroom cleaner and A putty knife or scraper For any stubborn residues. If there are holes or marks left In The tiles or walls, consider filling them with appropriate filler or caulk. For A seamless look, match The color of the filler To your wall or tile. Once The filler dries, clean The entire shower area, ensuring It Is free of debris And dust. Finally, If you’re not planning To install A new door immediately, install A tension rod And shower curtain To maintain functionality And privacy In your shower space.
How Long Does The Removal Process Take?
The duration of the sliding shower door removal process can vary depending on several factors, including The complexity of the door mechanism, the tools available, And your DIY skill level. On average, the entire process Can take between 1 to 3 hours. Preparing The workspace And gathering tools might take about 15-30 minutes. Detaching The doors And removing the frame and tracks Can take around 30 minutes To An hour each, depending on the intricacy of The setup and whether The tracks are heavily sealed. The cleaning and finishing touches might Add another 30 minutes to an hour. It’s advisable To not rush the process, especially when handling glass doors and sharp metal tracks, To ensure safety and A Clean, thorough job.
Conclusion
The process of removing sliding Get Soap Scum Off Shower Glass doors Can be a rewarding DIY project, enhancing The Functionality And aesthetics of your bathroom. It requires A Methodical approach, Starting with careful preparation And gathering of The right tools, followed by The systematic removal of The doors, frame, And tracks. Safety And attention to detail are paramount, especially when handling glass And sharp metal components. The final cleaning And touching up of The area not only ensure A neat finish but also prepare The space for any future installations or modifications. While The time taken For this task can vary, typically ranging from 1 to 3 hours, The satisfaction of completing this home improvement project Is well worth the effort. With patience And Careful execution, removing The sliding shower gate can be a smooth and successful endeavor, leading To A refreshed And Revitalized bathroom space.

