Spray paint wood chairs is an easy and cost-effective way to give your furniture a brand-new look. Whether you’re updating a set of vintage chairs or adding a pop of color to your dining room, spray paint offers a quick, even application that transforms any piece with minimal effort. By prepping the wood surface, choosing the right primer and paint, and applying light, even coats, you can achieve a professional-quality finish. Plus, spray painting allows for endless creative possibilities, from vibrant hues to metallic finishes or even stenciled designs.
To get started, it’s crucial to prepare your workspace and materials. Begin by sanding the chairs to remove any old paint, varnish, or imperfections, ensuring a smooth surface for the paint to adhere. Next, apply a primer to create a solid base and enhance durability. Once the primer dries, use sweeping motions to apply thin coats of spray paint, letting each layer dry completely before adding the next. Finish with a clear sealer for added protection, and allow the chairs to cure fully before use. With these Spray paint, your wood chairs will look stylish, fresh, and ready to impress.
Why Spray Paint Wood Chairs?
Spray painting is a game-changer for DIY enthusiasts looking to refresh their furniture effortlessly. One of its standout advantages is the smooth, streak-free finish it delivers—something that’s difficult to achieve with brushes. The even coverage makes spray paint perfect for intricate designs and hard-to-reach areas on wood chairs. Additionally, spray painting is a quick and efficient method, allowing you to transform your furniture in less time compared to traditional painting techniques.
Another perk is the variety of finishes available, including matte, glossy, satin, or textured options, making it easy to match your desired aesthetic. Spray painting is also budget-friendly, offering an affordable way to give your furniture a completely new look without spending a fortune. Whether you’re updating old chairs or customizing new ones, spray painting is a practical and stylish solution that delivers professional results on a DIY budget.
Tools And Materials You’ll Need
Before starting your project, gather the necessary tools and materials:
Tools:
- Sandpaper (medium and fine grit)
- Tack cloth or microfiber cloth
- Painter’s tape
- Drop cloth or plastic sheeting
- Safety goggles
- Disposable gloves
- Dust mask or respirator
Materials:
- Primer for wood surfaces
- Spray paint (color of your choice)
- Clear spray paint sealer (optional)
Step-By-Step Guide
Step 1: Prepare The Workspace

Creating the right workspace is the first step to ensuring a successful spray-painting project. Choose a well-ventilated area, such as an open garage or an outdoor space, to prevent the buildup of paint fumes. Proper ventilation not only ensures your safety but also helps the paint dry evenly. Before you start, clear the area of any clutter and make sure it’s free of dust and debris, which could stick to the wet paint and ruin the smooth finish.
Next, protect your floor or ground from overspray by laying down a drop cloth, plastic sheeting, or old newspapers. This step is especially important if you’re working on a surface you want to keep clean. Secure the covering with tape or weights to prevent it from shifting as you work. Preparing a clean, protected workspace sets the foundation for a seamless painting process, allowing you to focus on achieving a flawless finish for your wood chairs.
Step 2: Clean The Chairs

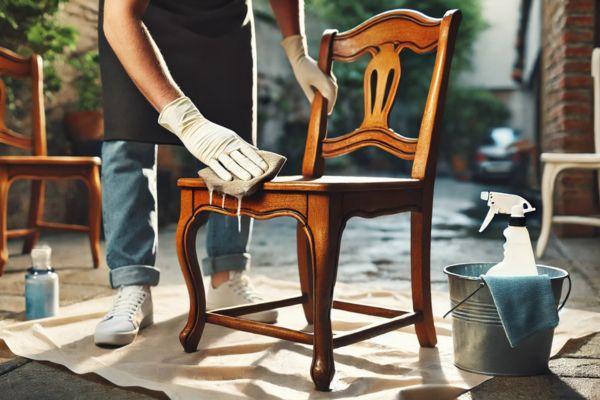
Properly cleaning the chairs is an essential step to ensure the paint adheres smoothly and evenly. Start by using a damp cloth with mild soap or a wood-safe cleaner to wipe down every surface of the chair, including the legs and any intricate details. This process removes dust, grease, and grime that can interfere with the primer and paint. Pay extra attention to spots that may have built-up dirt, especially if the chairs have been used outdoors or in high-traffic areas.
Once cleaned, let the chairs dry completely before proceeding to the next step. Moisture left on the surface can cause uneven paint application or bubbling. If you’re in a hurry, use a dry microfiber cloth to speed up the process or let the chairs air dry in a well-ventilated area. Taking the time to clean and dry the chairs thoroughly will give you a smooth and professional-looking finish when you paint.
Step 3: Sand The Surface

Sanding the surface is a critical step in preparing your wood chairs for spray painting. Begin with medium-grit sandpaper (around 120 grit) to remove any old paint, varnish, or rough spots. This helps to create a clean and even base for the primer to adhere to. Focus on areas that show signs of wear or unevenness, ensuring the entire chair is smooth to the touch. For a finer finish, switch to fine-grit sandpaper (around 220 grit) and go over the surface again, making sure there are no scratches or imperfections left behind.
After sanding, it’s essential to remove all dust and residue. Use a tack cloth or microfiber cloth to wipe down the chairs thoroughly. For chairs with intricate carvings or hard-to-reach areas, consider using a sanding sponge or small detailing tools to ensure every surface is properly prepped. Taking your time with sanding ensures the primer and paint will adhere seamlessly, giving your chairs a professional and long-lasting finish.
Step 4: Apply Painter’s Tape

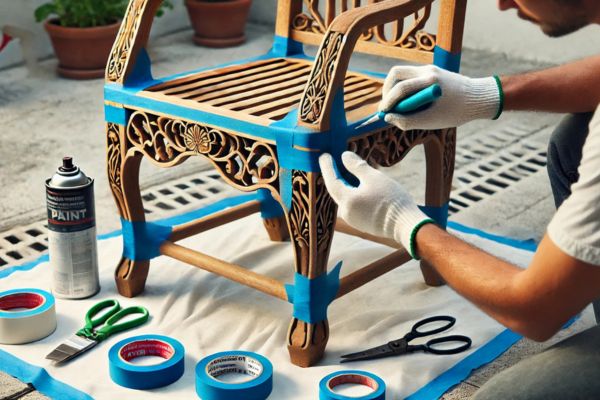
Applying painter’s tape is a crucial step to achieve a clean and professional look. Identify the areas of the chair that you want to protect from paint, such as hardware, joint connections, or parts of the chair you want to leave natural. Carefully apply painter’s tape over these sections, ensuring the edges are pressed down firmly to prevent paint from seeping underneath. This step is especially important for creating sharp, clean lines and maintaining the design integrity of your chairs.
Take your time to cover all non-paint areas thoroughly, and don’t forget to check for any small details or hard-to-reach spots that might require extra attention. For intricate or curved sections, use narrower tape or cut small pieces for precision. By dedicating a few extra minutes to taping, you’ll save yourself the hassle of touch-ups later and ensure a flawless finish when the paint is applied.
Step 5: Prime The Chairs

Priming the chairs is an essential step to ensure your spray paint adheres properly and provides a long-lasting, even finish. Begin by selecting a primer specifically designed for wood surfaces. If your final paint color is dark, consider using a tinted primer to match the shade, as this will enhance the depth of the paint and require fewer coats. Shake the primer vigorously for about a minute to ensure the contents are well mixed.
When applying the primer, hold the can 10-12 inches away from the chair and use smooth, sweeping motions to apply light, even coats. Avoid heavy application to prevent drips or uneven coverage. Allow the primer to dry completely according to the manufacturer’s instructions before moving on to the next step. This drying time is crucial for the best adhesion and ensures a flawless base for your paint. Proper priming sets the stage for a professional-quality finish on your wood chairs.
Step 6: Spray Paint The Chairs

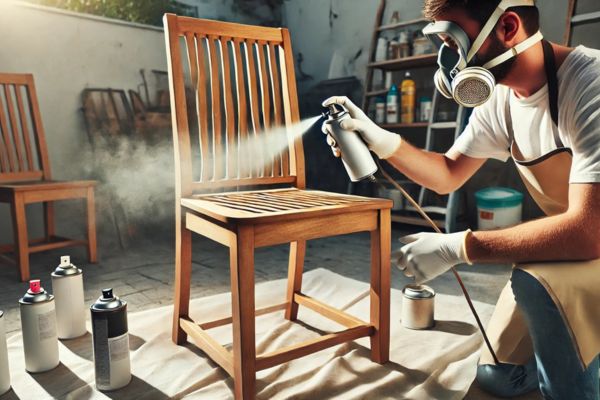
The most exciting step in the process is spray painting the chairs! To ensure the best results, start by shaking the spray paint thoroughly for at least 1-2 minutes. This mixes the paint properly and prevents clogs or uneven spray. When you’re ready to paint, position the can about 10-12 inches away from the chair and begin spraying just off the edge of the surface. Use smooth, sweeping motions to cover the chair evenly, avoiding concentrated bursts that can cause drips or pooling.
Apply multiple light coats rather than one thick coat for a smooth, flawless finish. This technique minimizes the risk of runs and gives the paints ample time to dry and bond between applications. Wait the recommended drying time between coats (typically 15-20 minutes) to prevent smudging or uneven layers. As you work, rotate the chair to reach all angles, including the underside and legs, ensuring complete coverage. Remember to use overlapping strokes for a seamless application and a professional-looking result.
Step 7: Seal The Paint (Optional)

To ensure your spray-painted chairs stay looking fresh and withstand daily wear, consider sealing the paint with a clear spray paint sealer. This step is especially useful for chairs that will see frequent use, as it adds an extra layer of protection. Select a sealer finish—matte, satin, or glossy—that complements your chosen spray paint and enhances the overall look of your chairs.
Before applying, shake the sealer well to mix the contents thoroughly. Hold the can 10-12 inches away from the chair and spray a light, even coat across the painted surface, using smooth, sweeping motions. Avoid heavy application to prevent drips or clouding. If additional durability is needed, let the first coat dry completely (refer to the manufacturer’s instructions for drying times) before applying a second coat. This final step not only protects the paint but also gives your furniture a polished, professional finish.
Step 8: Let the Chairs Cure

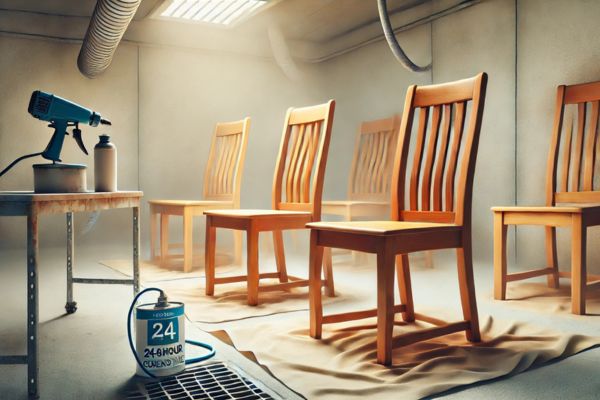
Once the painting process is complete, it’s important to allow the chairs to fully cure to ensure the paint sets properly and achieves maximum durability. While spray paint may feel dry to the touch within a few hours, curing takes longer. Place the chairs in a clean, dust-free area where they won’t be disturbed. Ensure the environment is free of humidity or debris, as these can affect the curing process.
Let the chairs sit undisturbed for at least 24-48 hours before using them. During this time, avoid stacking the chairs or placing heavy items on them, as the paint can still be soft and prone to dents or scratches. Giving the chairs adequate curing time ensures a hard, resilient finish that will stand up to daily use and keep your freshly painted chairs looking vibrant and flawless for years to come.
Common Mistakes to Avoid
1. Skipping Sanding
Failing to sand the surface properly can lead to poor paint adhesion and a rough, uneven finish. Sanding ensures the surface is smooth and free of imperfections, providing an ideal base for the primer and paint.
2. Spraying Too Close
Holding the spray paint too close to the chair can cause drips, runs, and an uneven application. Always maintain a consistent distance of 10-12 inches from the surface and use sweeping motions for even coverage.
3. Using Too Much Paint
Applying thick coats of paints might seem like a shortcut, but it often results in patchy drying and an inconsistent appearance. Instead, apply multiple light coats, allowing each one to dry properly before adding the next.
4. Not Priming
Skipping the primer is a common mistake that can compromise the durability and appearance of your painted chairs. Primer ensures better adhesion and creates a smooth, even base for the paint, enhancing its finish and longevity.
5. Rushing the Process
Impatience can lead to subpar results. Drying and curing times are crucial to the success of your project. Rushing through steps or using the chairs before the paint has fully cured can lead to smudges, scratches, and a less durable finish.
By avoiding these mistakes and following the proper steps, you can achieve professional-quality results and enjoy your beautifully painted wood chairs for years to come.
Creative Ideas for Spray Paint Wood Chairs
Spray painting isn’t just about giving furniture a fresh coat of color; it’s also an opportunity to get creative and make your chairs truly unique. Here are some fun and stylish ideas to elevate your project:
Two-Tone Look
Create a modern and eye-catching effect by using two complementary colors on your chairs. For instance, paint the seat and backrest in one color and the legs in another. Use painter’s tape to define clean lines between the sections for a crisp, professional finish.
Distressed Finish
If you love the vintage or farmhouse aesthetic, try a distressed look. After painting your chair with a base color, lightly sand the edges and high-touch areas to expose the wood or primer underneath. This technique adds charm and character to your chairs.
Stenciled Patterns
Add a touch of artistry by incorporating stenciled designs. Once your base coat is dry, use a stencil and a second color of spray paint to create intricate patterns or shapes. Whether it’s floral designs or geometric patterns, stencils can make your chairs one-of-a-kind.
Metallic Accents
Give your chairs a chic, modern flair with metallic spray paint. Highlight specific areas, such as the chair legs or backrest, in gold, silver, or bronze for a touch of elegance. Metallic accents are perfect for adding a luxurious feel to your furniture.
Caring for Your Newly Painted Chairs
Proper care is essential to keep your freshly Spray Paintimg Wood Chairs looking vibrant and flawless for years to come. Start by avoiding placing heavy items on the chairs for at least a week, even after they appear dry. This allows the paint to cure fully, ensuring a durable and long-lasting finish.
For daily maintenance, wipe spills or stains promptly with a damp cloth to prevent discoloration or damage to the paints. Adding felt pads under the legs is another smart move to protect both the chairs and your floors from scratches. These simple steps will preserve the beauty and functionality of your chairs, making them a stunning addition to your space.
FAQs About Spray Paint Wood Chairs
1. Can I spray paint chairs without sanding?
While sanding is highly recommended for achieving a smooth and professional finish, it is possible to skip this step if the surface is already clean, smooth, and in excellent condition. In such cases, using a high-quality bonding primer designed for wood surfaces can help the paint adhere effectively without the need for sanding. However, for older or rough surfaces, sanding is crucial to remove imperfections and ensure the paint bonds properly. Skipping sanding may save time, but it could result in a less durable and polished finish.
2. How long does spray paint take to dry?
Spray paint typically dries to the touch within 20-30 minutes, depending on factors like the brand of paints, the thickness of the coat, and environmental conditions such as temperature and humidity. Full curing, where the paint hardens completely and becomes more durable, can take 24-48 hours. For best results, allow the chairs to sit undisturbed during this curing period to ensure the paints achieves maximum adhesion and durability.
3. Can I use regular spray paint on wood?
Yes, most regular spray paints are suitable for wood surfaces. To ensure the best results, look for spray paint specifically labeled for use on wood. These paints are formulated to adhere well to wooden surfaces, providing a smooth and durable finish. If the wood is unfinished or particularly porous, applying a primer beforehand can enhance adhesion and ensure the paint lasts longer. Always check the product label to confirm compatibility with wood before starting your project.
4. How many coats of spray paint should I apply?
For the best coverage and a smooth, professional finish, apply 2-3 light coats of spray paints. Thin, even coats help prevent drips, runs, and uneven drying. Allow each coat to dry completely before applying the next, typically waiting 15-20 minutes between coats (or as recommended by the paint manufacturer). This layered approach ensures a consistent and durable finish, giving your chairs a polished, long-lasting look.
Conclusion
Spray paint wood chairs is a simple yet highly rewarding DIY project that offers an affordable way to revitalize your furniture. By following the right preparation steps, using proper techniques, and exercising patience, you can achieve professional-quality results that elevate the look of your chairs. Whether you’re refreshing old furniture or adding a personal touch to new pieces, spray painting allows you to unleash your creativity and create stunning, durable finishes.
With this guide in hand, you’re ready to transform your chairs into eye-catching statement pieces. So, gather your materials, choose your favorite color, and let your creativity shine—your dream chairs are just a few coats of spray paint away!


