
When It comes to maintaining the aesthetic appeal And functionality of your bathroom, Small elements like sink knobs can make A significant difference. These seemingly insignificant components not only allow you to control water flow And temperature, but they also contribute to the overall style of your bathroom. Over time, these knobs can become worn out, dated, or faulty, necessitating A replacement. But how exactly do you go about change bathroom sink knobs? While It might seem like A task best left to professionals, With A little guidance And the right tools, Changing the basin knob can be A manageable DIY project. This blog will walk you through the step-by-step process of replacing the bathroom basin knob, Helping you revamp your bathroom’s functionality And appearance.
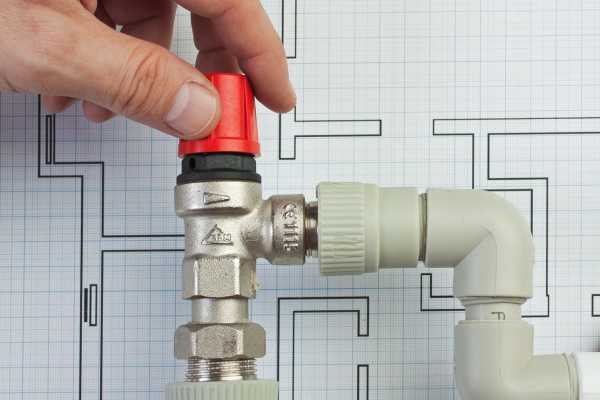
Shut Off The Water Supply To The Sink
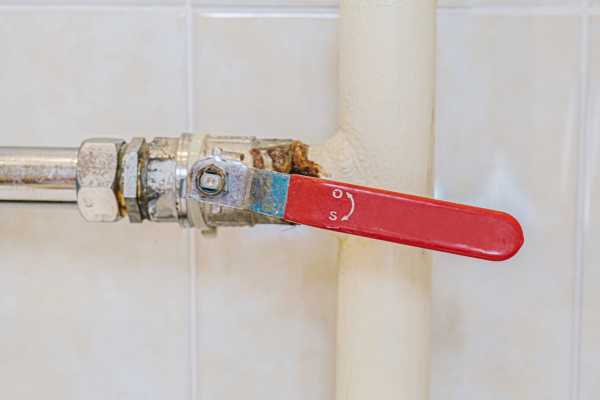
The first and foremost step before you dive into changing and adjusting your bathroom sink knobs is to shut off the water supply. This precautionary step is crucial to prevent water from gushing out once you disassemble the handles. Typically, You can find the shut-off valves for the water supply underneath the sink. Turn these valves clockwise until they can’t turn anymore to ensure the water is entirely off. Don’t rush this process, As forgetting to turn off the water supply could lead to unnecessary messes And potential damage.
Identify The Type Of Sink Knobs

Next, it’s time to identify your basin knob type. Faucets come in various designs and styles. From single-handled, to double-handled to those with screws, caps, or even both. Knowing the type of sink handles you have makes the process of changing them much more straightforward.
For instance, with single-handled faucets, the knob usually pulls out and turns for water control. Conversely, double-handled faucets have separate handles for hot and cold water. Take some time to research and familiarize yourself with your basin knob type before starting the task.
Use A Screwdriver To Remove The Caps Or Screws

Once you have a clear picture of your sink knob type, you can start the removal process. The knobs are typically held in place by screws or caps. For screws, A simple turn with A screwdriver should loosen them. For caps, It’s A little more complicated. You may need to use A small, flat blade or A utility knife to pry them off gently. Take caution to avoid scratching your faucet. Once you remove the screws or caps, You can comfortably lift the handles off the sink.
The entire process is easier than it seems. So, if your bathroom needs a minor upgrade, or your sink knobs have worn out, don’t shy away from this task. With these guidelines, you’ll have change your bathroom sink knobs changed in no time. Don’t forget, every change, no matter how small, contributes to making your space more personalized and comfortable
Detach The Knobs From The Mounting System

Revamping your bathroom’s look often involves replacing old or outdated fixtures, and changing your washroom faucet handles can significantly contribute to this transformation. To start the replacement process, You first need to detach the existing knobs from the mounting system. Often, these handles are held in place by screws that are hidden under decorative caps. Use A flat-head screwdriver to gently remove the caps And expose the screws. You’ll then be able to unscrew the handles using A Phillips-head screwdriver. Always remember to turn off the water supply before starting this process to avoid any unforeseen spills or water gushing. This step might require some patience And gentle maneuvering, especially if the faucet handles are old And A bit stuck due to mineral buildup.
Match The New Sink Knobs With The Existing Plumbing Fixtures
After you’ve successfully detached the old knobs, It’s time to find the right replacements. The new knobs must be compatible with your existing plumbing fixtures. Factors to consider include the faucet’s configuration, The diameter of the new knobs, And the type of valve your system uses. Matching these specifications will ensure A correct and secure fit, And It will help to prevent potential leaks or damage. It’s best to compare the old handles’ Specifics with the new ones to be certain they are compatible.
Align The Knobs With The Faucet Stem And Ensuring A Snug Fit

The last major step is to align the new knobs with the faucet stem and ensure a snug fit. Begin by placing the base of the knob over the faucet stem, Making sure that the screw holes are aligned. Next, You’ll insert the screws from the old knobs or new ones provided, And then tighten them. It’s crucial not to over-tighten the screws, As this can lead to damage. Once the handles are installed, Test them by turning the water on and off. If the handles function correctly and there are no leaks, Then you’ve successfully changed your bathroom faucet handles.
Replacing washroom faucet handles might seem like A minor task, But It can have A significant impact on your bathroom’s overall look and functionality. By following these straightforward steps, You can complete the task successfully, Enhancing your bathroom’s aesthetic And utility.
Secure The New Sink Knobs To The Mounting System

After selecting the perfect replacements for change your bathroom sink knobs And ensuring they match your existing plumbing fixtures, The next step involves attaching these new knobs to your sink. Begin by placing the knob over the faucet stem, ensuring the screw holes are correctly aligned. After aligning the holes, Use the screws you saved from the old knobs (or new ones if provided) to secure the knobs in place. It’s important to screw them just until they are snug – over-tightening may damage the new knobs. This process may seem A bit technical, But with A little patience and focus, you’ll secure the new knobs successfully.
Turn On The Water Supply And Checking For Leaks

With the new faucet handles securely attached to your basin, It’s now time for the moment of truth: testing your installation. Gradually turn on the water supply and observe how your new handles operate. As the water flows, carefully inspect the base of the handles and the surrounding area for any signs of leaks. No detail is too small to overlook; even A tiny leak can escalate into A larger problem down the line. Take the time to run the water through different temperature settings, Ensuring the handles turn smoothly and function correctly. If there’s no sign of water leakage And the handles are operating seamlessly, You can pat yourself on the back for A job well done.
The Final Thought
Changing bathroom faucet handles may seem like A small detail, But Its impact on the overall look and functionality of your bathroom is far from insignificant. This task not only elevates the aesthetic appeal of your washroom but also enhances Its utility by ensuring the smooth operation of the faucets. The process may require A certain level of patience and attention to detail, But the payoff in the form of A revitalized washroom space is undoubtedly worth it. So the next time you think of giving your washroom A fresh update, remember that even the smallest changes can make A significant difference. Enjoy the satisfaction of A successful DIY project And the refreshed look of your bathroom!

