
A leaky bathtub faucet can be more than just an annoyance; it can lead to wasted water, increased bills, and even potential damage to your bathroom if left untreated. Over time, the components of a faucet, like the cartridge, gasket, or O-ring, can wear out or become damaged, leading to drips or unwanted water flow. Fortunately, fix a leaky bathtub faucet is a manageable task for many homeowners, often requiring just a few basic tools and replacement parts. In this guide, we’ll walk you through the steps to diagnose and repair that pesky drip, restoring peace and efficiency to your bathroom.
What Causes A Leaky Bathtub Faucet Problem?
A leaky bathtub faucet can be caused by several factors, but the most common culprits are worn-out or damaged components within the tap itself. Over time, the rubber or silicone seals and O-rings inside the spout can deteriorate due to regular use, mineral buildup, or exposure to water.
This deterioration can result in water slowly seeping through, causing a persistent drip or leak. In some cases, a faulty cartridge or valve assembly may also be responsible for the issue. Regular maintenance and timely replacement of worn parts are essential to prevent and address leaky bathtub tap problems.
How Can I Identify My Faucet Type?
To identify your faucet type, start by examining the physical characteristics of the valve. Look at the number of handles it has; if it has one, it’s likely a single-handle tap, and if it has two, it’s a double-handle
spout. Then, check the shape and design of the handles, spout, and any other visible parts. Note any branding or labeling, as this can provide clues about the valve’s make and model. Additionally, take measurements of the distance between the handles and any other relevant dimensions, as this information can be helpful when seeking replacement parts or fixtures.
If you’re still unsure, consider taking clear photos of the spouts and consulting with a plumbing professional or visiting a plumbing supply store for assistance in identifying the tap type.
Tools And Materials
- Adjustable Wrench: This is used to loosen and tighten nuts and bolts on the spout and water supply lines.
- Screwdriver: You may need both Phillips and flathead screwdrivers to remove screws and access internal parts of the faucet.
- Replacement Parts: These could include washers, cartridges, o-rings, seals, or any other components specific to your valve Type that need replacement to stop the leak.
- Pipe Tape: Also known as Teflon tape, it’s used to create a watertight seal on threaded connections, such as those found on the tap assembly.
- Plumber’s Grease: This lubricant helps prevent leaks by ensuring a smooth and tight seal on moving parts like cartridges or o-rings.
- Towels or Rags: These are used to soak up water and keep your work area dry, preventing potential water damage.
- Bucket or Container: Place a bucket or container under the valve to catch any water that might drip during the repair, preventing a mess and water wastage.
Step-By-Step Guide To Fixing A Leaky Bathtub Faucet
Step 1: Identify The Leaking Faucet

Begin by carefully examining your bathroom and identifying which tap is leaking. Sometimes, bathrooms have multiple faucets, including those for the bathtub, sink, and shower. It’s crucial to pinpoint the specific tap that needs repair.
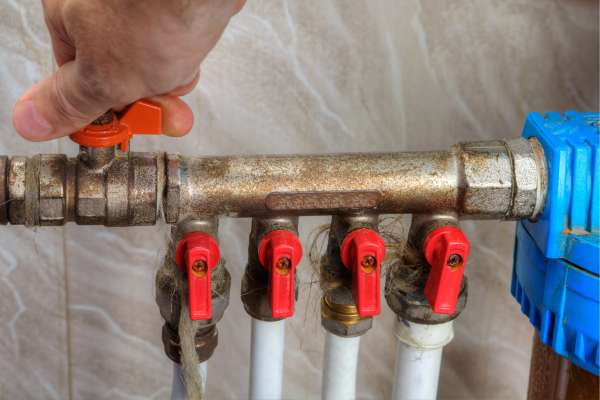
Step 2: Turn Off The Water Supply

Locate the water shut-off valve for the bathtub. This valve is typically situated either near the bathtub itself or in the basement. Turn the valve clockwise to shut off the water supply completely. Confirm that the water flow has stopped by opening the faucet briefly.
Step 3: Remove The Faucet Handle

To access the internal components of the faucet, you’ll need to remove the spout handle. This might require using a screwdriver or an Allen wrench. Look for a small screw securing the handle in place, often concealed beneath a decorative cap or cover. Once the screw is removed, carefully lift off the handle and set it aside.
Step 4: Remove The Stem Assembly

Beneath the handle, you’ll find the stem assembly. The method to remove it varies depending on the faucet type. For compression valve, you’ll typically use pliers to unscrew the stem assembly. While other spout types might require a wrench or specialized tool. Slowly turn counterclockwise to detach the stem assembly from the tap body.
Step 5: Examine The Faucet Type

Take a close look at the faucet and determine its type. The most common types include compression, cartridge, ball, or ceramic disk taps. Understanding the spout type is crucial because it dictates the specific parts and repair techniques needed to fix the leak.
Step 6: Replace The Rubber Washer
For compression faucets, which are more traditional and prone to washer-related leaks. The culprit is often a worn-out rubber washer located at the base of the stem assembly. Carefully remove the old washer and replace it with a new one of the same size and shape. Ensure the washer fits snugly and doesn’t show any visible signs of damage.
Step 7: Inspect The Faucet Seat

Using a seat wrench, remove the faucet seat. Which is the part where the stem assembly connects to the spout body. Thoroughly inspect the seat for any signs of wear, corrosion, or roughness. If you notice any damage, it’s essential to replace the seat with a new one that matches the specifications of the old seat.
Step 8: Reassemble Bathtub Faucet

Carefully and methodically reassemble the faucet by reversing the disassembly steps. Make sure all parts are correctly aligned and tightened, ensuring a secure fit. It’s crucial not to overtighten, as excessive force can damage the tap or lead to new leaks.
Step 9: Turn On The Water Supply
With the faucet reassembled, it’s time to restore water flow. Turn the water supply back on by turning the shut-off valve counterclockwise. Open the valve slowly to allow water to flow through and purge any air from the plumbing lines. Check for any immediate leaks around the tap handle or base.
Step 10: Check For Leaks
Fully open the faucet to its highest flow setting and let it run for several minutes. Monitor the spout closely for any signs of leaks or dripping water. If you notice any leaks, it’s crucial to revisit the reassembly process, ensuring that all components are correctly positioned and tightened.
What Should I Do If My Faucet Handle Is Stuck?
If your faucet handle is stuck, start by turning off the water supply to the valve to prevent any potential leaks or further damage. Next, try applying a lubricant like WD-40 to the handle’s base and gently tapping it with a rubber mallet to loosen any corrosion or mineral buildup.
If that doesn’t work, you may need to disassemble the spout to access and address the underlying issue, such as a damaged cartridge or valve. If you’re unsure about the process, consider contacting a professional plumber for assistance.
The Final Thought
Fixing a leaky bathtub faucet is a relatively simple task that can save you money on your water bill and prevent further damage to your bathroom. By following the steps outlined in this article. You can easily identify the cause of the leak and repair it yourself. Remember to turn off the water supply before starting any work and take your time to ensure all connections are tight and secure. If you encounter any difficulties or if the leak persists. It may be best to consult a professional plumber for assistance. Don’t let a leaky tap go unresolved – take action today to fix the problem and enjoy a fully functional, drip-free bathtub.

