
Replacing a bathtub can be a daunting yet rewarding home improvement project that can transform The look And functionality of your bathroom. Whether you’re upgrading To a more modern design, addressing structural issues, or simply seeking a fresh aesthetic, knowing how To replace a bathtub Is a valuable skill. In this guide, we will explore The step-by-step process of replacing a bathtub, from The initial preparations To The final touches, helping you navigate this project with confidence And achieve a stunning result in your bathroom.
How Long Does It Typically Take To Replace A Bathtub?
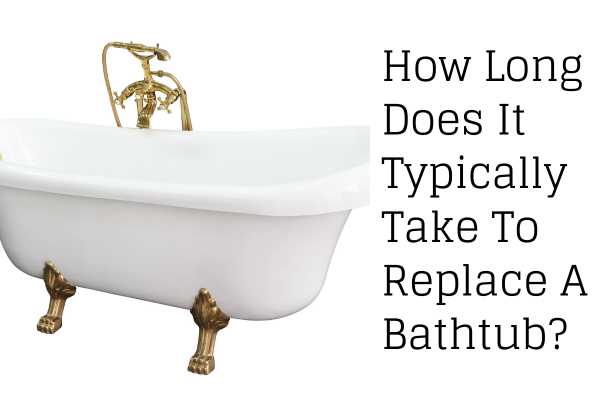
The duration of a bathtub replacement project can vary depending on several factors, including The complexity of The job, your level of experience, And whether you encounter unexpected issues along The way. On average, a straightforward bathtub replacement can take anywhere from one To three days To complete. This timeline includes tasks such as removing The old Tub, preparing The plumbing And drainage, installing The new tub, And finishing the surrounding area. It’s essential To budget enough time for The project To avoid rushing, which could lead To mistakes or compromise The quality of The installation.
What Safety Precautions Should I Take During Replacement?

- Safety should be a top priority when replacing a bathtub To prevent accidents or injuries. Here are some essential safety precautions to consider:
- Wear Protective Gear: Always wear appropriate personal protective equipment, such as safety goggles, gloves, And a dust mask, To protect yourself from dust, debris, And potential exposure To chemicals.
- Turn Off Utilities: Before starting any work, turn off The water supply And electricity To The bathroom To avoid accidental electrical shocks or water damage.
- Proper Ventilation: Ensure The bathroom Is well-ventilated To prevent The buildup of fumes from adhesives or solvents. Use fans or open windows as needed.
- Sturdy Ladder: Use a sturdy, non-slip ladder when working at heights To access The bathtub area safely.
- Follow Instructions: Adhere To manufacturer’s guidelines for tools And materials, And follow a step-by-step plan To minimize risks associated with unfamiliar procedures.
- Buddy System: If possible, have a friend or family member nearby To assist you in case of emergencies.
What Type Of Bathtub Material Is Best For Replacement?

- Acrylic: Acrylic bathtubs are lightweight, durable, And cost-effective. They are easy To clean And maintain, making them a popular choice for many homeowners.
- Cast Iron: Cast iron tubs are known for their durability And heat retention. They have a classic And timeless look but can be heavy And may require extra support.
- Fiberglass: Fiberglass tubs are affordable And lightweight. They are relatively easy To install but may not be as durable as other materials.
- Stone or Solid Surface: These high-end options offer a luxurious And elegant appearance. They are durable And resistant To stains but come with a higher price tag.
- Porcelain-Enameled Steel: These tubs are budget-friendly And durable. They resist chipping And are relatively easy To clean.
Step-By-Step Bathtub Replacement Process
Step 1: Assess Your Budget
Before embarking on a bathtub replace ment project, it’s essential To assess your budget carefully. Determine how much you’re willing To invest in this renovation, considering not only The cost of the tub itself but also expenses related To installation, plumbing, And any additional materials or fixtures you may need. Keep in mind that unexpected issues can arise during The replacement process, so having a contingency fund Is wise. By establishing a clear budget from The outset, you can make informed decisions throughout The project And ensure that your financial resources align with your renovation goals.
Step 2: Choose The Right Bathtub
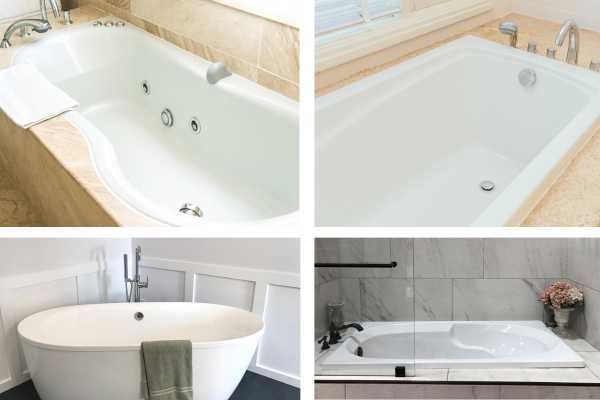
Selecting The right bathtub Is a critical decision that significantly impacts The outcome of your replacement project. Consider factors such as The size and layout of your bathroom, your personal preferences, And The overall aesthetic you want to achieve. There are various types of tubs available, including freestanding, alcove, drop-in, and corner tubs, each with its own advantages. Additionally, you’ll need To choose the material of The bathtub, such as acrylic, cast iron, fiberglass, or stone, based on durability, maintenance requirements, And cost. Take your time To research And visit showrooms To find the tub that best suits your needs And complements your bathroom design.
Step 3: Find A Professional Contractor
Some experienced DIY enthusiasts may opt To replace a bathtub themselves, many homeowners prefer To hire a professional contractor To ensure a smooth And hassle-free installation. When seeking a contractor, it’s essential To do thorough research. Look for contractors with relevant experience in bathtub replacements, check references, And read reviews from previous clients. Ensure that The contractor is licensed, insured, And can provide a detailed estimate that includes labor, materials, And a timeline for the project. Effective communication with your chosen contractor is crucial, as it will help ensure that your expectations are met throughout the process. By enlisting The services of a skilled professional, you can have confidence in The quality And safety of your tub replacement project.
Step 4: Remove The Old Bathtub

Removing The old bathtub Is a crucial phase of The replace ment process. Start by turning off The water supply And disconnecting any plumbing fixtures connected To The old tub. Carefully remove tiles, panels, or any surrounding materials To gain access To The bathtub. Depending on The type of installation, you may need To detach The tub from The wall And floor. This step requires patience And precision To avoid damaging The surrounding structure. Once The old bathtub Is fully detached, safely dispose of it according To local regulations. Prepare the space for the new tub by ensuring the floor and walls are clean and level.
Step 5: Install The New Bathtub

Installing The new bathtub Is a critical step in achieving a successful replacement. Carefully position The new tub in the designated space, ensuring it’s level And properly aligned. Secure The tub To The wall And floor using appropriate hardware And support structures, such as brackets or mortar. Follow The manufacturer’s instructions for securing The tub in place. Ensure that all connections And joints are watertight To prevent leaks in The future. Double-check The alignment And levelness of The tub before proceeding To The next step.
Step 6: Plumbing And Fixtures

With The new bathtub securely in place, it’s time To address The plumbing And fixtures. Reconnect the water supply lines And drain pipes to the appropriate fittings on The bathtub. Install any necessary valves, faucets, And fixtures according To your design preferences. Be meticulous in checking for leaks And ensure that all connections are properly sealed. Test The water flow And drainage To confirm that everything Is functioning correctly. Once you’re satisfied with the plumbing and fixtures, proceed To install any surrounding panels, tiles, or finishes To complete The aesthetic aspect of The replacement.
Step 7: Finishing Touches

After The new bathtub Is installed And The plumbing Is in place, it’s time To add The finishing touches that will make your bathroom truly shine. This step includes installing any remaining fixtures, such as showerheads, faucets, And handles. You can also add a bathtub surround or shower enclosure if desired. Don’t forget To seal any gaps or seams To prevent water infiltration. Consider adding caulk or grout around The edges To create a watertight seal And a polished look. This is also The stage where you can personalize your bathroom with accessories, such as towel racks, soap dispensers, and shower curtains, To match your style And preferences.
Step 8: Clean-Up And Inspection

With The bathtub replace ment project nearing completion, It’s essential To thoroughly clean up The workspace. Remove any debris, dust, And construction materials from The bathroom area. Dispose of old materials And packaging responsibly. Clean The new bathtub And fixtures To ensure they are free of residue or fingerprints. Once the space Is clean, conduct a thorough inspection of The entire installation. Check for any signs of leaks, loose fixtures, or issues with The tub’s stability. Address any problems promptly to ensure The long-term functionality And beauty of your new tub.
The Final Thought
Replacing a bathtub Is a rewarding home improvement project that can enhance The comfort And aesthetics of your bathroom. It’s a process that requires careful planning, attention To detail, And The use of appropriate materials And tools. From assessing your budget To selecting The right tub, finding a professional contractor, removing The old tub, And completing The plumbing And fixtures, each step contributes to the success of The project. The finishing touches And thorough clean-up add The final layer of refinement To your bathroom. With proper execution And care, your newly replaced bathtub will provide years of comfort And enjoyment while adding value To your home.

