Creating a vanity unit is an excellent way to enhance your bathroom’s functionality and aesthetic appeal. Whether you’re a DIY enthusiast or a homeowner looking to add a personal touch to your space, learning how to make a vanity unit can be both rewarding and cost-effective. This project allows you to customize every detail, from the materials and finishes to the storage solutions, ensuring that the final product perfectly suits your needs and style. Not only will you save money by building your own vanity entity, but you’ll also gain a sense of accomplishment and pride in your craftsmanship. With the right tools, materials, and a clear plan, you can easily make a conceit unit that transforms your bathroom into a more organized and beautiful space.
How Long Does It Take To Make A Vanity Unit?
The time it takes to make a vanity unit can vary depending on several factors such as the complexity of the design, materials used, and the skill level of the craftsman. Typically, a simple conceit unit made from standard materials may take anywhere from a few days to a week to complete. However, more intricate designs or custom-made units could take longer, potentially several weeks or even months.
Can I Use Reclaimed Wood?
Yes, you can definitely use reclaimed wood for various projects and applications. Reclaimed wood is a sustainable and environmentally friendly option as it gives new life to old materials that would otherwise go to waste. It also adds a unique character and charm to your project, with each piece having its own history and story.
Can I Install A Double Sink On My Vanity Unit?
Yes, you can install a double sink on your vanity unit as long as there is enough space and plumbing support for it. Double sinks are a popular choice for bathrooms shared by multiple people or for those who prefer more counter space. Before proceeding with the installation, make sure to measure the dimensions of your vanity entity and ensure that it can accommodate two sinks without overcrowding the space.
Materials Needed
1. Wood
Wood is the foundation of your vanity unit. Depending on your design preferences and budget, you can choose from various types of wood, such as oak, pine, or plywood. Solid wood offers durability and a classic look, while plywood can be more cost-effective and easier to work with. Ensure that the wood is of high quality and free from defects to create a sturdy and attractive unit.
2. Screws And Nails
To assemble your unit, you’ll need a variety of screws and nails. These fasteners are essential for joining different parts of the wood securely. Use screws for stronger joints and nails for parts that need to be fixed quickly. It’s important to choose the right size and type of screws and nails for the thickness and type of wood you are using. Having a good drill and hammer on hand will make this process smoother and more efficient.
3. Paint Or Stain
Once your vanity unit is assembled, finishing it with paint or stain can enhance its appearance and protect the wood. Paint offers a wide range of color options to match your bathroom decor, while stain can bring out the natural beauty of the wood grain. Make sure to sand the surface thoroughly before applying any finish to ensure a smooth and even application. Depending on your preference, you might also need a primer to prepare the wood for painting or staining.
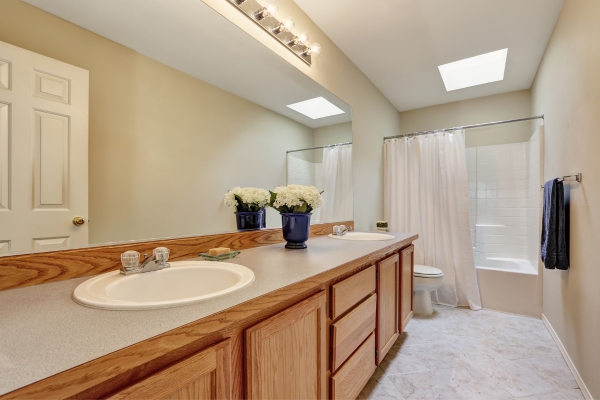
4. Sink And Faucet
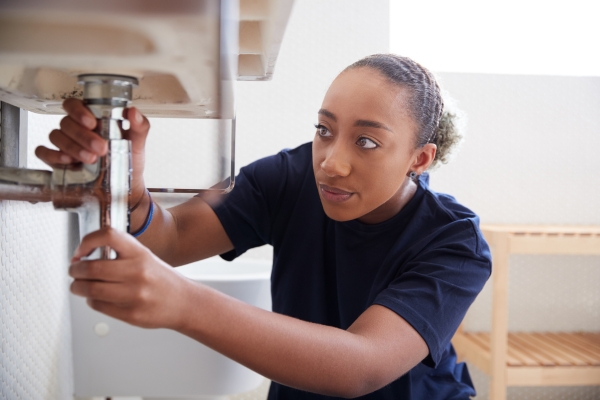
The sink and faucet are integral parts of your conceit unit, combining functionality with style. Choose a sink that fits the size of your vanity and complements the overall design. There are various styles, such as undermount, vessel, or drop-in sinks, each offering a different look and installation method. Similarly, the faucet should match the sink and provide the desired water flow and temperature control. Ensuring that the plumbing is correctly installed is vital for the sink and faucet to function properly and efficiently.
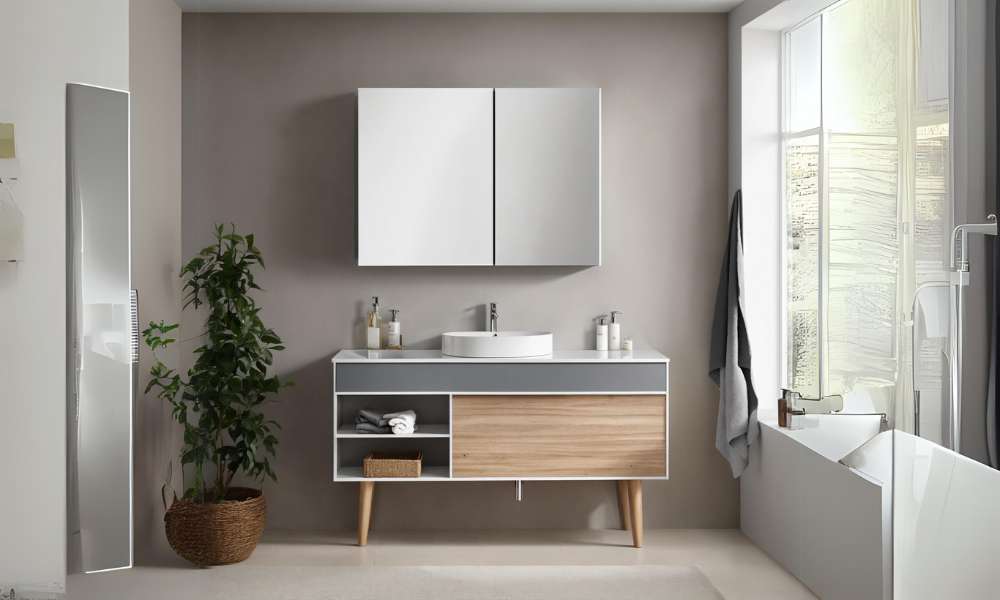
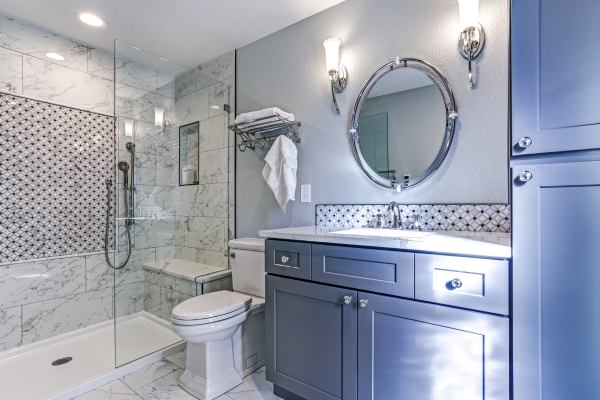
Deciding On The Design
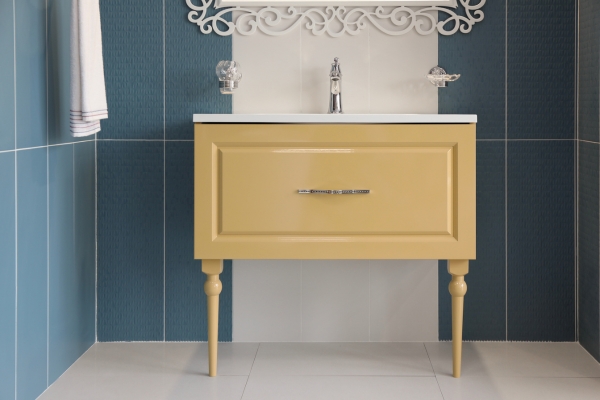
Before you start building, the first step in how to make a vanity unit is deciding on the design. Consider the overall style of your bathroom and how the unit will fit into it. Do you prefer a modern, sleek look, or are you more inclined toward a rustic, traditional style? Think about the color scheme, materials, and finishes that will complement your bathroom’s existing decor. It’s also essential to determine the size of the vanity entity, ensuring it fits well within the available space while providing adequate storage. By carefully planning the design, you can create a vanity entity that is both functional and visually appealing.
Sketching The Blueprint
Once you have a clear design in mind, the next step in how to make a vanity entity is sketching the blueprint. This involves drawing a detailed plan that includes all the measurements and specifications. Your blueprint should outline the dimensions of each component, including the countertop, drawers, and cabinet doors. Additionally, it’s important to plan the placement of plumbing fixtures, such as the sink and faucet, to ensure they are correctly positioned. A well-drafted blueprint serves as a valuable guide throughout the construction process, helping you to visualize the final product and avoid any mistakes.
Laying Out The Pieces
After finalizing your blueprint, the next phase in how to make a vanity unit is laying out the pieces. Begin by gathering all the materials and tools you’ll need, such as wood, screws, nails, and a saw. Carefully measure and cut each piece according to your blueprint, ensuring precise cuts for a professional finish. It’s helpful to label each piece to avoid confusion during assembly. Lay out the pieces on a flat surface, arranging them in the order they will be assembled. This step allows you to double-check your measurements and make any necessary adjustments before you start building. Properly laying out the pieces ensures a smooth construction process and helps you to create a sturdy, well-built unit.
Attaching The Back Panel
Once the side panels are securely attached to the conceit unit, it’s time to focus on attaching the back panel. This final step is crucial in ensuring the structural integrity and stability of the unit. Start by positioning the back panel against the sides and make sure it aligns perfectly with the edges. Use screws or nails to secure the back panel in place, ensuring it is flush with all corners.
Preparing The Top For The Sink
To prepare the top for the sink in your bathroom vanity unit, precision is key. Begin by measuring the dimensions of both the sink and the countertop to ensure a perfect fit. Next, carefully mark out where the hole for the sink will be placed, using a template if necessary for accuracy. Consider opting for a material that is both durable and easy to clean, such as marble or quartz, to make maintenance a breeze.
Attaching The Doors
Attaching the doors is a significant step in creating a functional and visually appealing entity unit. Begin by measuring and marking the positions for the hinges on both the vanity frame and the doors. Attach the hinges to the doors first, ensuring they are aligned properly. Then, secure the hinges to the frame with screws, checking that the doors are level and open and close smoothly. Adding handles or knobs to the doors will enhance their usability and complete the look. Well-fitted doors not only provide easy access to the storage compartments of your conceit unit but also contribute to its overall design and functionality.
Sealing The Wood
Sealing the wood of a vanity unit is essential for protecting and enhancing its longevity. To achieve the best results, it is crucial to choose a high-quality sealant that is suitable for the specific type of wood being used. Applying multiple thin coats, allowing each coat to fully dry before adding the next layer, can help in creating a durable and long-lasting finish.
The Final Thought
Building your own vanity unit can be a rewarding and cost-effective project that adds both functionality and style to your bathroom. By following the step-by-step instructions outlined in this guide, you can create a customized piece that perfectly suits your space and design preferences. Remember to carefully measure and plan out each step to ensure a successful outcome. With some patience, creativity, and basic woodworking skills, you can transform your bathroom with a unique vanity entity that reflects your personal taste and adds value to your home. Start building your dream vanity entity today and enjoy the satisfaction of completing a DIY project that enhances both form and function in your bathroom.

