
Tiling A bathroom wall is an excellent way to enhance the overall aesthetic appeal And functionality of your restroom. Whether you’re looking to add A touch of elegance or simply protect the walls from moisture and stains, Learning how to put tiles on your bathroom wall is A skill that can transform your space. In this Article, We will guide you through the step-by-step process of tiling A bathroom wall, ensuring that you achieve professional-looking results even if you have little to no experience in DIY projects. From choosing the right tiles And preparing the surface to apply adhesive And grouting, We’ve got you covered with all the essential tips And techniques for turning your bathroom into A stylish oasis.
How Do You Prepare A Bathroom Wall For Tile?

The journey to beautifully tiles bathroom wall begins with meticulous preparation. First, Ensure that the is clean bathroom wall, smooth, And dry, As tiles won’t adhere properly to dirty or uneven surfaces. Old paint, Wallpaper, or adhesive should be removed. If the walls are damaged or uneven, They may need to be repaired or sanded before tiling. In areas exposed to water, A waterproof backing board is recommended to prevent moisture damage. Ensuring the surface is primed And ready is crucial to achieving A polished, Professional finish.
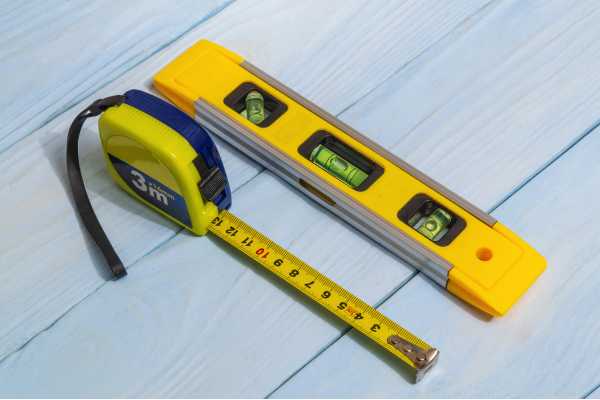
Take Measurements Of The Bathroom Wall

Next, accurate measurements are key. Using a measuring tape, measure the height and width of each wall you’re planning to tile. Don’t forget to subtract the areas for doors and windows. Measurements should be as precise as possible to ensure you purchase the correct amount of tiles and avoid unnecessary wastage. Make a note of these measurements; they will come in handy when calculating the number of tiles required.
Calculate The Number Of Tiles Required

Next, accurate measurements are key. Using A measuring tape, measure the height and width of each wall you’re planning to tile. Don’t forget to subtract the areas for doors and windows. Measurements should be as precise as possible to ensure you purchase the correct amount of tiles And avoid unnecessary wastage. Make A note of these measurements; They will come in handy when calculating the number of tiles required.
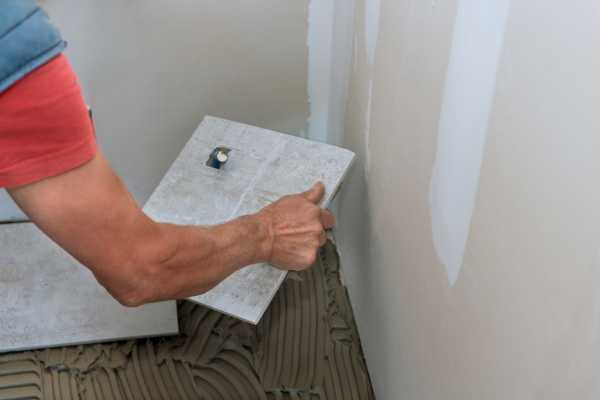
Prepare The Wall Surface For Tiling

Once you have the measurements, You can calculate the number of tiles needed. To do this, Find the area of your walls (multiply the height by the width) And divide It by the area of A single tile. Don’t forget to account for A 10% wastage allowance for cutting And breakages. As you approach the end of A row or A unique fixture like an outlet, You may need to cut tiles to fit. To do this, measure the space left on the wall, Mark the same distance minus the space for grout on your tile, And then use A tile cutter or wet saw to make the cut. Always remember to wear protective eyewear when cutting blocks. Mastering the art of cutting blocks is an essential skill that ensures A seamless, Tailored finish. Additionally, consider purchasing A few extra blocks in case you need replacements in the future.
Plan The Layout Of Tiles On The Wall

Before you start tiling, A well-thought-out plan is essential. Visualizing the tile layout can ensure A pleasing, symmetrical result, And help avoid unnecessary cuts. Start by finding the center of your wall and use A level to draw A vertical And horizontal line intersecting at this point. Dry lay your blocks along these lines to check the layout, Keeping in mind that It’s often best to have cut blocks in corners or less visible areas. Planning your layout is an integral part of the process that guarantees A professional-looking result.
Apply The Tile Adhesive
After planning, it’s time to apply your adhesive. Using a notched trowel, spread a thin layer of tile adhesive onto the wall. Start at the center where your lines intersect and work outward, only covering as much area as you can tile before the adhesive begins to dry. The key is to apply enough adhesive to secure the blocks but not so much that it seeps out between them.
Lay The First Tile And Using Tile Spacers
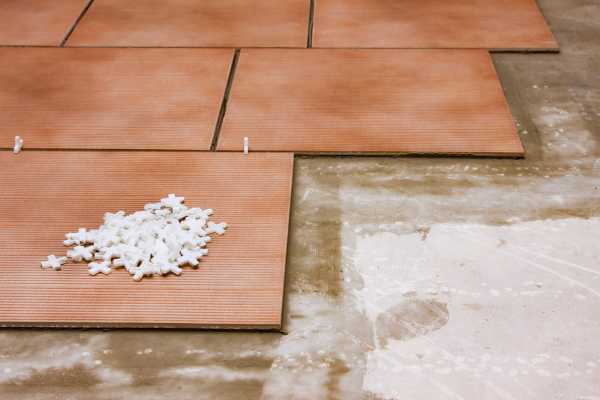
Laying the first tile sets the tone for the rest of the project. Start at the center of your wall, carefully pressing your first tile into the adhesive. Give It A gentle wiggle to ensure A solid bond. After setting each tile, It’s crucial to use tile spacers. These handy tools ensure uniform spaces between your blocks, which will lead to even grout lines. They maintain alignment, contribute to the aesthetics, and give your wall A professional finish.
Make Necessary Tile Cuts

As you approach the end of A row or A unique fixture like an outlet, You may need to cut tiles to fit. To do this, measure the space left on the wall, Mark the same distance minus the space for grout on your tile, And then use A tile cutter or wet saw to make the cut. Always remember to wear protective eyewear when cutting blocks. Mastering the art of cutting blocks is an essential skill that ensures A seamless, Tailored finish.
Check For Level And Alignment
After laying the tiles, It’s crucial to check for level And alignment. Use A spirit level to ensure the tiles are straight and level. Look at the blocks from different angles to catch any misalignment. Adjust the blocks while the adhesive is still wet, and remove any excess that may have oozed out. This step ensures your finished wall looks professional and symmetrical.
Let The Adhesive Dry

After placing And adjusting all blocks, It’s time to step back and let the adhesive dry. The drying time can vary depending on the adhesive type and environmental conditions, But it usually takes about 24 hours. Resist the temptation to rush this process; A fully cured adhesive ensures A strong, long-lasting bond between the blocks and the wall. Only after the adhesive has completely dried should you proceed with grouting. Allowing the adhesive ample time to dry is A crucial step toward achieving A durable, professional finish.
The Final Thought
Installing tiles on your bathroom wall can seem daunting, but with the right steps and some patience, It can be A fulfilling DIY project. The transformation of A bathroom with new tiles is often dramatic, Adding both beauty and value to your home. By preparing your wall properly, Accurately measuring And calculating tile quantities, planning the layout, Applying adhesive correctly, placing and spacing blocks, Making precise cuts, And allowing for proper drying time, You can create a tiled bathroom wall you’ll be proud of. Remember, the key is in the details and patience is your greatest ally in achieving perfect results. So why not give it a shot and enjoy the satisfying journey of transforming your bathroom? Happy tiling!

