
When It comes to home improvement projects, One of the most common tasks homeowners face is removing A bathroom light fitting. Whether you are looking to replace an outdated fixture or simply need to access the wiring for maintenance or repairs, Knowing how to safely And effectively remove A bathroom light fixture is essential. In this article, We will guide you through the step-by-step process of removing A washroom light fitting, From gathering the necessary tools to disconnecting the wiring and safely detaching the fixture from the wall or ceiling. By following these instructions, You’ll be able to tackle this DIY project with confidence And ensure that your bathroom’s Lighting is up-to-date And functional in no time.
How To Remove A Bathroom Light Fixture: A Detailed Step-by-Step Guide:
How Do You Remove Old Ceiling Lights?

Removing an old bathroom light fitting might appear challenging, but with the right tools and steps, It’s A manageable DIY task. The removal process involves A combination of safety protocols And simple mechanics. With a bit of patience, you can upgrade your lighting situation to better suit your bathroom aesthetic.
Shut Off Power To The Bathroom Light Fitting

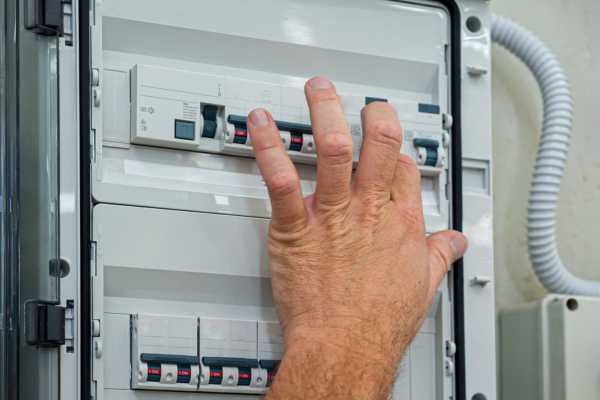
Safety should be your top priority when dealing with electrical fixtures. To ensure this, your first step should be to shut off power to the bathroom light fitting. Navigate to your home’s electrical panel, Usually located in the basement or garage, And flip the switch corresponding to your bathroom’s electricity. This crucial step prevents any unexpected electrical surges or shocks during the removal process.
Test To Ensure The Power Is Off
Once you’ve turned off the power, it’s imperative to test and confirm that the electricity is indeed off before proceeding. This can be done using a non-contact voltage tester, an essential tool for any DIY electrician. When placed near the light fixture, this device will indicate whether there’s an active current. Confirming the absence of electricity mitigates the risk of electrical shock, making the removal process safer and smoother. With the power safely off, you’re ready to dive into the task at hand – removing your old bathroom light fitting.
Unscrew Or Unclip The Fixture Cover

With the power safely switched off And verified, You can now proceed to the physical removal of the washroom light fitting. The first step involves removing the fixture cover. This process may vary depending on your specific light fixture design. Some covers are held in place with screws, which can be removed using A screwdriver, while others may feature clips that can simply be unclipped. Remember to handle the cover gently to avoid accidental breakage or damage.
Safely Remove Light Bulbs From The Fixture

Once the fixture cover is successfully removed, The next step is to take out the light bulbs. Ensure that the lights have been switched off for A while before attempting this step. This prevents any heat-related burns as bulbs can get quite hot when in use. The removal process generally involves unscrewing the bulbs counterclockwise. However, some bulbs may have different mechanisms, So It’s essential to refer to the bulb manufacturer’s instructions if you’re unsure. Use A non-slip glove to prevent the bulb from slipping from your hands, Leading to potential injury or damage.
Properly Dispose Of Old Or Broken Bulbs

The final step is to dispose of the old or broken bulbs properly. Incorrect disposal of light bulbs can lead to environmental hazards as most bulbs, particularly fluorescent ones, contain a small amount of mercury. To responsibly dispose of your bulbs, you should consider recycling programs available in your community. Many local waste facilities and home improvement stores offer bulb recycling services. It’s also crucial to avoid breaking bulbs during disposal as this could release potentially harmful substances. Place the bulb in a sealed bag before discarding it to prevent breakage and to protect waste handlers. Remember, responsible disposal not only safeguards the environment but also ensures the safety of your community.
Disconnect The Wiring

Having safely removed the light bulbs, It’s time to disconnect the wiring, Which is A critical stage that must be approached with the utmost caution. Before you begin, ensure the power supply to the bathroom is switched off from the main circuit breaker. This step is vital to ensure your safety and avoid any risk of electrical shock. Next, Find the wire connectors, Also known as wire nuts, That hold the wires together And unscrew them. Once the wire nuts are removed, Carefully separate the wires. Always remember to keep track of which wire was connected to which to facilitate the installation of A new fixture.
Support The Fixture During The Removal

After disconnecting the wiring, The final step is to physically remove the fixture from the wall or ceiling. This stage may require A helping hand as fixtures can be heavy. Before unscrewing the fixture, Ensure you have A firm grip or support for It to avoid It falling And causing damage or injury. If the fixture is attached with screws, use A screwdriver to loosen them while you or A helper supports the fixture. If It’s attached with A mounting bracket, loosen the mounting nuts while supporting the fixture. Always bear in mind that safety should be your priority. Therefore, Use the appropriate tools and take the necessary precautions during this process. After removal, inspect the electrical box and wiring for any signs of damage or wear before installing A new fixture.
Remove The Mounting Bracket

Once the fixture has been safely removed, You will likely be left with the mounting bracket, A metallic plate that usually secures the fixture to the wall or ceiling. Depending on your new light fixture, You may need to remove this bracket or leave It in place. If removal is necessary, Start by unscrewing the bracket from the electrical box using A screwdriver. While this process is generally straightforward, It’s essential to be gentle And careful not to damage the electrical wires. Once the mounting bracket is off, Your bathroom wall or ceiling is ready for A new fixture installation, Or you can cover it up If you are planning on not replacing the fixture immediately.
The Final Thought
Remove A bathroom light fixture is A task that may seem daunting at first, But with the right knowledge, tools, And precautions, It’s quite doable. Whether you are redecorating, Upgrading, or repairing, This guide provides A simple, Step-by-step approach to safely And effectively remove your light fixture. Remember, Safety is paramount, And if any step feels uncomfortable or risky, Do not hesitate to seek professional help. After all, The goal is not just to change the bathroom light fixture but also to do so in A manner that preserves the integrity of your bathroom And your well-being. It’s an empowering skill to have, And you’ll appreciate the satisfaction of having done it yourself.

