
Bathroom renovation projects are often accompanied by the tedious task of removing old tiles. Whether You’re Looking to update the aesthetic appeal of your bathroom or simply Repair damaged tiles, Knowing how to remove them correctly is crucial in ensuring A smooth And successful renovation process. In this article, We will guide you through step-by-step instructions on how to remove bathroom tiles efficiently And effectively. From gathering the necessary tools to avoiding common pitfalls, We’ve got you covered with expert tips And techniques that will make this daunting task feel like A breeze. So let’s dive into the world of tile removal And transform your bathroom into A fresh new space!
Step-by-Step Guide: Removing and Replacing Bathroom Tiles:
Importance Of Bathroom Tile Removal

In-home improvement, Bathroom tile removal is A crucial task often overlooked. Tile removal is not only About Aesthetic changes but also About preserving the bathroom’s overall health. Over time, Tiles can become cracked, Discolored, Or even start to loosen, Becoming potential safety hazards. Dated or deteriorated tiles can also harbor mold And mildew, Impacting indoor air quality. This process provides the opportunity to update waterproofing systems, Ensuring the longevity of the bathroom structure. Therefore, Tile removal is fundamental for both bathroom renovation And maintenance.
Benefits Of Removing Bathroom Tiles

The Act of removing bathroom tiles offers several benefits that enhance your home’s value And livability. Firstly, It provides the chance to revamp your bathroom’s look, reflecting current trends, And personal style, Or improve the overall appeal for potential buyers. Secondly, It eliminates hidden issues such as mold, Water leaks, Or structural damage, That are not visible underneath the tiles. Lastly, Removal allows for upgrading insulation or adding modern amenities like radiant floor heating. Therefore, Removing bathroom tiles can significantly improve the functionality, Aesthetics, And comfort of your bathroom.
Clear The Bathroom And Remove Obstacles

Preparing your bathroom for tile removal is A prerequisite step that ensures safety And efficiency during the process. This involves clearing out all bathroom items such as toiletries, rugs, Shower curtains, And movable fixtures. Detaching items like the toilet, Vanity, Or free-standing bathtub might be necessary depending on the extent of your project. It’s also crucial to cover immovable fixtures And seal doors to prevent dust from spreading. Disconnecting the power is also essential for avoiding any electrical accidents. Preparing your bathroom correctly will help streamline the tile removal process, Reduce the risk of damage, And ensure A safer work environment.
Identifying The Type Of Bathroom Tiles
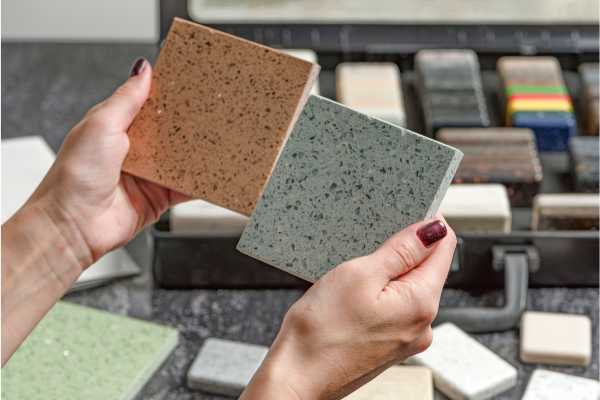
Before commencing A bathroom tile removal project, It’s essential to identify the type of tiles installed. Whether they’re ceramic, porcelain, Stone, Or glass tiles, each type has different attributes affecting their removal method. Some may be more difficult to remove due to their hardness or the adhesive used during installation. Familiarity with your tile type can guide the selection of appropriate tools and techniques for the job. Notably, Older homes may have asbestos-containing tiles, Requiring professional help for safe removal. Therefore, understanding what kind of tiles you’re dealing with can ensure an efficient, Safe, And successful tile removal process.
Remove Grout And Caulking
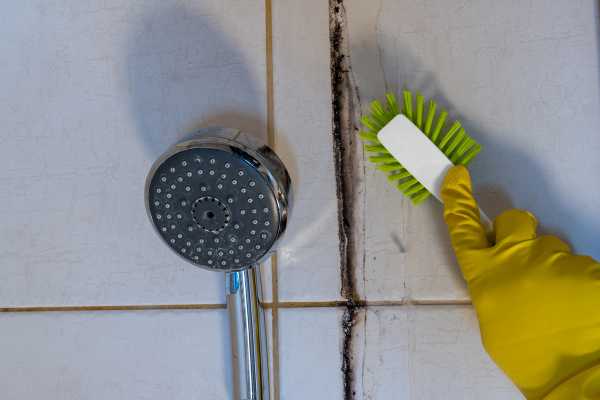
One of the initial steps in bathroom tile removal involves eliminating grout And caulking surrounding the tiles. Grout is a dense fluid used to embed rebar in masonry walls and seal joints between tiles. Caulking, on the other hand, is A waterproof filler and sealant, used in building work And repairs. Using tools like A grout saw or A rotary tool, you can scrape out these substances, Freeing the edges of the tiles. This task requires patience and precision to avoid tile breakage or damage to the underlying surface. Effective removal of grout and caulking sets the stage for an easier And cleaner tile removal process.
Loosen The First Tile And Subsequent Tiles

After clearing the grout and caulking, the next step involves loosening and lifting the first tile. This can be the most challenging part of the process as it often dictates how smoothly the rest of the job will go. Using a chisel and hammer, start at a corner or edge and carefully work your way under the tile to pry it up. Once the first tile is successfully removed, it creates a starting point for removing subsequent tiles. You should then use the same careful, methodical approach for each tile thereafter. The efficiency of this process can determine the overall success of your bathroom tile removal project.
Use Appropriate Tools To Pry And Lift Tiles

Choosing the correct tools for tile removal is paramount to the efficiency and safety of the project. Standard tools include a chisel to break up tiles, A hammer to strike the chisel, And A floor scraper to pry up large sections of tile and adhesive. A sturdy putty knife can also come in handy for scraping away smaller residues. Power tools like a rotary hammer with a chisel bit or an oscillating multi-tool can save time and energy on larger projects, but they must be used with caution to prevent unnecessary damage. Using the right tools can make the process of prying and lifting bathroom tiles less strenuous and more successful.
Deal With Stubborn Or Damaged Tiles

During The tile removal process, you’ll likely encounter stubborn or damaged tiles that don’t come off easily. For these, additional tools and techniques may be needed. A heat gun can be used to soften the adhesive under stubborn tiles, making them easier to pry up. Damaged tiles, on the other hand, should be dealt with carefully to avoid injury from sharp edges. Broken tiles can be removed piece by piece using a chisel, with safety goggles and gloves for protection. In extreme cases where tiles are too difficult to remove, professional help may be warranted. Navigating these challenges effectively ensures the smooth completion of your bathroom tile removal project.
Remove Any Remaining Adhesive
Once all tiles are removed, your task isn’t over. You’re likely left with patches of adhesive that once held the tiles in place. The type of adhesive used originally, whether mastic or thin-set mortar, will determine the removal method. For mastic, a simple scraper can usually do the job, while for this set, you may need to use a floor scraper or even a power tool, such as an angle grinder with a diamond blade. Removing all adhesive is vital to create a smooth, clean surface, ready for new tiles or flooring. Remember to clean bathroom tiles from the dust and debris after scraping. This often-overlooked step ensures that the next phase of your bathroom renovation starts on a solid footing.
The Final Thought
Bathroom tile removal might seem a daunting task, But with the right approach and tools, it’s an achievable project. Each step, from identifying tile type, And removing grout And caulking, to dealing with stubborn tiles And adhesive removal, requires patience, Diligence, And safety precautions. It’s essential to remember that each bathroom is unique, With potential unseen issues. If you encounter asbestos, extremely stubborn tiles, or underlying structural damage, seeking professional help is the safest route. Bathroom tile removal is an opportunity to refresh your space, deal with hidden problems, And enhance your home’s comfort, Appeal, And value. Be confident, and take this home renovation project as an adventure that leads to A more beautiful And functional bathroom.

